The original Xbox was a treasure trove of a gaming console that introduced me to a lot of concepts that really kicked off my interest in electronics and programming. Even today I still find myself drawn to the amazing game collection and just the pure fun of modifying the original Xbox.
This project is a dream project for me. It's a fun little hack that combines cheap off-the-shelf components into a packet that is perfect for my needs.
The motivation for this hack was that I wanted to play my favorite original Xbox on modern digital displays with HDMI connections, and I wanted to make use of the wonderful HDMI up-scaler mCable mClassic. This adapter uses AI to improve image clarity and resolution. A perfect fit for one of my favorite games: Steel Battalion.
Design inspiration came from Tek Nemesis
Parts list
Stuff needed to complete the project
Tools and equipment
- Soldering iron
- Solder
- Flux
- Knife
- Cable cutter
- Cable stripper
- 3D Printer and filement
Components
Disassebly
Prepare for the work
Start by disabling the Wii2HDMI adapter, and desolder the Wii AV contact. When this is done use a knife and a cable cutter to disassemble the Xbox contact and unsolder all the wires from the contact.
Xbox contact
We start with the hardest part
Follow the wiring diagram below and solder 5v, Y/Pb/Pr, Audio R/L, and digital audio. In addition, you have to short the mode 2 and mode 3 to earth to enable component video mode. To minimize the noize in the image and audio we connect every earth lead.
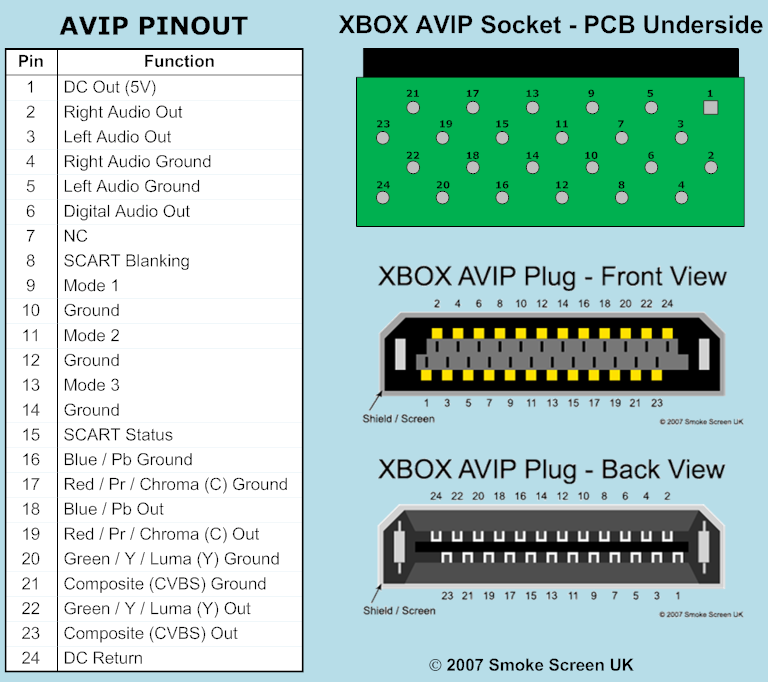
Fig 1: Xbox AV contact pinout - Image by Smoke Screen UK
HDMI converter
Convert component video to digital video
Follow the wiring diagram, and solder the 5v power supply, Y/Pb/Pr, Audio R/L, and all ground leads. Since the solder points are on both sides of the PCB, be careful to make sure the copper inside the wires does not come in contact with each other. Connect all the earth wires to minimize the video and audio noise.
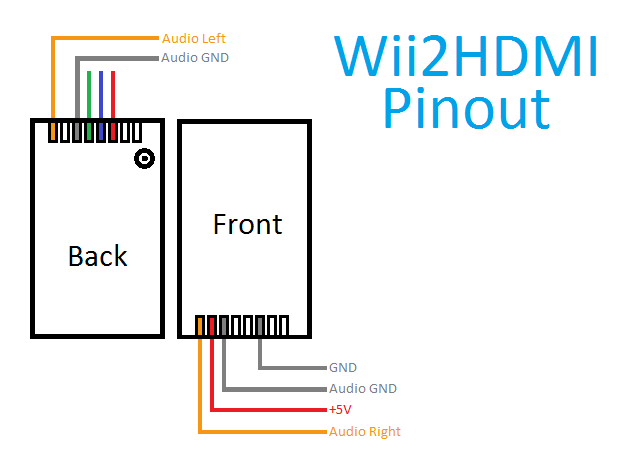
Fig 2: Wii2HDMI solder pinout - Image by indigo4 at Imgur
Testing
Now it's time to test that the Adapter works as intended. Assemble the contact and plug the adapter into your Xbox, and connect the adapter to a monitor or TV that supports 480i/p video. Note that most computer monitors do not support this resolution!
If you have a good-looking image and clear audio, your installation was successful. If you get strange colors, please double-check the video wires.
3D Print
Make it cool and permanent.
All cool electronics projects deserve a nice and practical encapsulation. This project is no exception. Follow this link for the STL files I created for this project.

I created three variants of the housing that can be found on my Thingiverse page.
- All-in-one housing - with RCA
- All-in-one housing - with TOSLINK
- Basic - without USB power and digital audio
Download the one you want to use, and print it on your 3D printer.
I recommend Simplify3D as a slicer since I have the most positive experience with that program compared to other free variants.
When the parts are printed you can start to fit the electronics inside the encapsulation.
USB power supply
Bonus feature
Since the mCable mClassic does require a USB power supply I added the option for a USB power supply to the adapter to prevent a wire spaghetti around the Xbox when using the HDMI adapter.
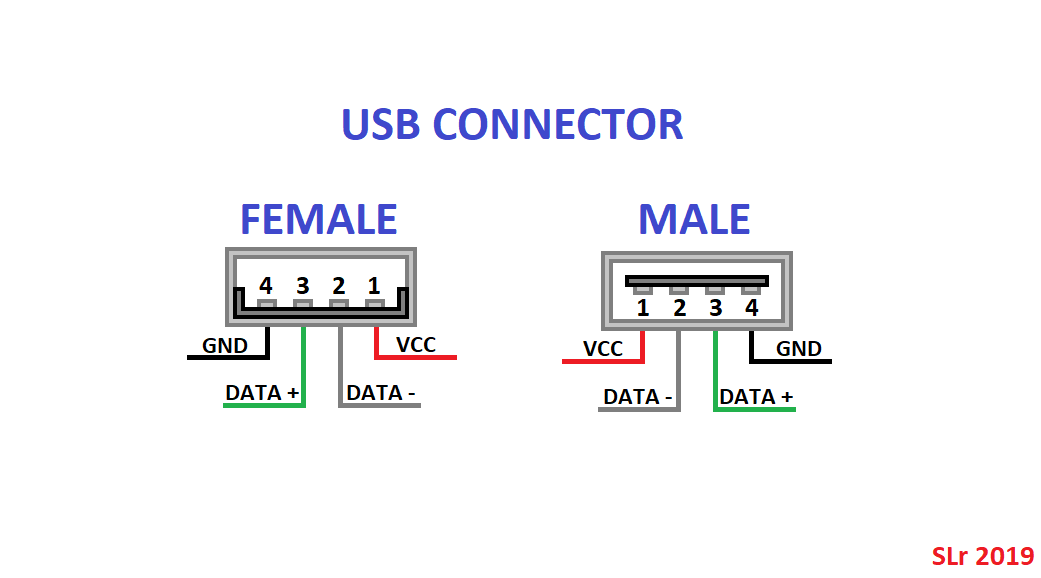
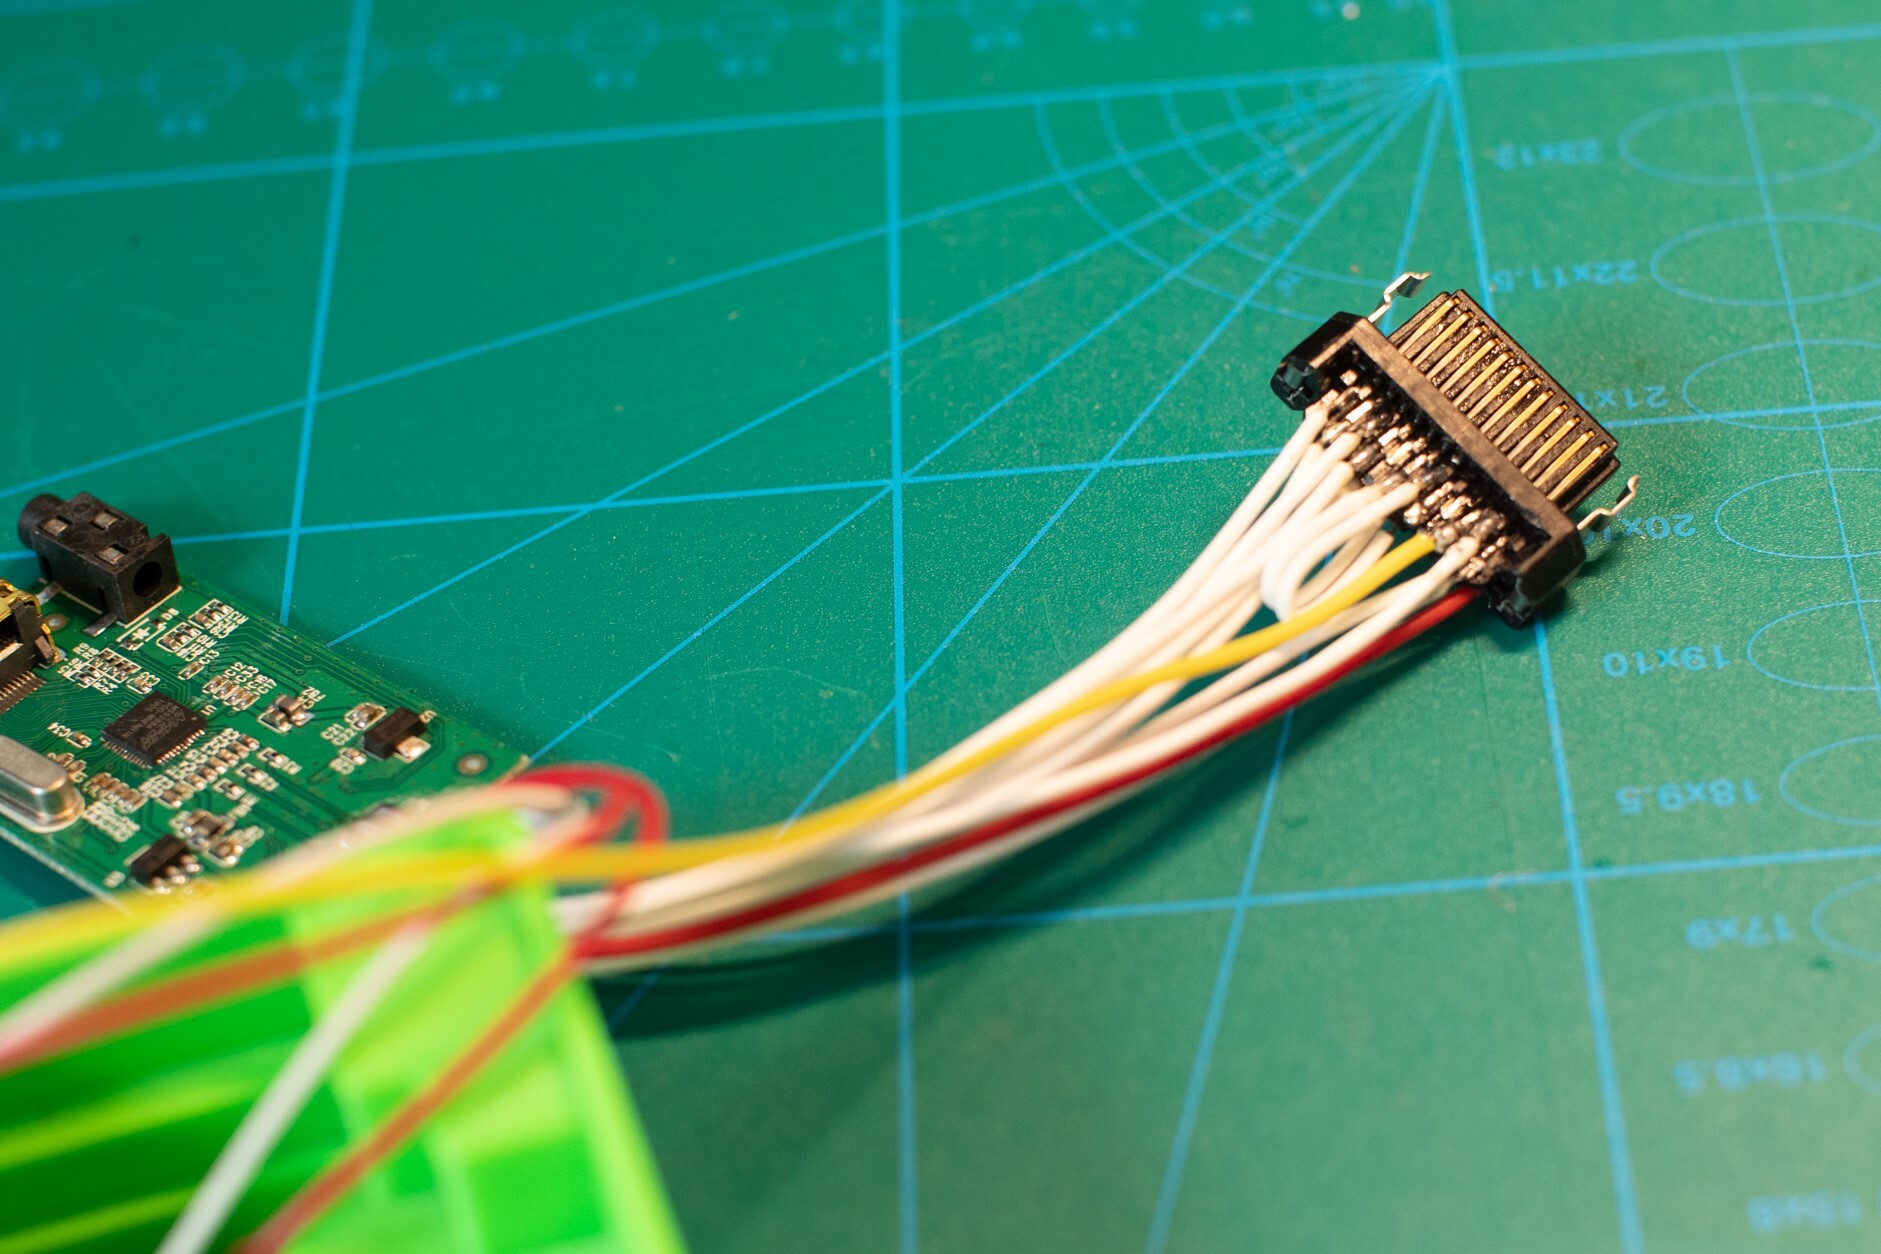
Fig 4: USB connector pinout - Image by JeromeDoubleyou from Imgur
Solder the power pins to the USB connector and push it into it's hole in the casing.
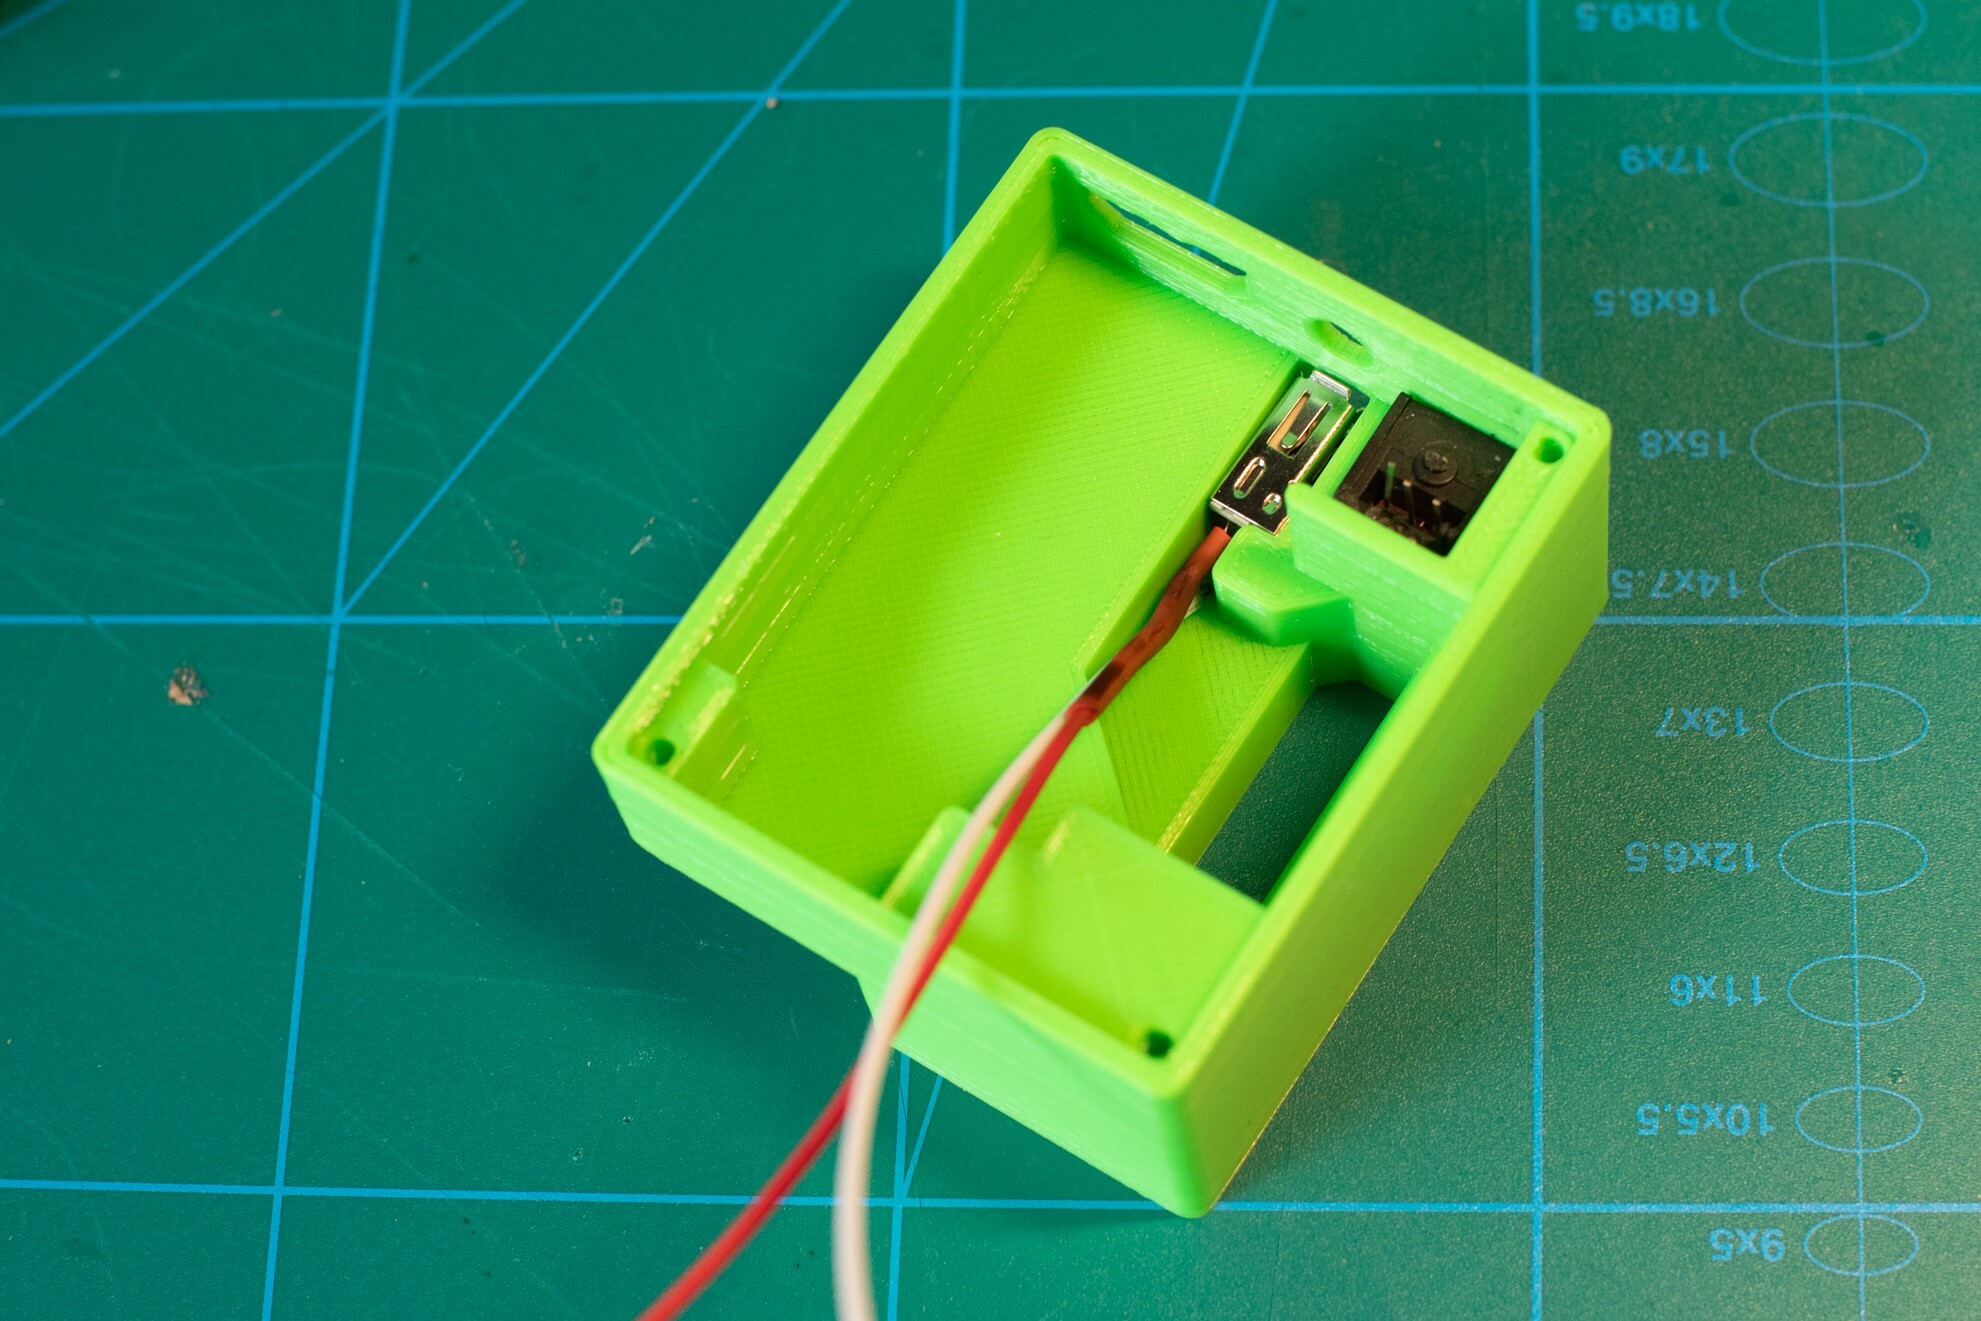
Fig 5: USB power supply with connected power wires put inside the housing - Image © Stanley Skarshaug
Please note that I put shrink-tubes on the top power lead to prevent a short to the Wii2HDMI card.
Digital audio
Bonus feature
The original Xbox supports digital 5.1 audio in Dolby Digital and DTS. Actually, a lot of games support this as well. Unfortunately does the Wii2Hdmi adapter not support digital audio. Because of this, you have to add an RCA or TOSLINK connection to the adapter. I ordered a TOSLINK adapter to make use of optical digital audio.
TOSLINK (optical) and RCA (coax) are very similar. The only difference is that the optical TOSLINK connector does need a 5v power supply.
Connect the digital audio wire from the Xbox AV connector to the signal lead on the TOSLINK, or the center part of the RCA connector or the ground connector on the TOSLINK. For ground use one of the ground pads on the Wii2HDMI adapter. For the 5v power supply on the TOSLINK connect that to the 5v pad on the Wii2Hdmi adapter.
Assembly
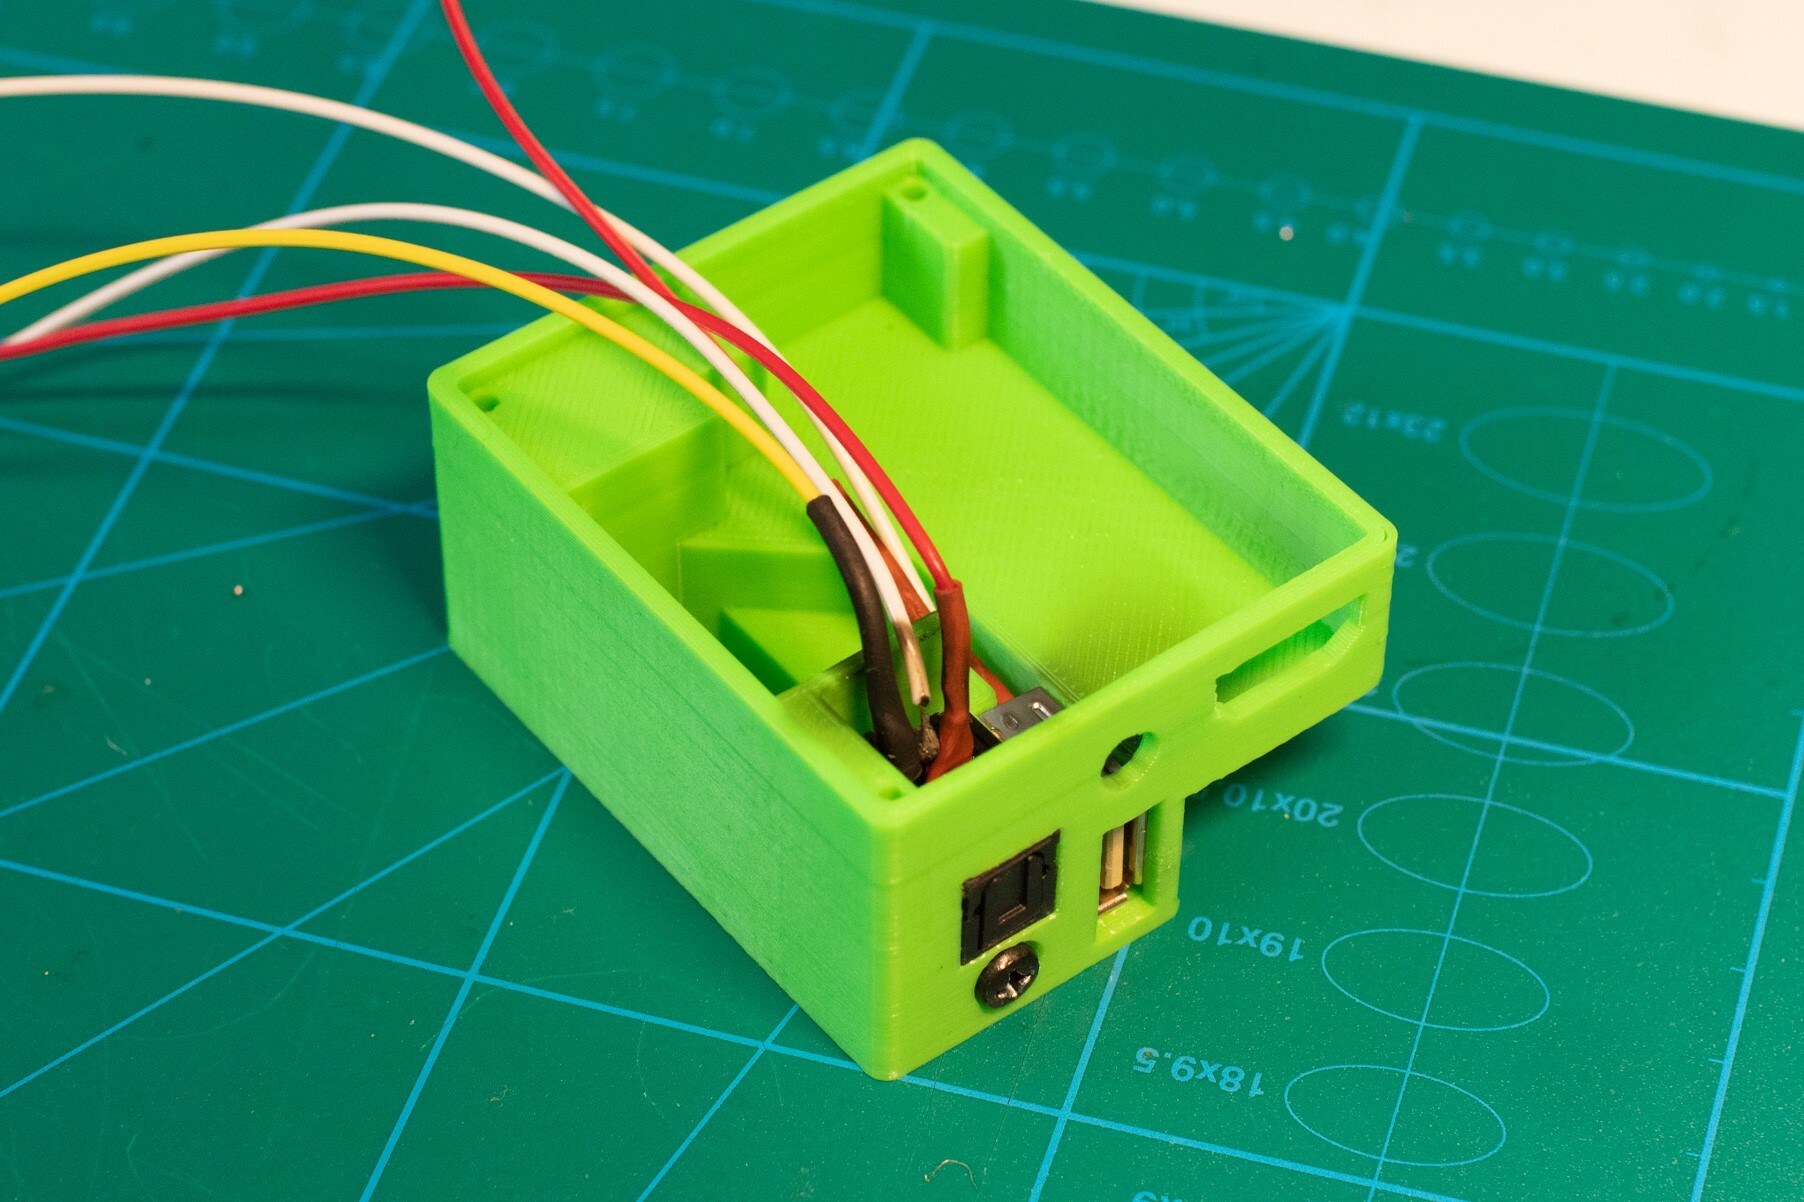
Start the assembly by putting the USB connector into its hole in the 3D printed adapter. Then carefully insert the Wii2HDMI adapter into the side holes, before pressing the PCB into the housing. Fit the RCA, or TOSLINK connector into its hole. This is a tight fit, so some force might be needed. Secure the TOSLINK with a screw.
When the USB power supply and the digital audio are in place, you can push the Wii2HDMI card into position. Use a nibbling tool to cut out a notch for the cables in the side of the AV connector housing (fig 10). When the Wii2HDMI card is in place you can assemble the Xbox connector and push it into position.
Pack the wires neatly so that the lid can be put on top and secured with three screws.
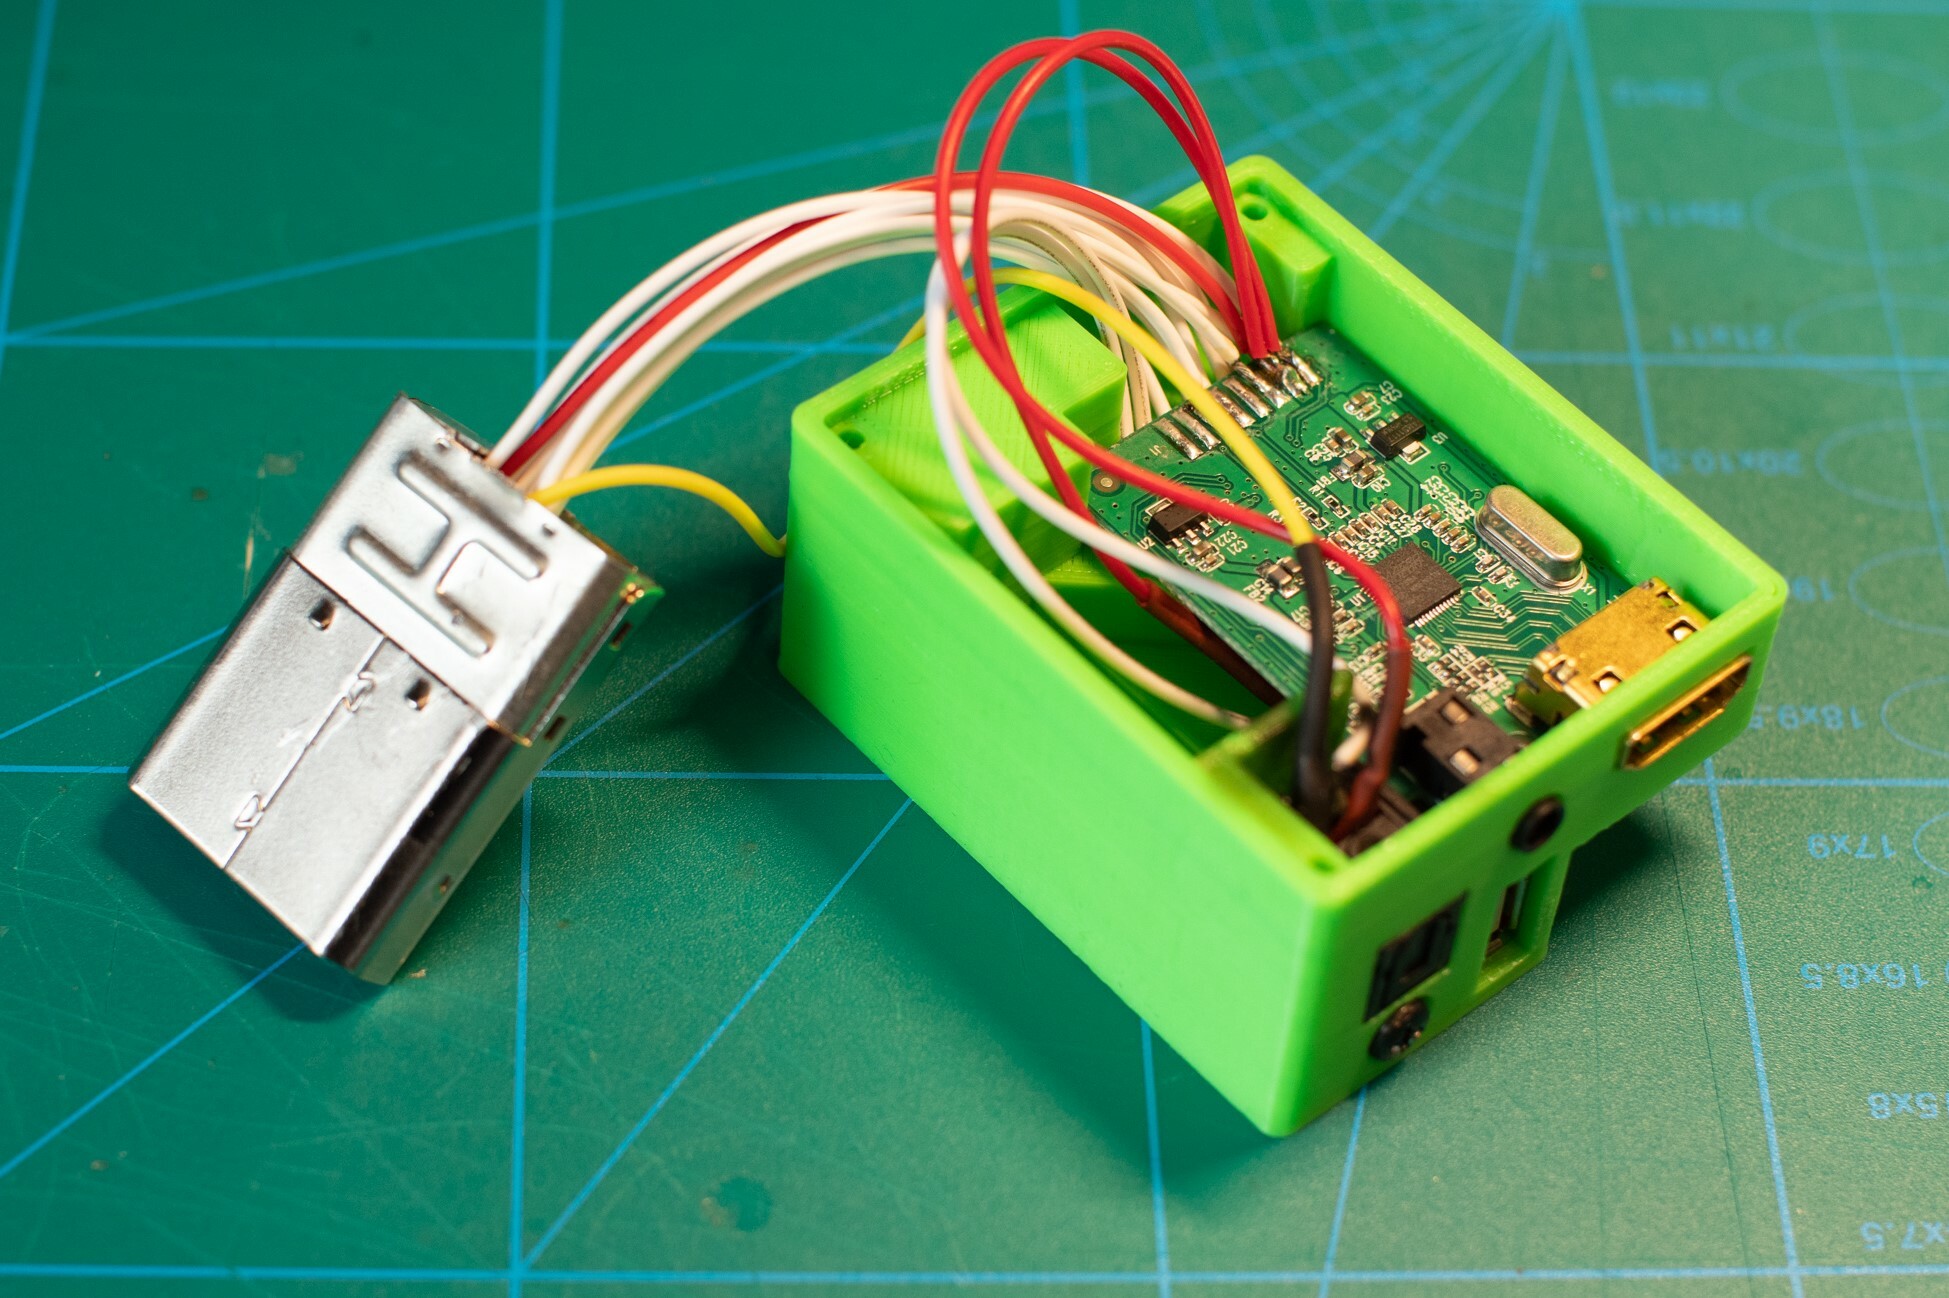
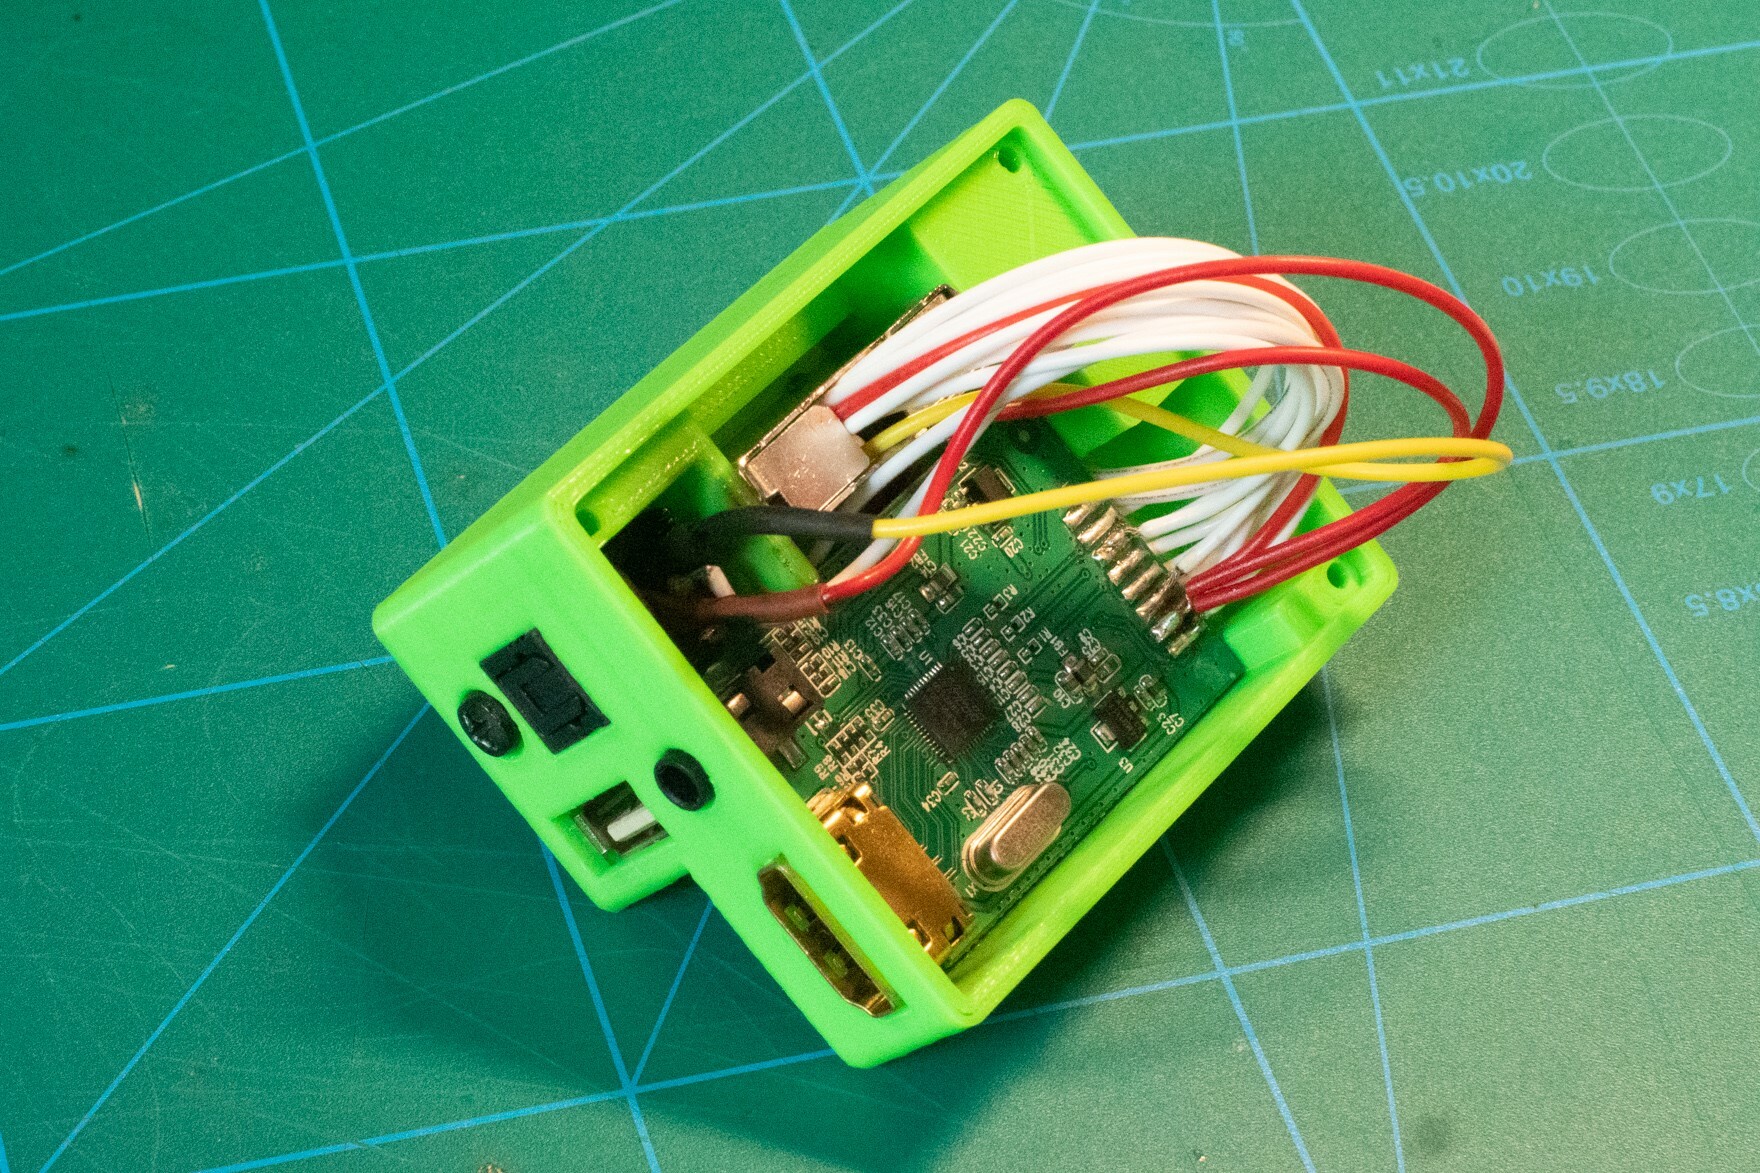
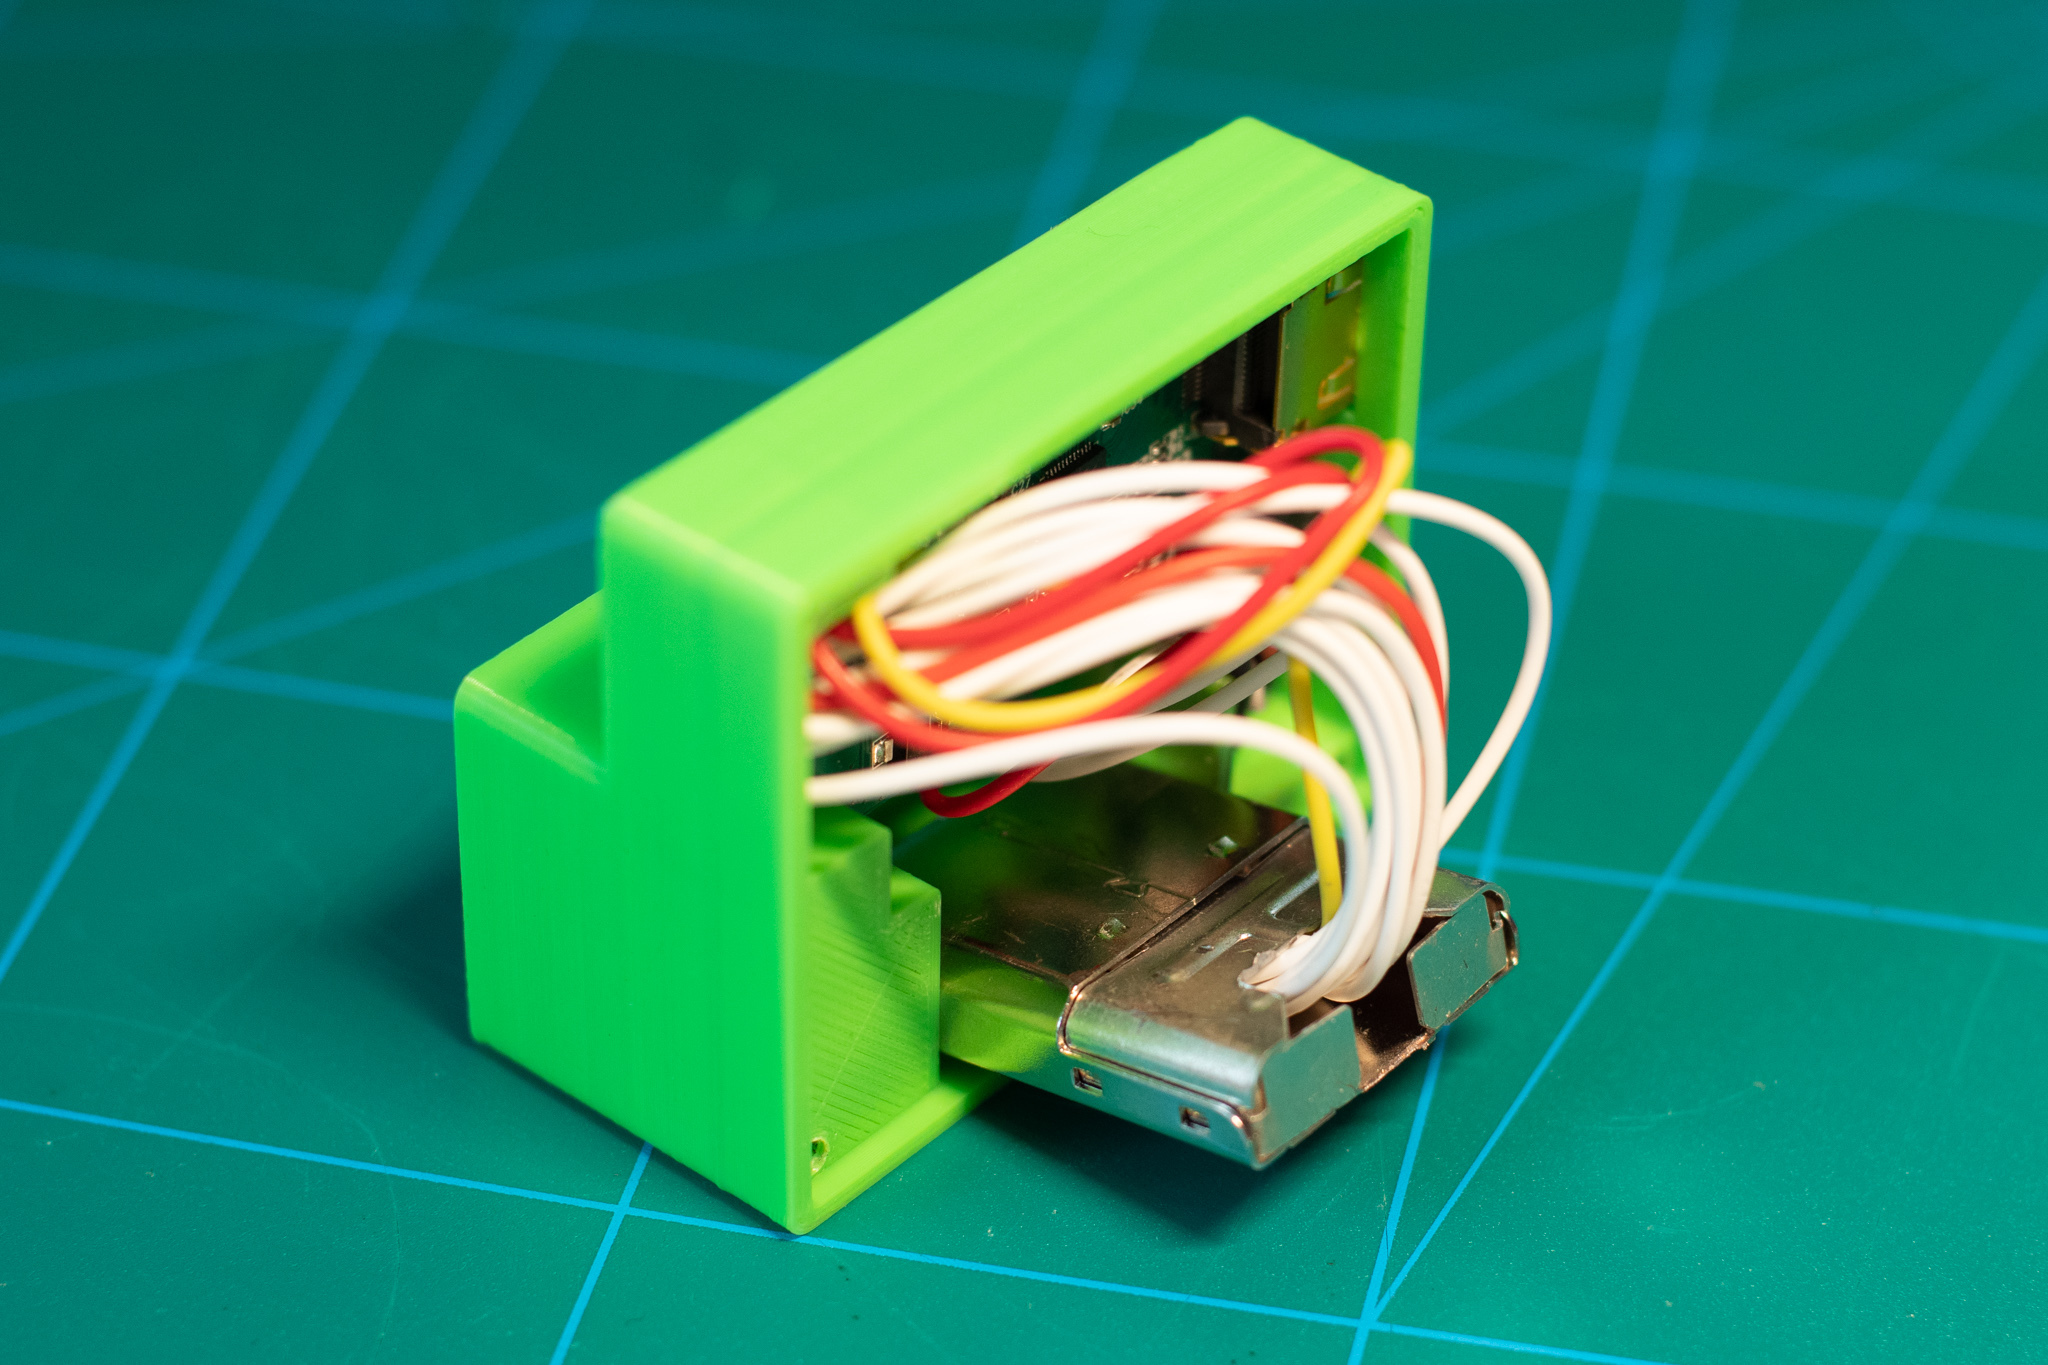
Fig 10: The cutout in the AV connector housing - Image © Stanley Skarshaug
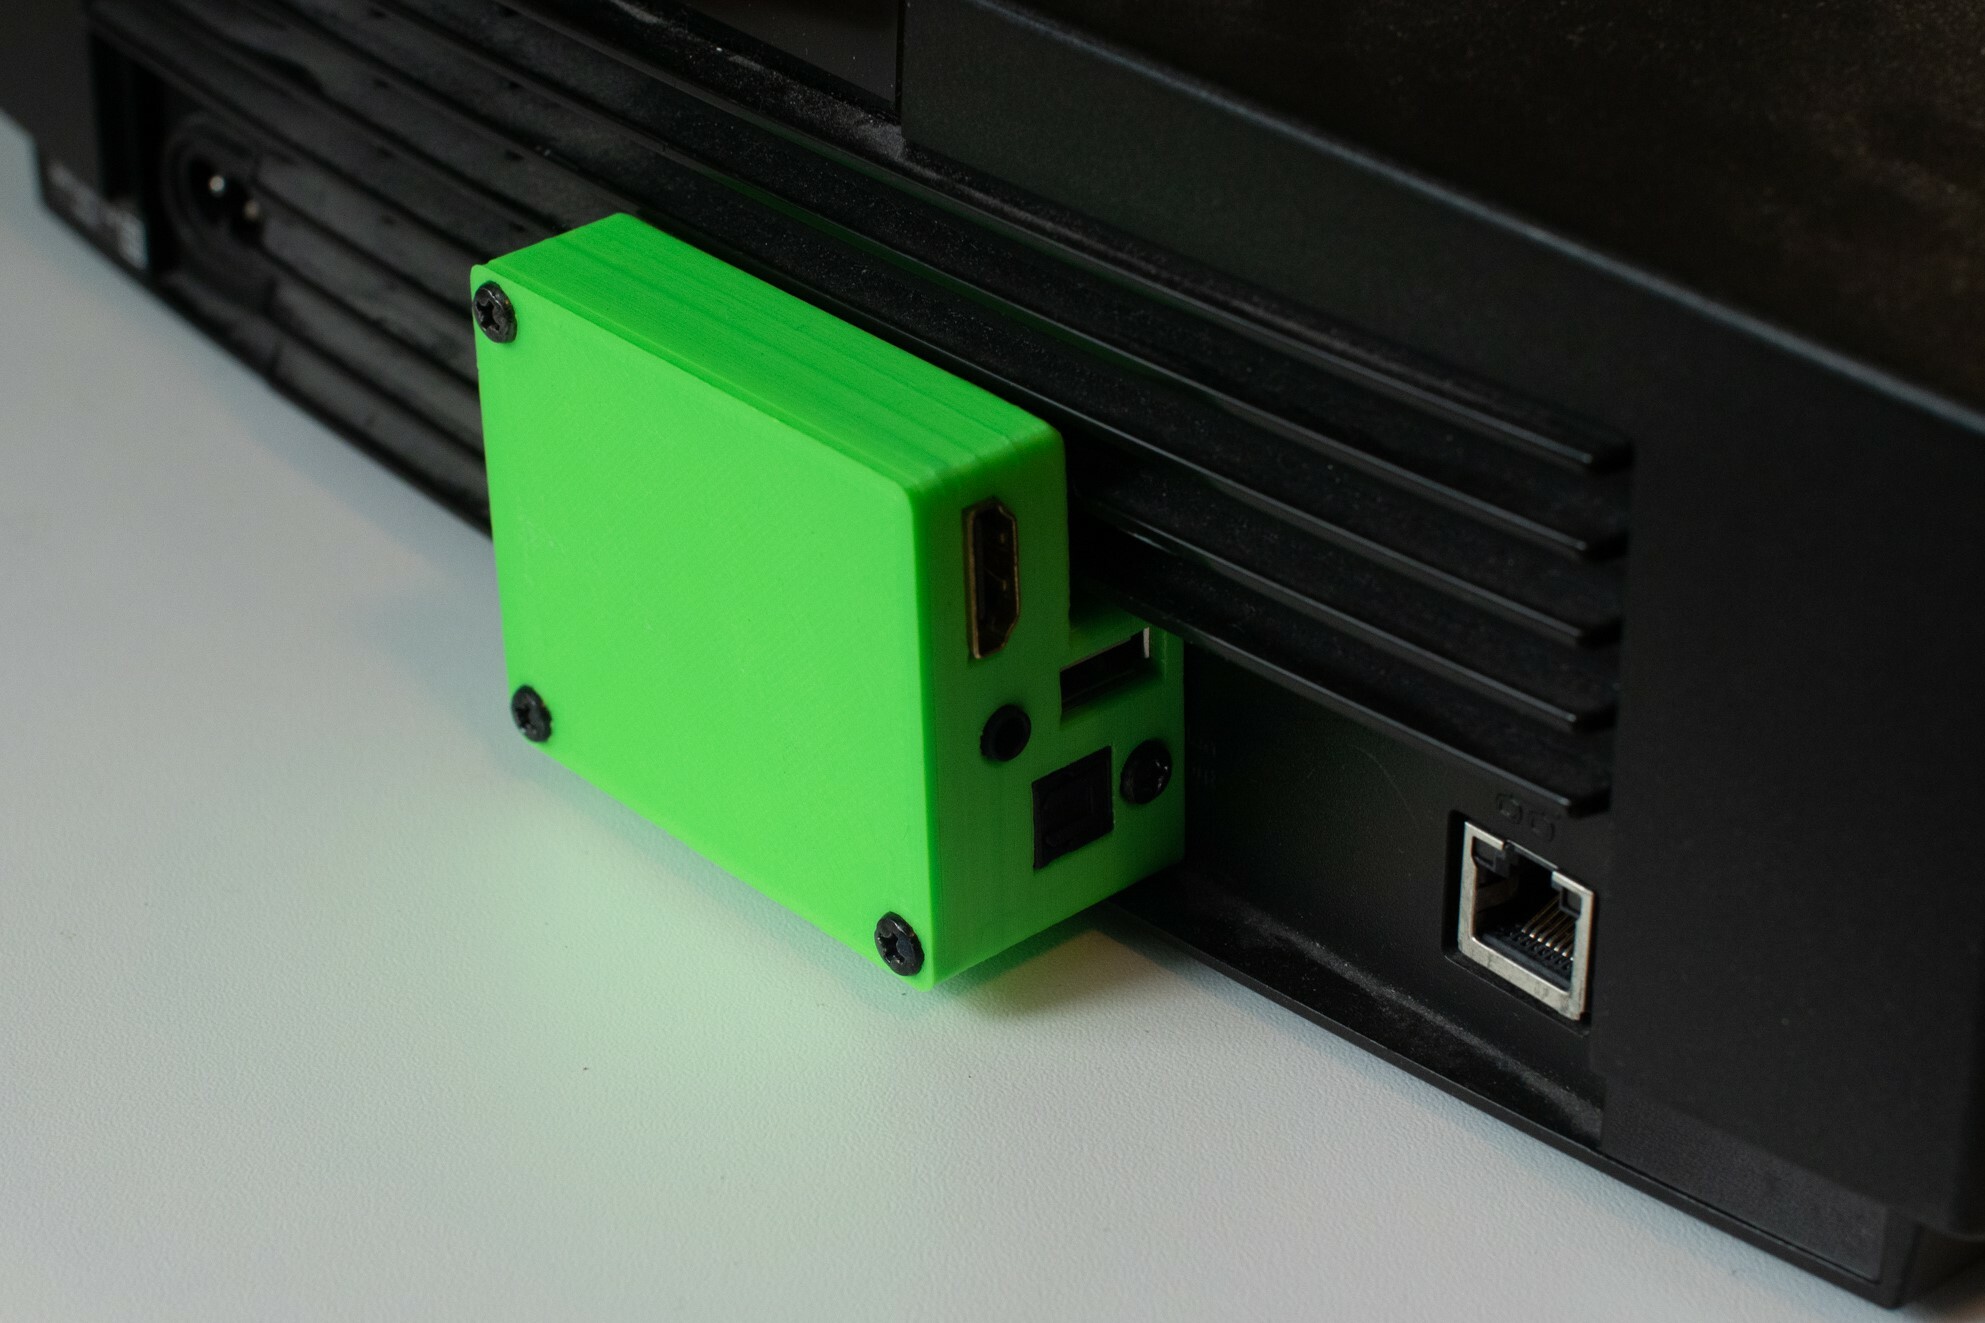
Congratulations! You now have a functional and cheap do-it-yourself HDMI adapter for your original Xbox!
Video modes
I hot-tip for improved gaming
If you live in Europe and have a PAL version Xbox, it's a good idea to change video mode to NTSC to make full use of this modification. In NTSC mode it's possible to activate native 480p and 720p video modes in games. To do this you will need a modchip or make use of a softmod to be able to use a homebrew application.
In addition, I recommend mCable mClassic for gaming on the original Xbox. This uses AI to improve the image quality coming out of the box. This makes it possible to game on computer monitors and will give you an incredible graphical improvement.
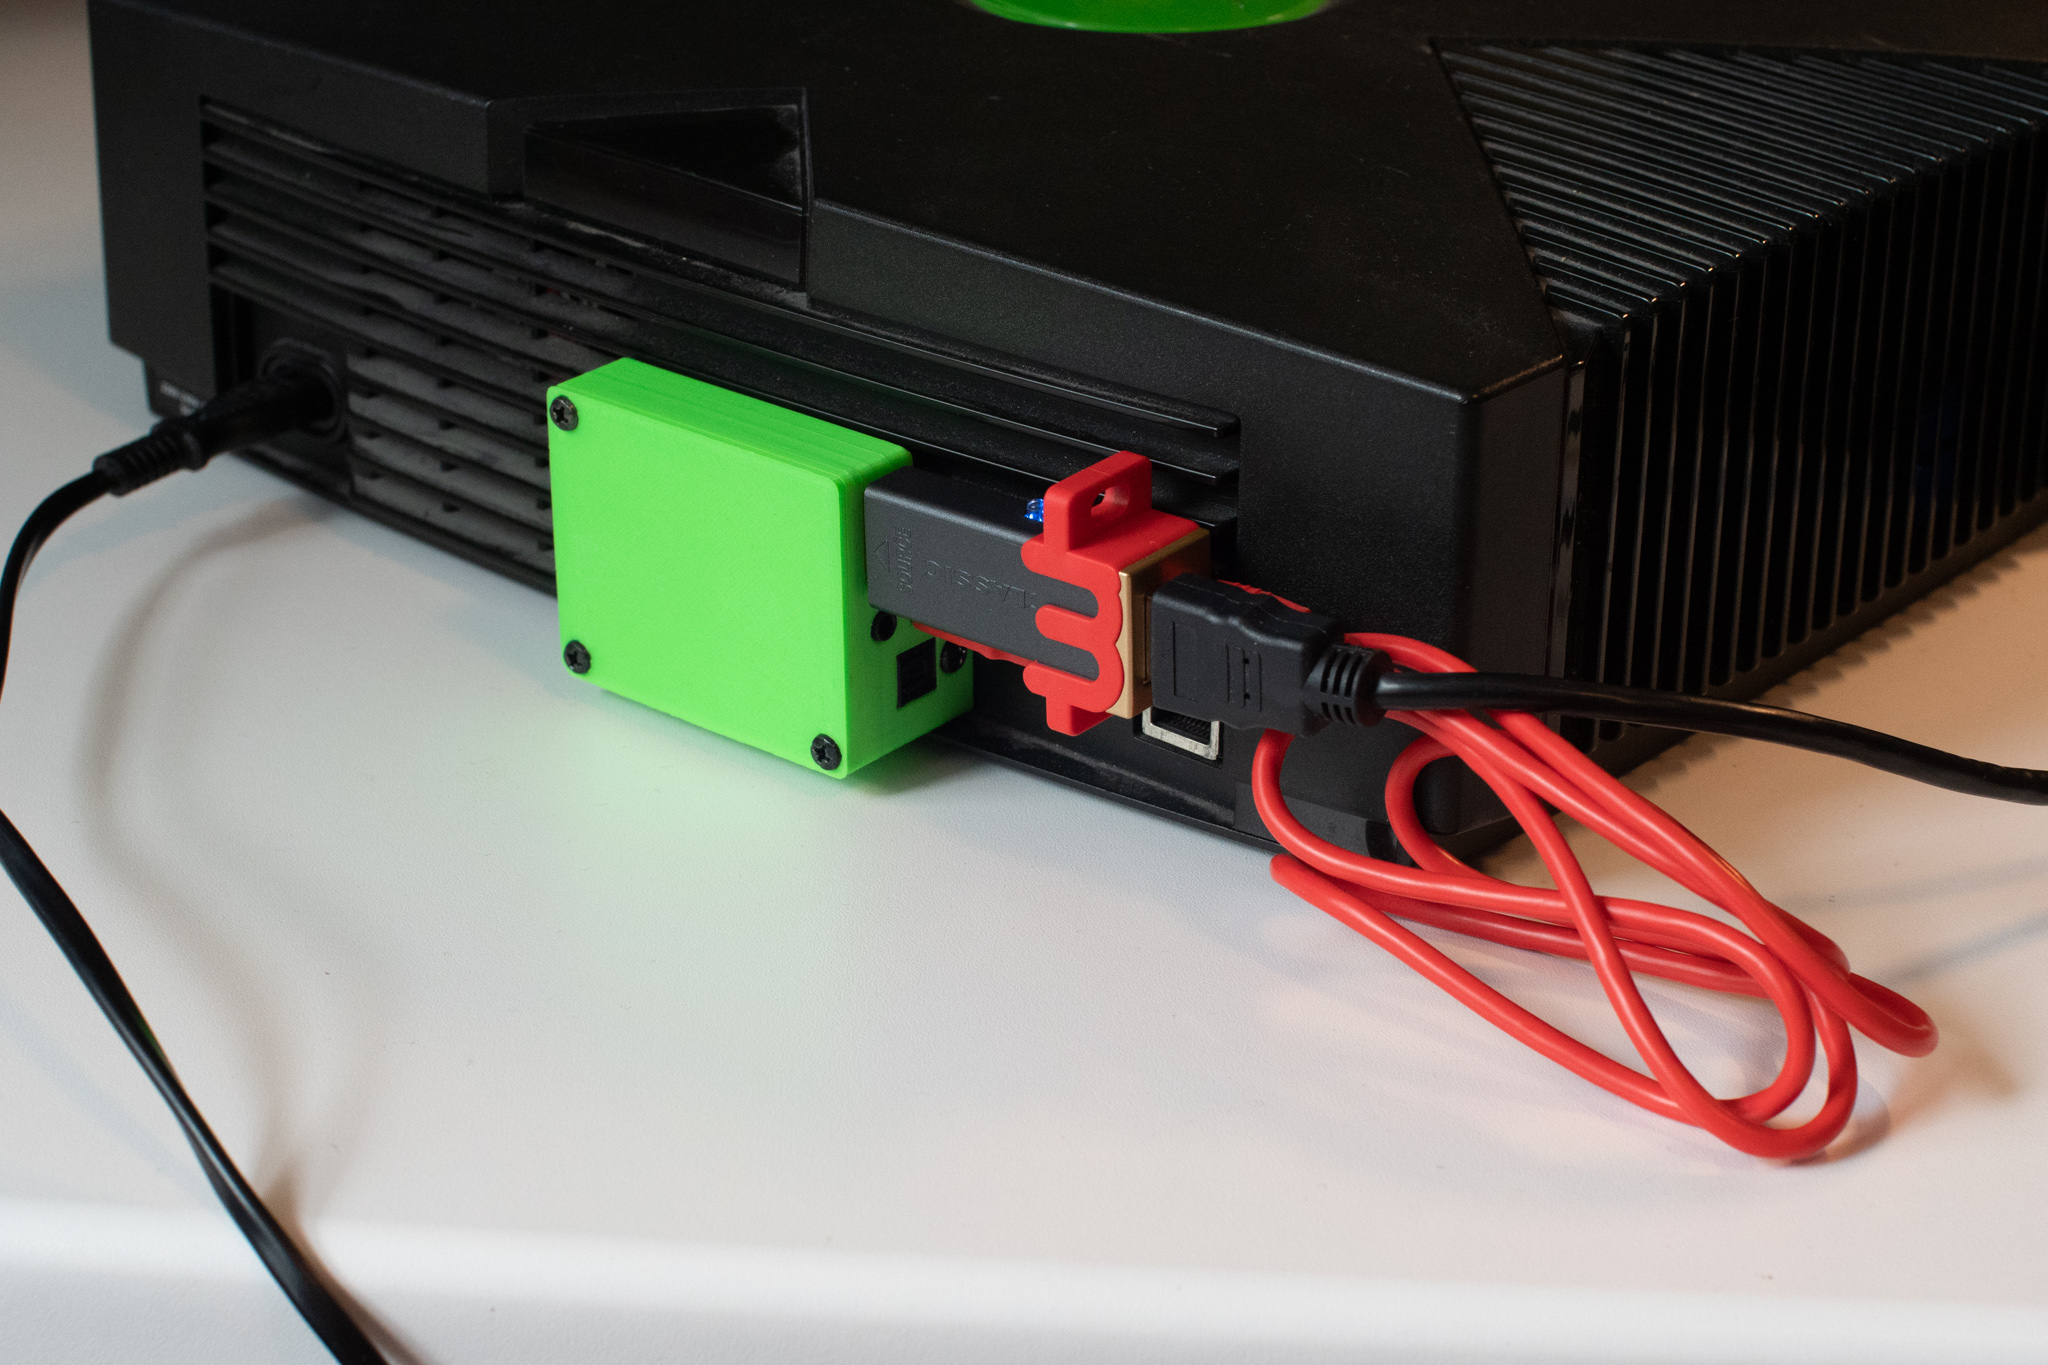
Fig 12: The digital AV adapter with mCable mClassic adapter inserted - Image © Stanley Skarshaug
When playing Steel Battalion I got shocked at how much better the image gets. It does actually look like you play on an emulator at a higher resolution. This makes it possible to actually read the gauges in the cockpit, and to better see what VT you have in sight.
PS: I'm in no way affiliated with mCable, I just love their product.