There are many reasons why you might want to have access to your home network from anywhere in the world. OpenVPN is a free solution that, in combination with some other tools and know-how, makes this possible for free.
In this article, I will guide you through a step-by-step process of setting up a VPN solution you can use to connect to your home.
OpenVPN Installation
To start you must install the OpenVPN access server on a Linux box in your house.
sudo bash -c 'bash <(curl -fsS https://packages.openvpn.net/as/install.sh) --yes'During the installation, you will get information on how to access the web UI.
...

Access Server Web UIs are available here:
Admin  UI: https://10.22.22.150:943/admin
Client UI: https://10.22.22.150:943/
To login please use the "openvpn" account with "something_very_secret" password.
(password can be changed on Admin UI)
+++++++++++++++++++++++++++++++++++++++++++++++

...
OpenVPN Licence
Before you can start using the VPN server, it has to be activated. Start by navigating to the purchase of a new licence
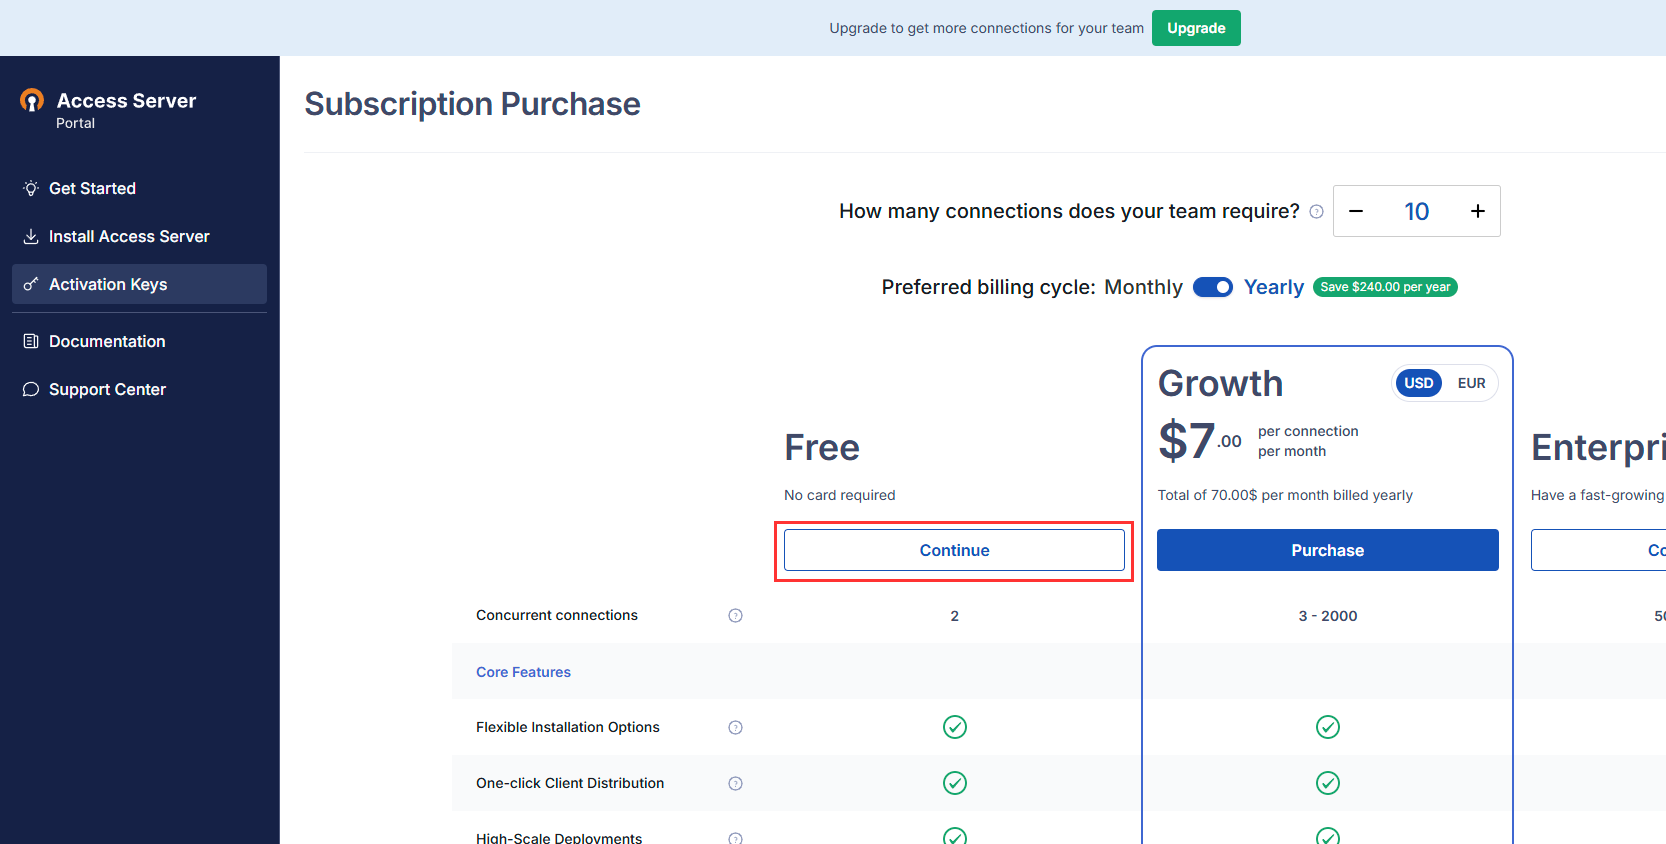
Once you have a free licence, you can continue by loggin int to the web UI, and activating the licence.
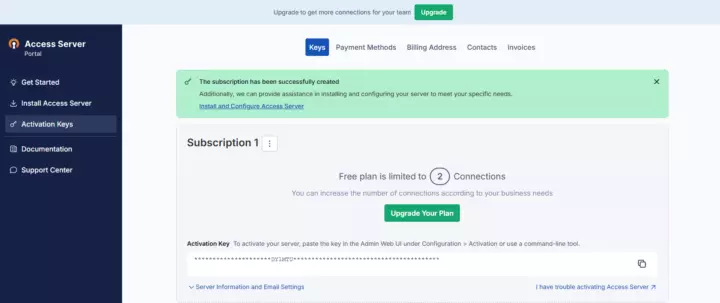
Getting your activation key
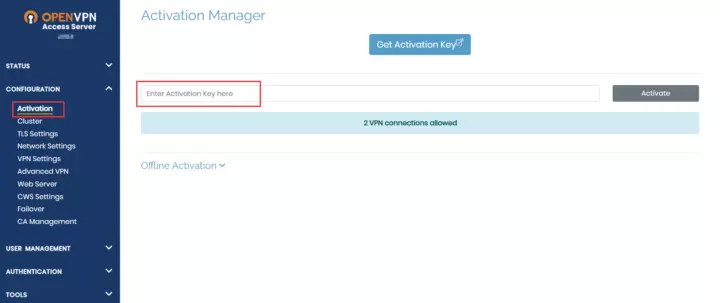
Enter the activation key
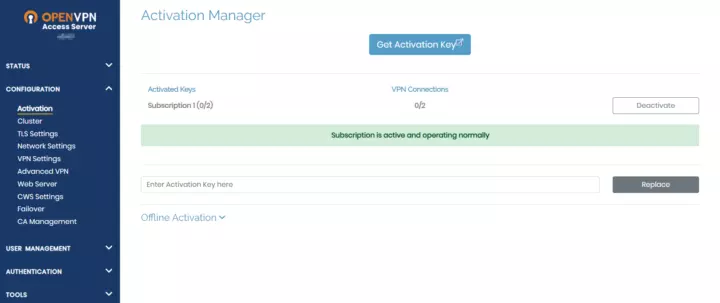
Successfully activated.
OpenVPN Users
Each user who needs access to the VPN needs their own user account and a profile that is used to connect.
Navigate to the user permissions page. Create a user account, and a password for the user. Then, create a profile that can be used to test the VPN server on your local network.
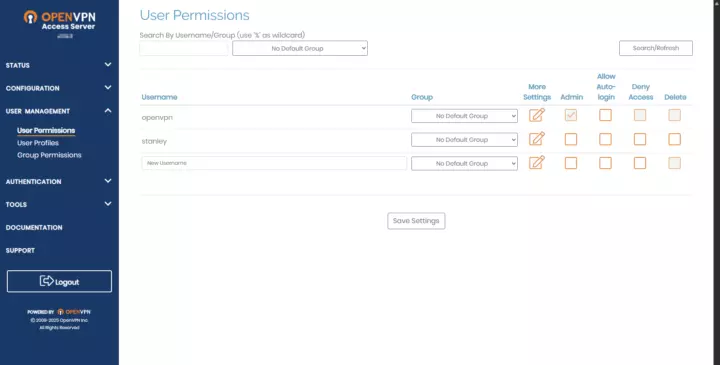
Adding a new user
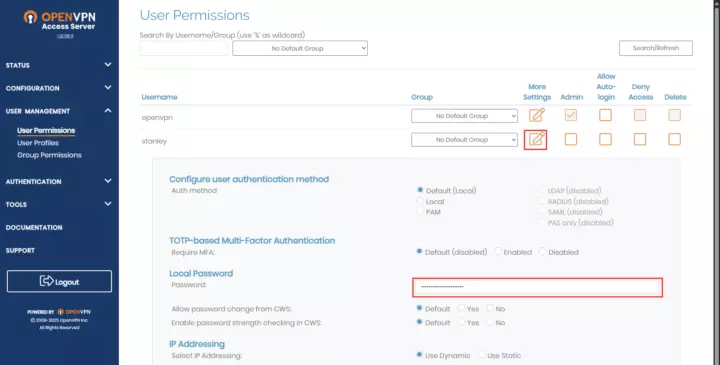
Adding a password to the user
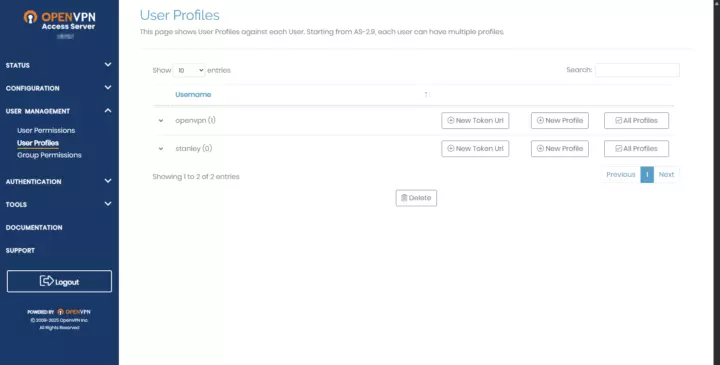
Add a new profile that is used to access the server.
OpenVPN Testing
Before continuing with the configuration, it's nice to check if the OpenVPN server is correctly installed and working as expected. By verifying that you can connect to the OpenVPN server from the LAN, you can limit the troubleshooting at a later stage.
Start by installing the OpenVPN client on your computer, and then try to connect to the VPN server using the profile you created previously.


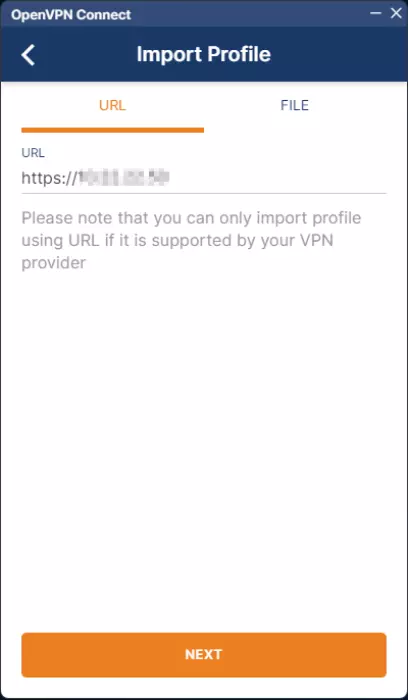

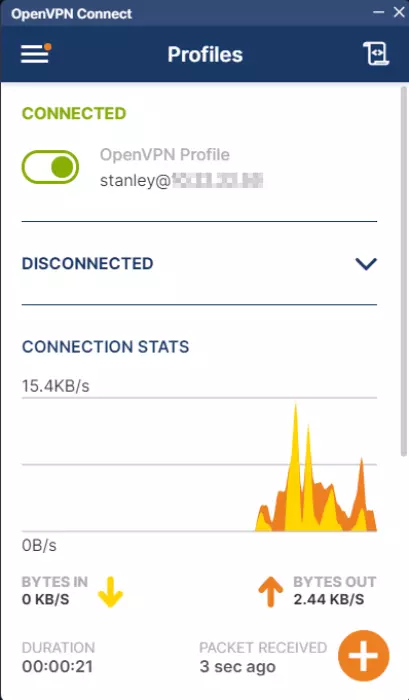
During connection, you will get a warning telling you that the certificate is self-signed. Accept the risk, and continue to connect. If you were able to connect, you can proceed with this guide.
No-IP Setup
Dynamic DNS server
A typical home internet uses a dynamic IP. This means that your home will periodically get a new IP address from your ISP (Internet Service Provider). This change of IP address might happen daily, weekly, monthly, or at any other time at the ISP's discretion. This is not good for typical DNS resolution, where you typically associate a hostname with a single specific IP address.
To connect to your VPN from anywhere in the world, you must have a hostname for the VPN, and that hostname must be resolvable by DNS. No-IP.com provides a dynamic DNS server that you can automatically update with the current IP address of your home.
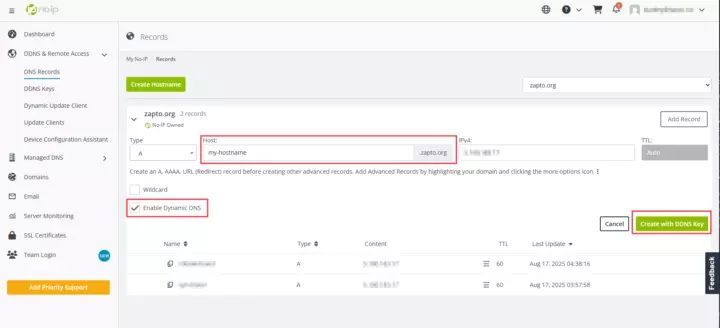
Add a new dynamic host
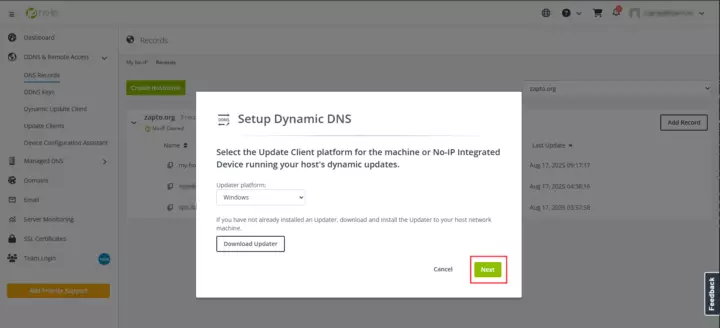
Skip the client download for now
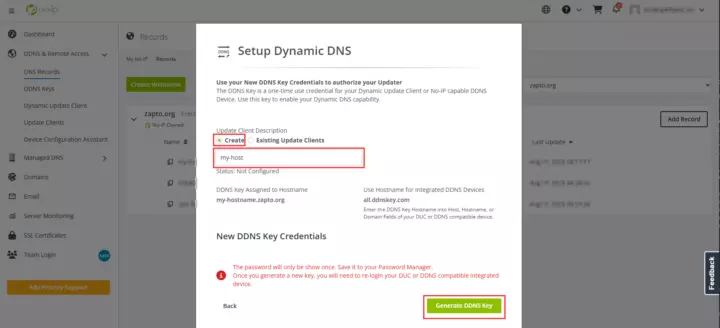
Create new credentials for the dynamic host

Save the credentials for later use
At this stage, you have successfully configured a dynamic DNS using no-ip.com.
The free tier of No-IP is limited to a single Dynamic DNS, and you have to confirm that the dynamic DNS is still in use manually by clicking on a link sent to you in a monthly email. Because of this, I personally use the cheapest paid subscription of No-IP. I think this is reasonably priced and works great.
No-IP Client
Update the dynamic DNS record automatically
Now, when the dynamic DNS is configured, you must install a DUC (Dynamic Update Client) that runs on a host on your home network and updates the dynamic DNS record with the correct IP address for your home. For simplicity's sake, I recommend running the DUC on the same host that is running the OpenVPN server.
Follow the official guide for installing the DUC on your host. Please note that the Linux guide makes some assumptions about what OS you are running. It worked like a charm on all my Ubuntu hosts, but I had to install the package using dpkg on a Raspberry Pi 4 running Debian 12.
No-IP Daemon
Automate the process of running the No-IP client
To make sure that the DUC is always running, I recommend creating a simple daemon managed by SystemD.
sudo vim /root/noip.service[Unit]
Description=Auto-update the no-ip host
[Service]
Type=simple
User=root
ExecStart=noip-duc --username 5spvh6f --password supersecret_ddns_password--hostnames my-hostname.zapto.org
[Install]
WantedBy=multi-user.targetsudo systemctl enable /root/noip.service
sudo systemctl start noipThis will enable SystemD to start the daemon when the system boots, and then start the daemon now.
To check the status of your No-IP service, run this command:
sudo systemctl status noip
● noip.service - Auto-update the no-ip host
     Loaded: loaded (/etc/systemd/system/noip.service; enabled; preset: enabled)
     Active: active (running) since Sun 2025-08-17 13:38:15 CEST; 2s ago
   Main PID: 1298 (noip-duc)
      Tasks: 1 (limit: 3926)
        CPU: 17ms
     CGroup: /system.slice/noip.service
             └─1298 noip-duc --username 5spvh6f --password supersecret_ddns_password--hostnames my-hostname.zapto.org

Aug 17 13:38:15 ***.haxor.no systemd[1]: Started noip.service - Auto-update the no-ip host.
Aug 17 13:38:15 ***.haxor.no noip-duc[1298]: [2025-08-17T11:38:15Z INFO  noip_duc::public_ip] Attempting to get IP with method Dns(No-IP Anycast DNS Tools)
Aug 17 13:38:15 ***.haxor.no noip-duc[1298]: [2025-08-17T11:38:15Z INFO  noip_duc::observer] got new ip; current=5.***.***.***, previous=0.0.0.0
Aug 17 13:38:16 ***.haxor.no noip-duc[1298]: [2025-08-17T11:38:16Z INFO  noip_duc::observer] update successful; current=5.***.***.***, previous=0.0.0.0
Aug 17 13:38:16 ***.haxor.no noip-duc[1298]: [2025-08-17T11:38:16Z INFO  noip_duc::observer] checking ip again in 5m
DNS Setup
Now it's possible to set up a CNAME on your own domain, which allows you to use a friendlier and personal hostname for your home VPN, like vpn.haxor.no. To do this, simply add a CNAME record to your domain that points to the dynamic no-ip DNS record.
OpenVPN hostname
Finalizing the OpenVPN server setup
Once you have configured a proper hostname that points to the dynamic DNS record, which points to your home IP, you can complete the configuration of the OpenVPN server.
Log in to the web admin portal, and set the correct hostname by navigating to the network section, and enter the hostname you defined on your own domain. For example, vpn.hacker.no, and save the changes.
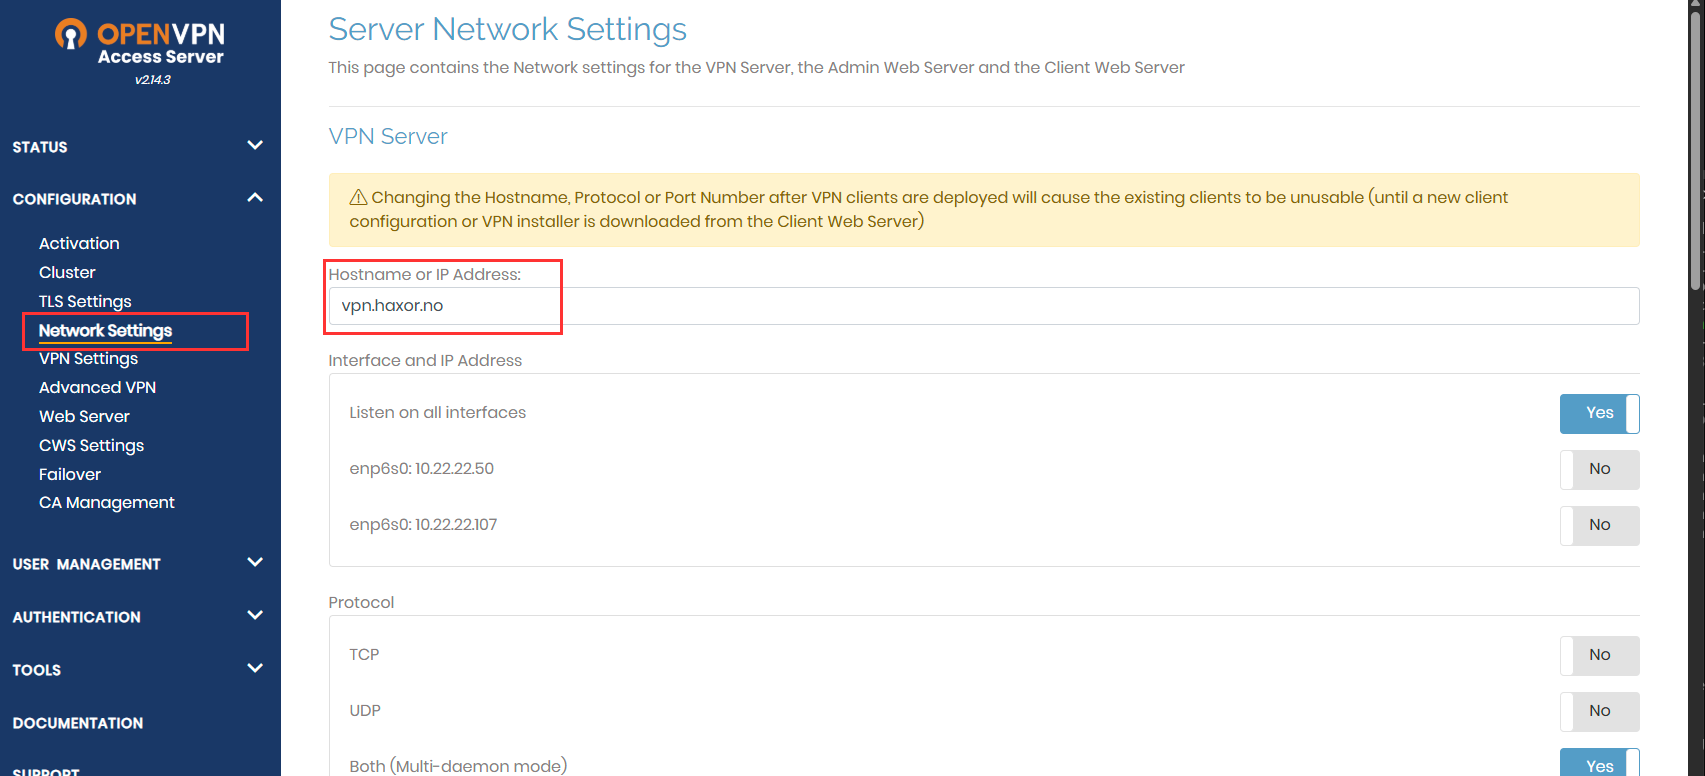
Updating the OpenVPN hostname
Since the hostname of the OpenVPN server was changed, you have to create new OpenVPN profiles for your users. Start by deleting the old profile you used previously for testing purposes.
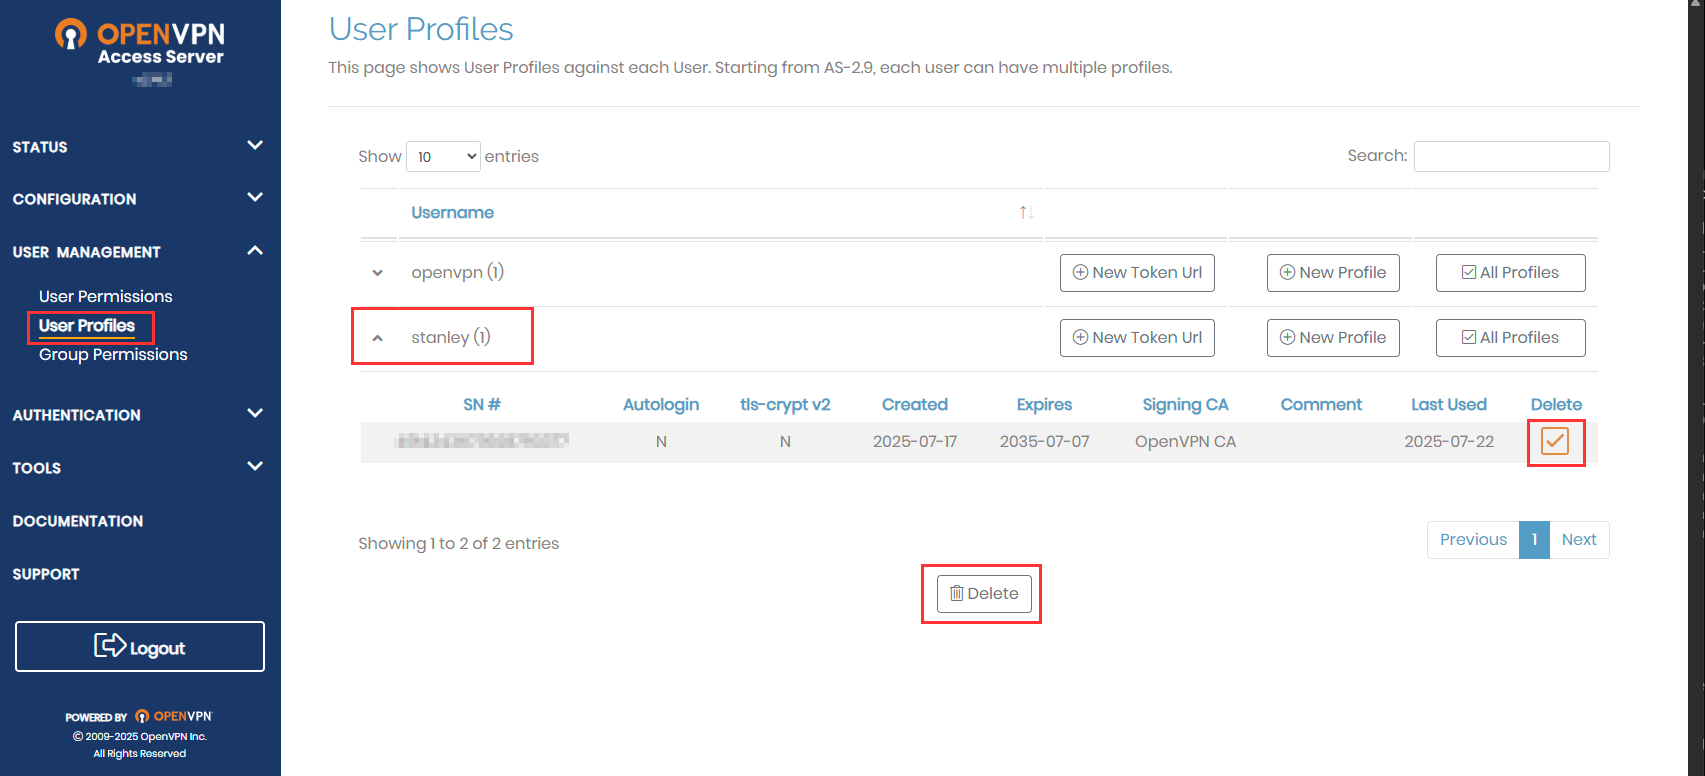
Deleting the test profile used previously.
You now have to create a new profile that can be used to access the VPN from outside your home.
Once the profile is downloaded, you have completed the setup of the VPN server.
Router Portforwarding
Giving the internett access to the OpenVPN server
The final step of the installation and configuration is to set port forwarding on your router. Port forwarding is the process of forwarding a connection made to a specific port and protocol on your router to a specific port and protocol on a host inside your home network. In this case, you want to forward the connection made to the ports used by the OpenVPN server.
Giving the world access to a host inside your home network is risky!
Please, do not proceed unless you know what you are doing.
It's important to thoroughly harden the server before setting up port forwarding to it. By hardening, I mean setting up a proper firewall with strict rules, configuring fail2ban, and performing other actions to limit what can be done if an attacker gets unauthorized access to the server.
Each router has its own GUI for setting up port forwarding. You have to find out how to configure it on your own router. Remember to add both the TCP port and UDP port that the OpenVPN server is listening to.
OpenVPN Connection
The final test
The final test is to connect to your home network from the outside using the new OpenVPN profile. A quick way to do this is to tether your smartphone to your computer and connect to the VPN using the mobile network.
If everything was configured correctly, you have successfully installed and configured a VPN solution that requires minimal maintenance. 🎉