Deploying business-critical applications can be stressful. Running automated tests can relieve that stress, and automating the process of always ensuring that all tests pass before deploying to prod can be a great safety-net, and cheap insurance.
Jenkins can become a valuable tool for running automated unit tests, feature tests, and static and dynamic security tests by integrating it into your deployment pipeline.
In this article, I will explain how to use Jenkins to set up a basic integration test suite for Laravel projects before deploying them to Laravel Forge.
Overview
How is the pipline structured?
This deployment pipeline is based on Laravel projects that use GitHub as a remote git repository and run a production environment on a VPS (Virtual Private Server) managed by Laravel Forge.
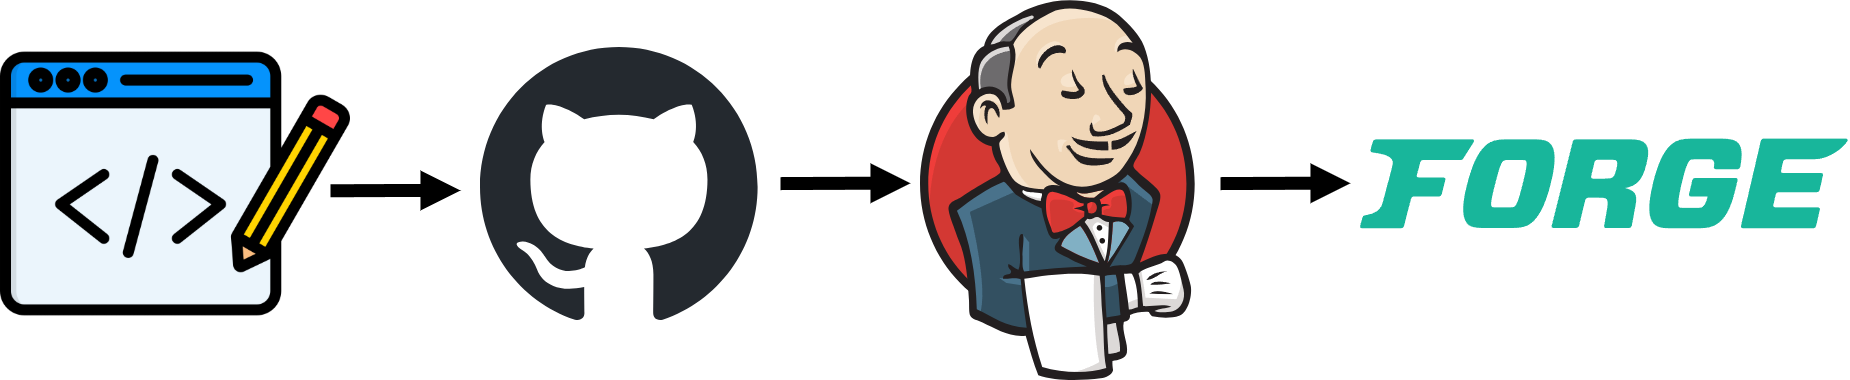
The process is initiated when fresh code is committed to the prod branch of the repository. When GitHub receives a push, it runs a webhook to initiate a CI (Continuous Integration) process in a Jenkins server. This CI process pulls the code from GitHub, installs dependencies, and runs all defined tests. If all tests pass, the Jenkins server calls the Laravel Forge webhook to start the deployment process on the prod server.
Jenkins is a complex automation platform that can be used to run almost any automation pipeline. This makes Jenkins a bit hard to learn.
There are more simple solutions specifically designed to run integration tests on PHP projects. One of these options, Chipper CI, has a much better setup and configuration UX than Jenkins. Because of this, I recommend using Chipper CI for professionals who only deploy PHP apps, and want to integrate a CI step into their deployment pipeline easily.
I think Jenkins is great because it is free and can be used to automate anything I want to automate. Once mastered, I could use Jenkins for integration testing and deployment of all my projects, regardless of technology. This includes CI/CD pipelines for Laravel written in PHP, Django apps written in Python, and building binaries for C++ projects.
Jenkins SSH setup
You must do two things before you can start using Jenkins to pull changes from GitHub and start running tests. First, you need to add a GitHub signature to the Jenkins Linux users' know_hosts file and create an SSH key that can be used for authentication.
To add the GitHub signature switch to the Jenkins user, connect to GitHub via SSH, without establishing a terminal by running these commands:
sudo su jenkins
ssh -T git@github.com
To generate an SSH key that can be used for authentication, run this command as the Jenkins user:
ssh-keygen
Generating public/private rsa key pair.
Enter file in which to save the key (/var/lib/jenkins/.ssh/id_rsa):
Created directory '/var/lib/jenkins/.ssh'.
Enter passphrase (empty for no passphrase):
Enter same passphrase again:
Your identification has been saved in /var/lib/jenkins/.ssh/id_rsa
Your public key has been saved in /var/lib/jenkins/.ssh/id_rsa.pub
The key fingerprint is:
SHA256:SMafRBP43/fl/lzdjmaQg9gJrW3Rsm1UKx/MwFV4CAg jenkins@testserver
The key's randomart image is:
+---[RSA 3072]----+
|       .Eo o.o.+.|
|     ... .. o + .|
|      +... . = o |
|     o +o.+ 5 =  |
|      . SB X + . |
|        o O B o +|
|         . . + o=|
|              o++|
|             o..*|
+----[SHA256]-----+
As you can read from the terminal dump above, a private key and a public key were created.
Next, you must create a credential in Jenkins that can be used to access your private repositories on GitHub. To do this, go to:
- Dashboard
- Manage Jenkins
- Credentials
- System
- Global credentials (unrestricted)
Here, you can add a new credential.
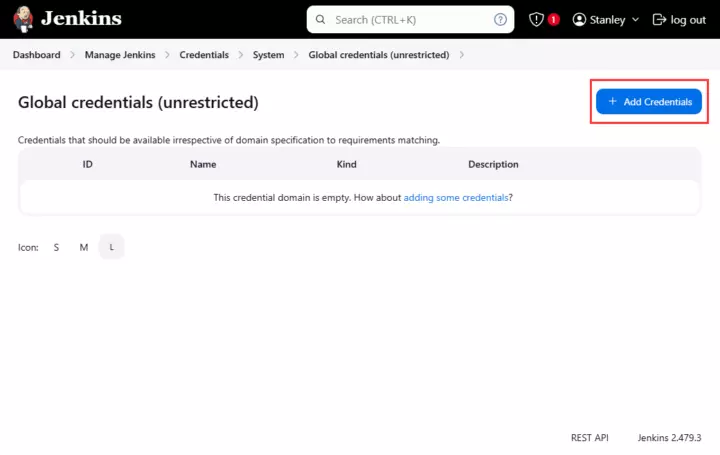
1/4: Click on the add credentials button.
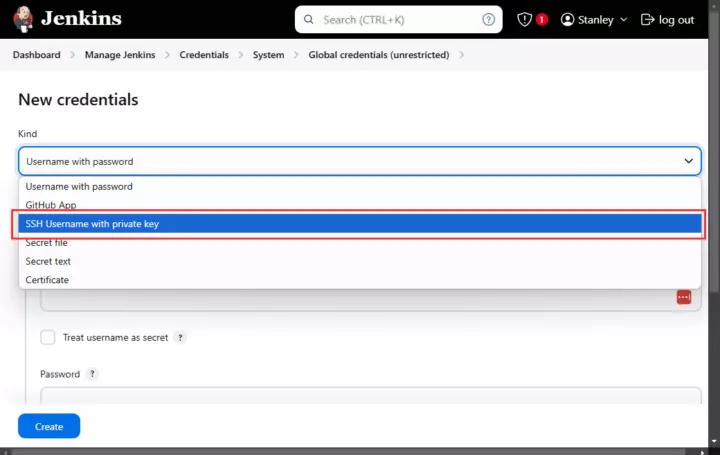
2/4: Select SSH Username with private key
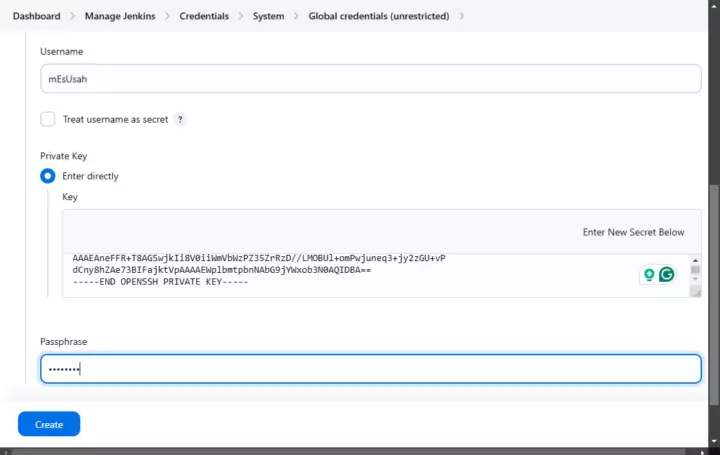
3/4: Give the credential a good name/id, enter your GitHub username, and paste in the private key
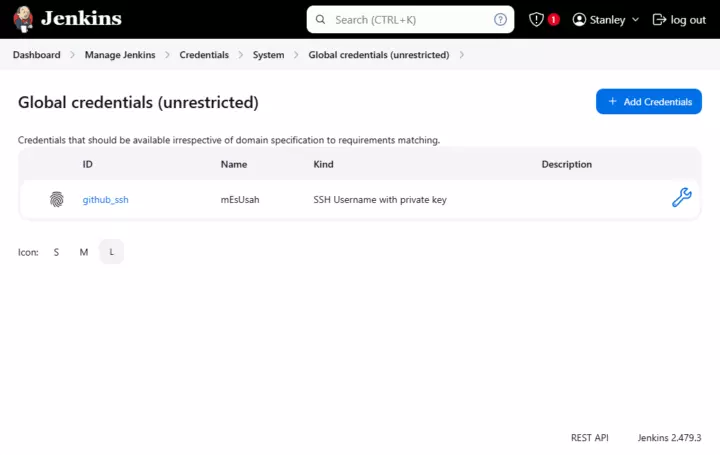
4/4: Done. Now your credential is listed.
Now, you can add the public key to your GitHub account to access private repositories from Jenkins with your created credentials.
Jenkins Item
Most git projects have various branches. For my projects, I typically develop on the master branch and other local branches, and when I'm ready to deploy, I merge my changes into the prod branch and push the changes in the prod branch to GitHub. This will typically kick off the CI/CD pipeline.
NOTE: A standard Jenkins "Pipeline" item does NOT support multiple branches in your Git repository and will start the build process every time you push to any branch on GitHub.
Thankfully, the "Multibranch Pipeline" does support multiple branches in your repository, can have separate pipelines for each branch, and will only start the build process on branches you have enabled.
To create a multibranch pipeline, go to the dashboard and click on the "New Item" button on the top left of the screen. Here you can give the item a name and select "multibranch pipeline", and click on the OK button.
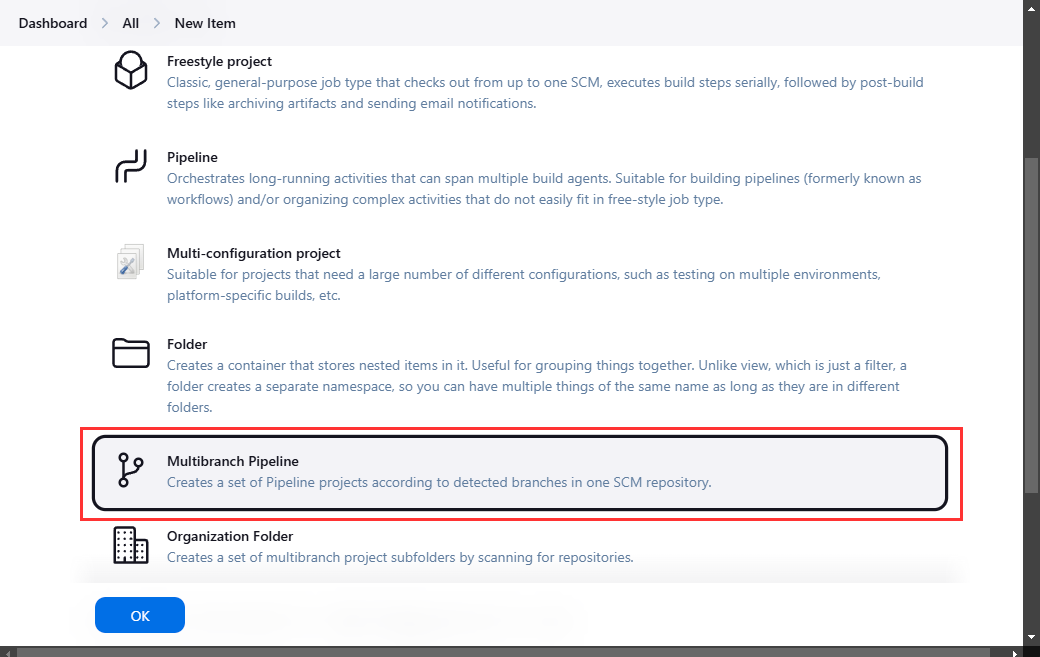
Create a mulitbranch pipeline.
Click the source dropdown on the following configuration screen, and select Git. This will add new options to the configuration.
You then add the git URL to your repository and select your previously created credentials. To limit what git branches the Jenkins Item should filter, you can add a behavior called "Filter by name (with wildcards)" and choose to include only the prod branch.
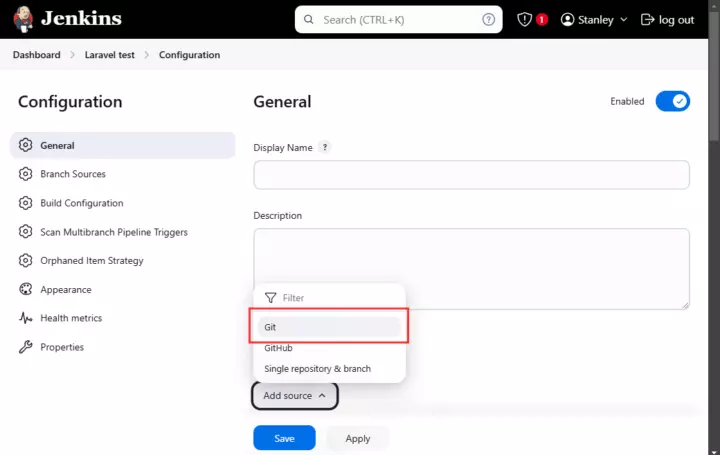
Select "Git" as the source.
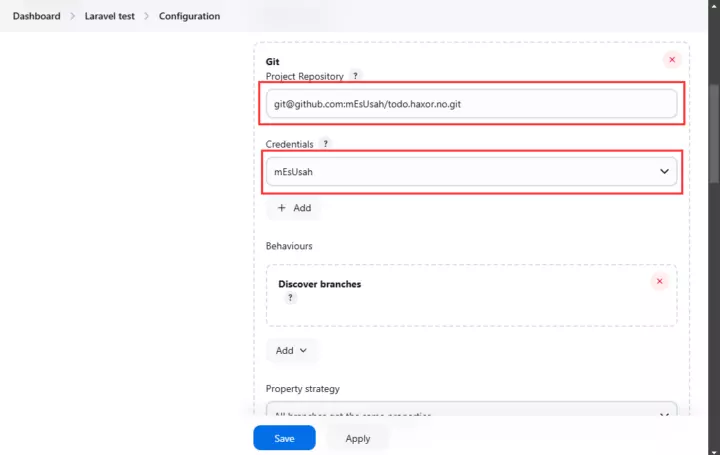
Enter git URL and select the credentials you created
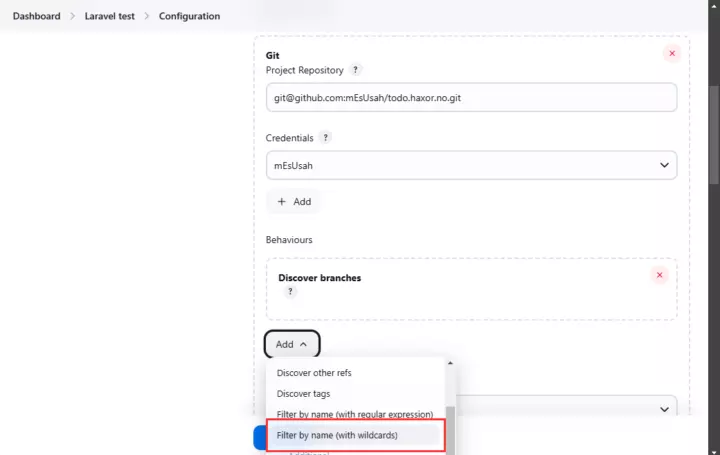
Add the Filter by name (with wildcards) behavior.
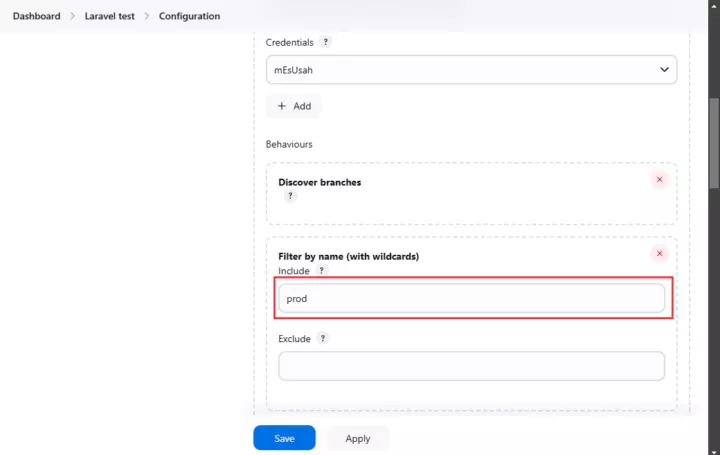
Only include the "prod" branch
To continue, click on the save button at the bottom of the screen.
Jenkinsfile
One of the brilliant parts of Jenkins is using the "Jenkinsfile." This file describes the pipeline's stages and the steps they include. A stage is simply a collection of steps that should be grouped together in the pipeline. The Jenkinsfile in this article consists of three steps: Setup, Test, and Deploy.
On a multibranch pipeline, you must have a Jenkinsfile in at least one of the branches of your git repo. When you initiate a scan for changes in your Jenkins Item, Jenkins will look for a Jenkinsfile in the updated and active branch, and execute it.
Since this project is not based on a Docker container, I had to install Composer and all PHP extensions needed by Laravel to run all the tests on the VPS. This is just like you would on a typical staging or production server running your Laravel applications.
Stage 1: Setup
Getting the environment ready for testing
The first stage of the Jenkinsfile in this article is the Setup stage. This is where the testing environment is prepared by running several shell commands.
pipeline {
    agent any

    stages {
        stage('Setup') {
            steps {
                // Install PHP dependencies
                sh '/usr/bin/php8.2 /usr/bin/composer install'

                // Create .env file
                sh 'cp .env.example .env'

                // Replace default values in .env file
                sh "sed -i 's/DB_HOST=db/DB_HOST=localhost/' .env"
                sh "sed -i 's/DB_DATABASE=db/DB_DATABASE=example_db/' .env"
                sh "sed -i 's/DB_USERNAME=db/DB_USERNAME=example_db/' .env"
                sh "sed -i 's/DB_PASSWORD=db/DB_PASSWORD=example_db/' .env"

                // Run migrations, seed with dummy data, and generate app key
                sh "/usr/bin/php8.2 artisan migrate:fresh"
                sh "/usr/bin/php8.2 artisan db:seed"
                sh "/usr/bin/php8.2 artisan key:generate"
            }
        }

        ...
    }
}
First, all PHP dependencies are installed with Composer.
Next, the .env.example file is copied, and the default database credentials are replaced by credentials used by Jenkins to run the test.
Finally, a fresh install of the database is migrated, and seeded with dummy data before the app key used for cookies is generated
Stage 2: Test
Performing the tests
In the test stage of the pipeline, the PHPUnit tests are run, and a Jenkins test report is generated. This will make it easy to get a quick look at the output of all test from the Jenkins GUI.
pipeline {
    agent any

    stages {
        ...

        stage('Test') {
            steps {
                sh "/usr/bin/php8.2 artisan test --log-junit report/junit.xml"
                junit 'report/*.xml'
            }
        }

        ...
    }
}
Stage 3: Deploy
Sending the project off for deployment
To deploy the commit to a prod environment managed by Laravel Forge, simply add a final stage that calls the webhook URL using curl.
pipeline {
    agent any

    stages {
        ...

        stage('Deploy') {
            steps {
                sh "curl -X POST -g https://forge.laravel.com/servers/xxxx/sites/yyyyyyyyy"
            }
        }

    }
}
Running the pipline
Trigger the pipelines manually
To test the pipelines, you can either scan for changes in the multi-branch pipeline from the main page of the multi-branch pipeline (showing all branches), or by clicking on the "Run now" button inside a branch. This is a nice option for debugging and for verifying that the pipeline works as expected.
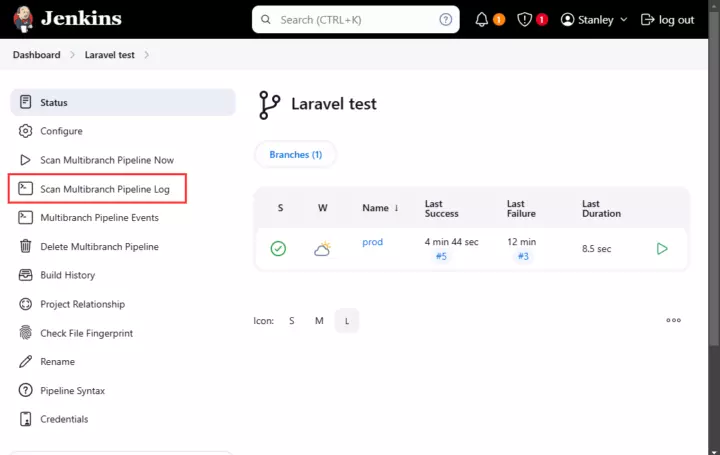
Runing the pipeline by scanning for changes in all branches
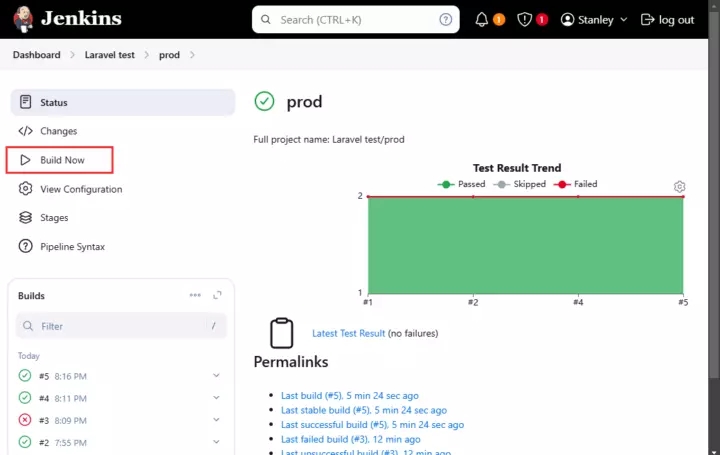
Running the pipeline on the prod branch by clicking the build now button
Jenkins webhook
Jenkins does not support webhooks on multibranch pipelines by default. Because of this, you have to install a plugin called "Multibranch Scan Webhook Trigger." To install this plugin, go to:
- Dashboard
- Manage Jenkins
- Plugins
Select "Available plugins" on that screen, and search for the plugin. When it appears in the list, check the checkbox next to it, and click the highlighted install button at the top of the screen.
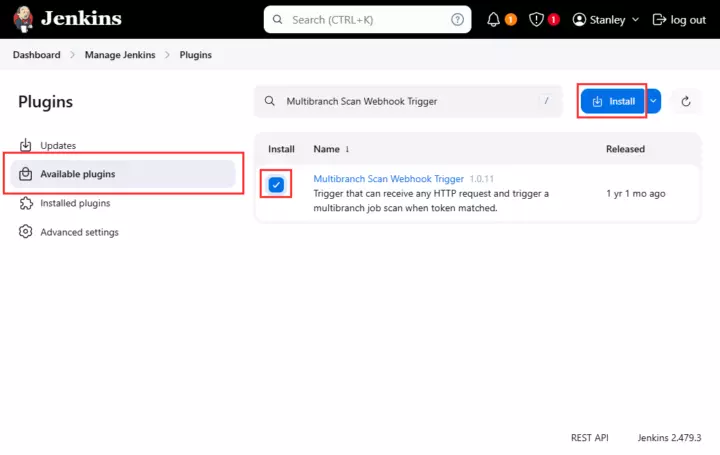
Select, and install the webhook plugin
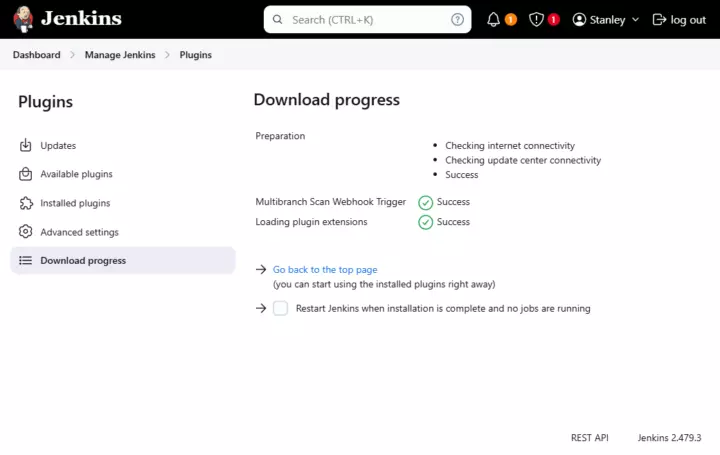
Plugin successfully installed
Once installed, you can activate the webhook in the multibranch-pipeline config page and add a trigger token used to trigger this Jenkins Item.

Activating the webhook in the multibranch pipeline
To trigger the webhook in your GitHub repository, you must add the webhook to the repository. This is done by navigating to the "Config" tab at the top of the repository front page, clicking on the "Webhooks" entry on the sidebar, and clicking on the "Add webhook" button at the top of the page.
Add the webhook URL to the Payload URL, select Content type: Application/JSON, and ensure that "Just the push event" is selected as the trigger event and that the webhook is active.
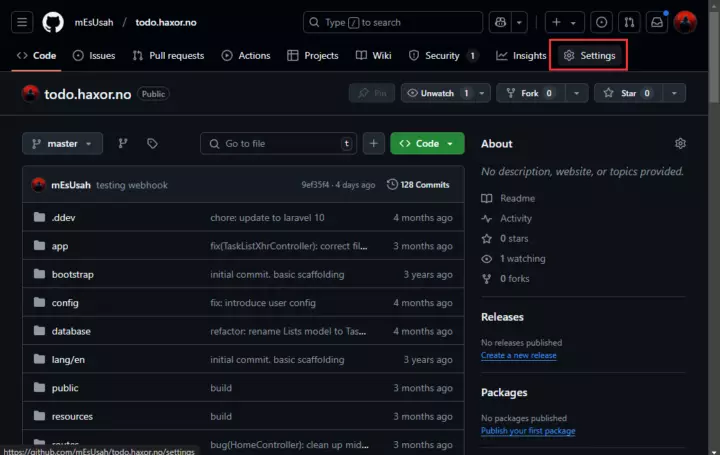
Open the repository settings
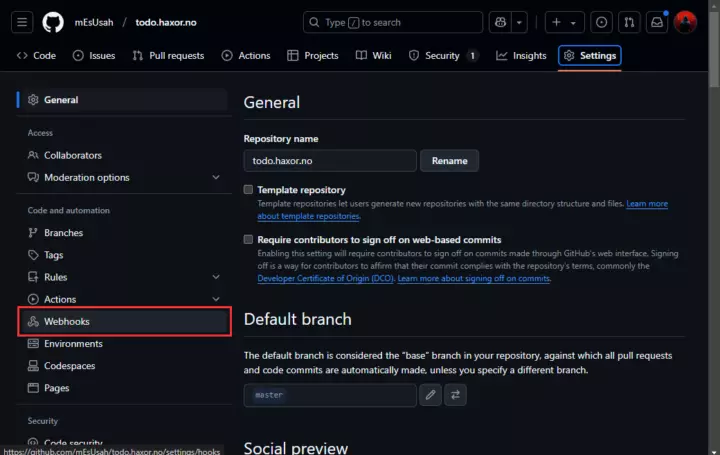
Navigate to the webhooks page
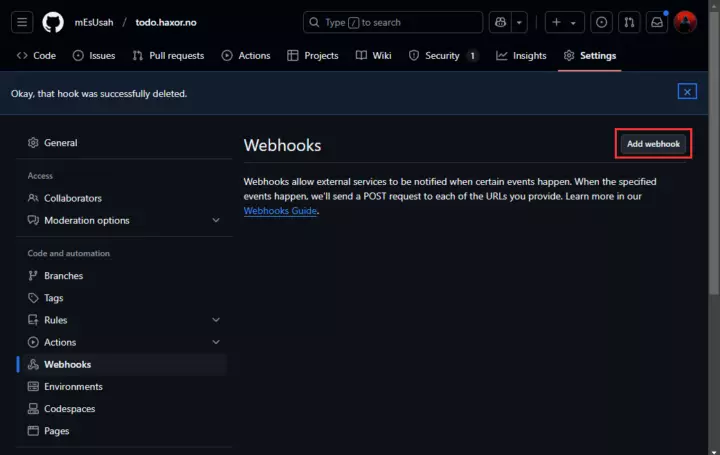
Click the new webhook button
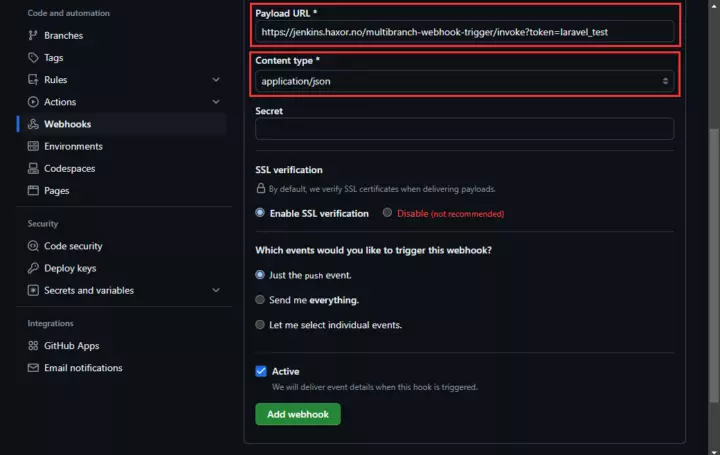
Enter the webhook URL, and select the correct content type.
Now, you can try committing a change to the repository to verify that the webhook is triggered and that the pipeline runs automatically.
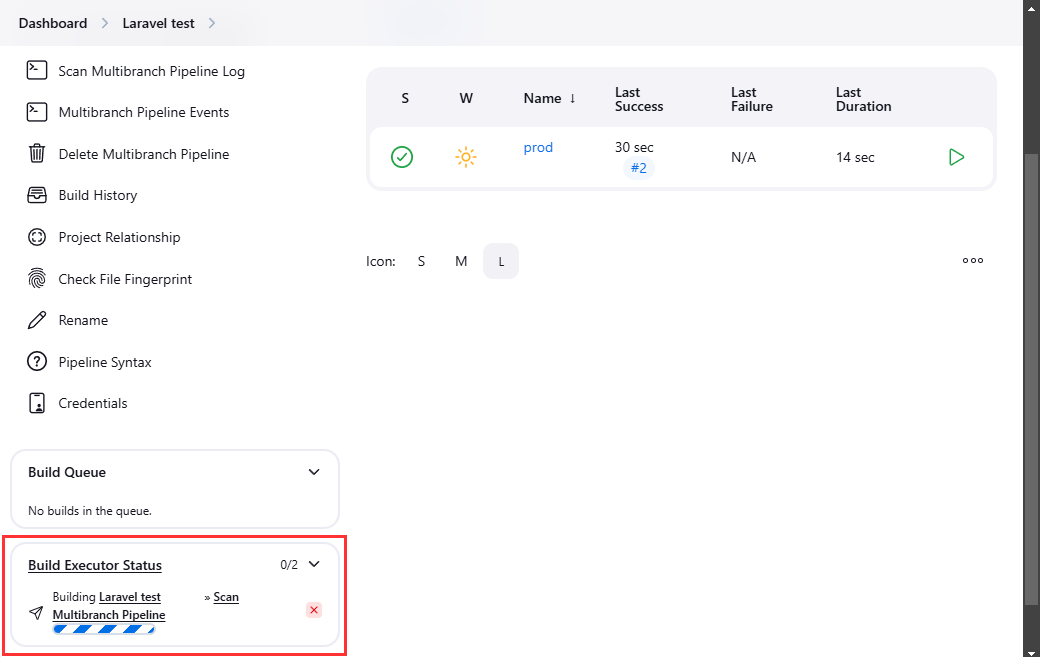
Verifying that the webhook initiated a scan for updates
Congratulations! You now have a fully operational CI/CD pipeline built with GitHub, Jenkins, and Laravel Forge 🎉