Microsoft Active Directory is a very popular platform to manage user authentication and authorization for organizations.
I personally use on-prem AD (Active Directory) to do security research without having to use cloud-based solutions. This gives me the control I want to have, and the peace of mind related to cost control in my haxor lab. Forgetting to shut down a VM instance can be a costly affair if you're not careful on cloud platforms such as AWS and Azure.
In this rather lengthy guide, I will take you through the entire process of setting up two VMs (Virtual Machines) running Windows Server 2022 to create a brand new AD domain on a virtual network in VMware Pro 16.
Create VM
Initial Virtual Machine configuration
Add a VM to VMware Workstation with a 60GB disk and make sure you have at least 4GB of RAM allocated to the VM. If you have given the VM too little memory you will get a warning saying that "Windows cannot find the Microsoft Software Licence Terms. Make sure the installation sources are valid and restart the installation".
OS installation
Installing WIndows Server 2022 on VM
Installing Windows Server 2022 on a VM is pretty straightforward. Browse to Microsoft.com download the ISO image. After the image is successfully downloaded, verify the download. If the hash of the download matches the one provided by Microsoft you can add it to the Optical drive in your VM, and boot the VM.
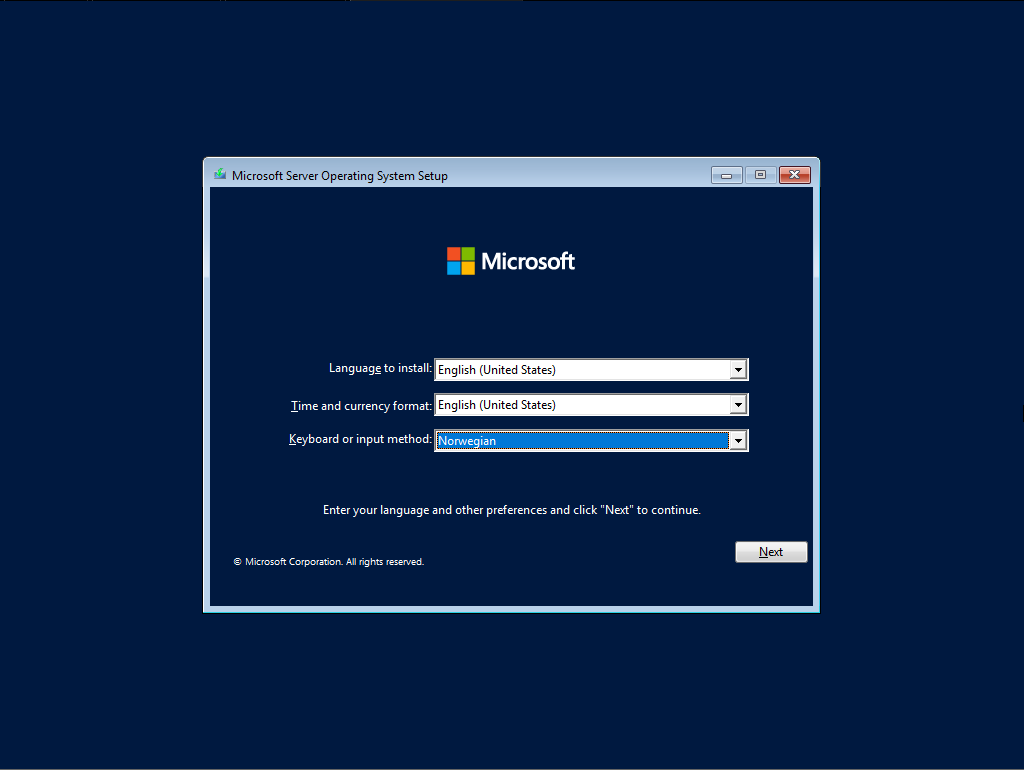
Language and keyboard layout selection
When the ISO has loaded, you will be prompted to select your desired operating system language and keyboard layout.
From the list of Windows, server variants select the one labeled Standard Evaluation (Desktop Experience). The Standard Evaluation version will not be installed with a graphical user interface and will be terminal only.
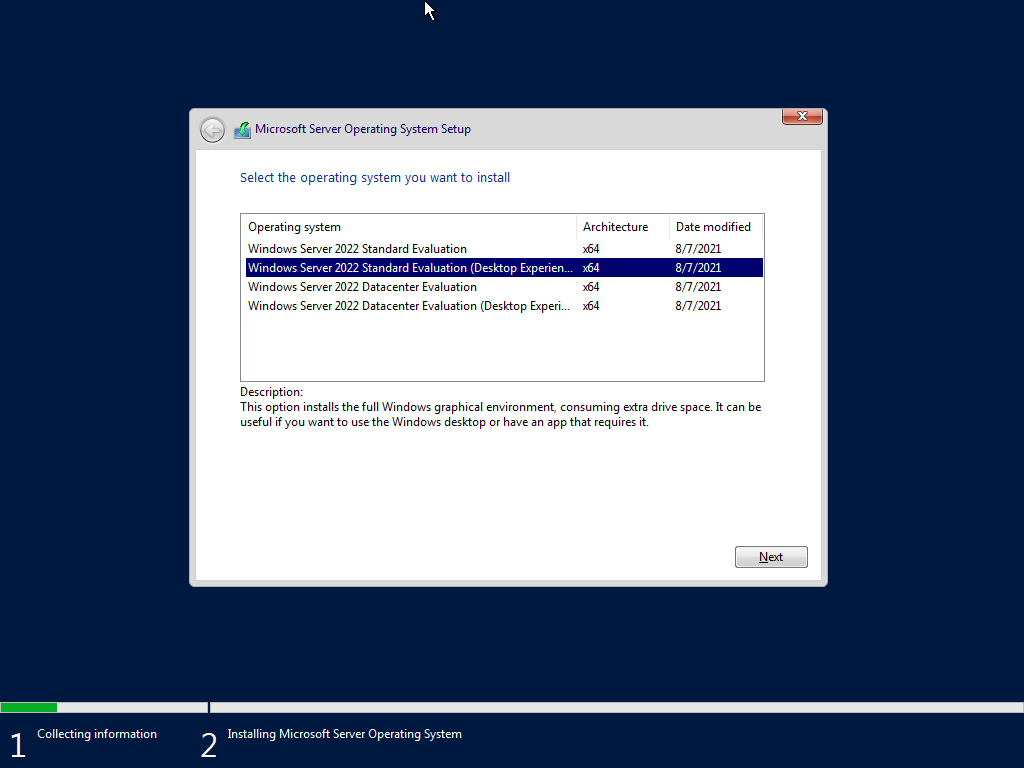
Windows Server 2022 version selector
The version without a GUI does require the OS to run fewer processes and because of this make it perform better. But for a lab environment, I just care about testing stuff out, so I use the Desktop Experience to make the experimentation as simple and easy as possible.
If I want to work on my PowerShell skills I can simply SSH into the server, or open a PowerShell window and do it from there.
Once the desired version of Windows Server 2022 is selected you can click next, and accept the license terms before moving forward.
Since you are installing the OS on a brand new VM; you select the second option to install the "server operating system only".
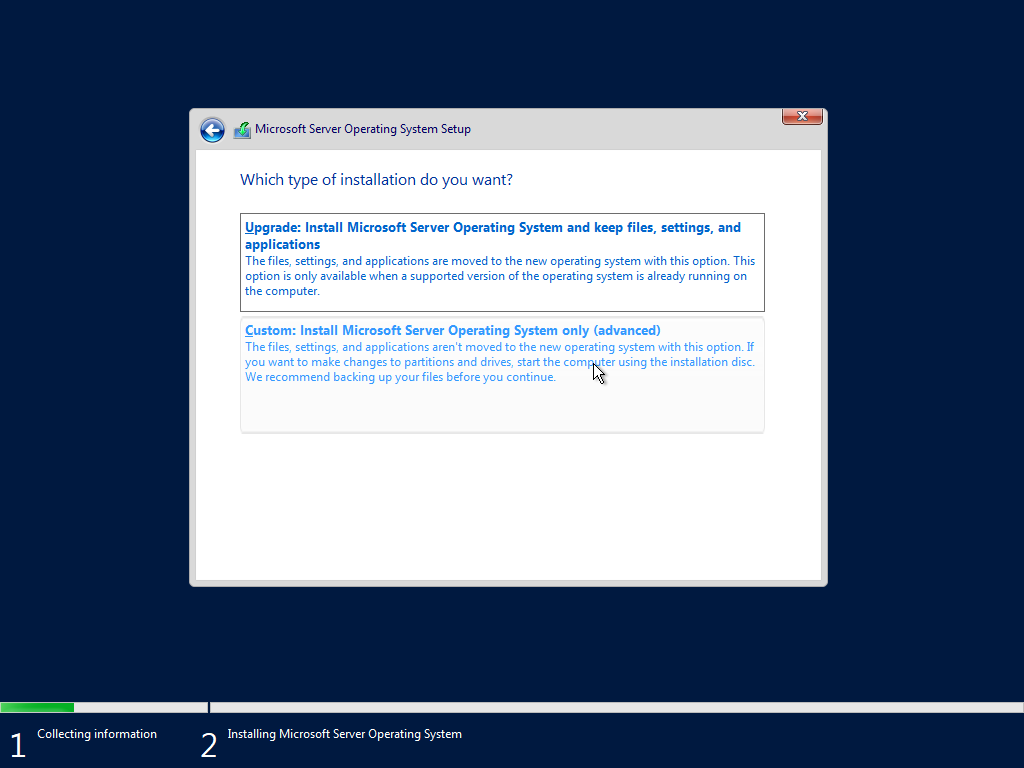
Start a brand new installation
On the next and final screen before the installation actually begins you select the empty drive listed, and click next.
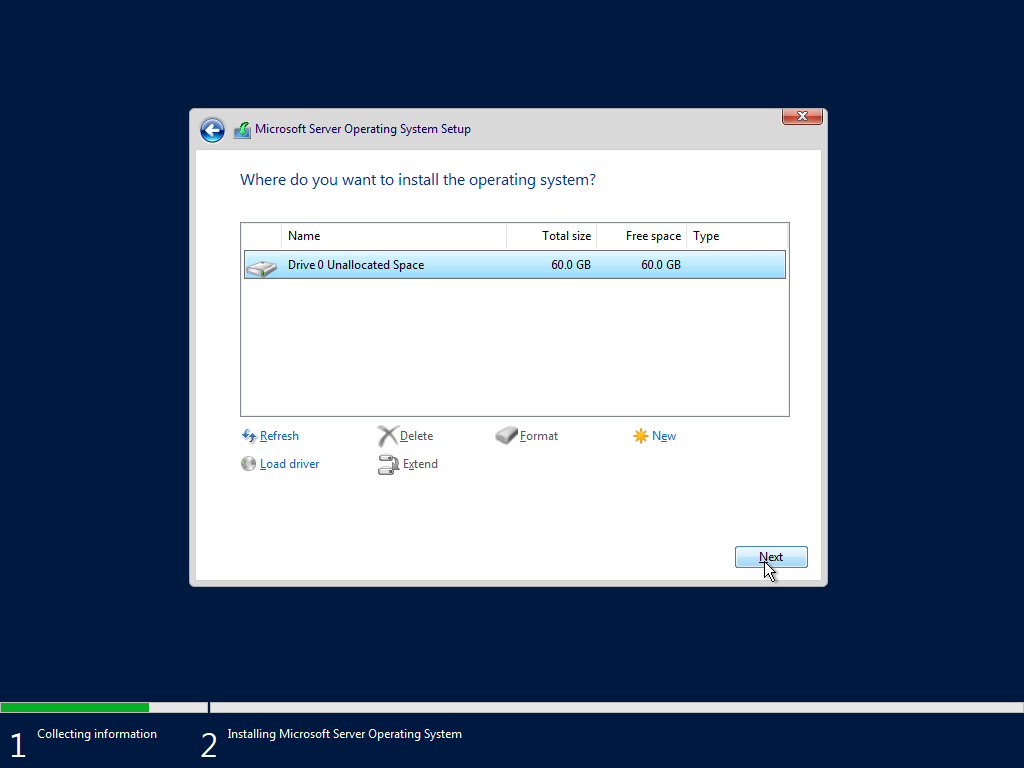
Select empty drive
Now you can sit back, and watch the installation of Windows Server 2022 on your VM finish. After the installation sequence is finished you will be asked to create password for the built-in Administrator account.
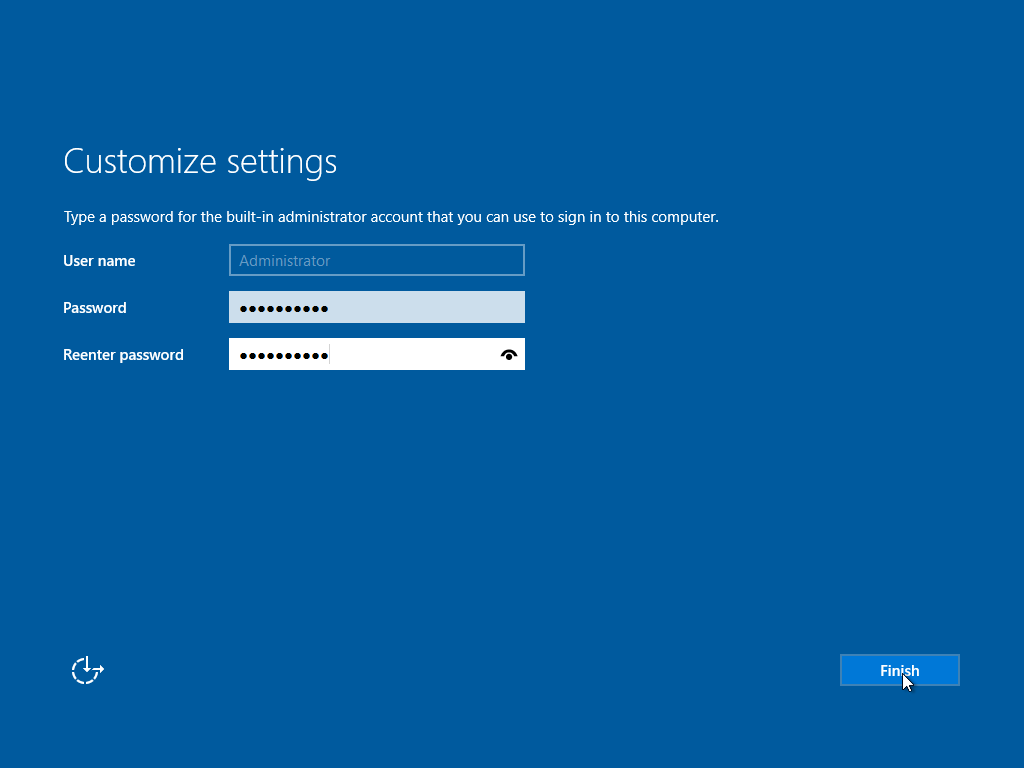
Add a nice and secure password for your lab server.
Click "Finish" to complete the OS installation wizard.
Update
Before the Windows server can be used for anything it's a good idea to update it, to get all the latest fixes.
Open the start menu, and type "update" on your keyboard. This will search for a shortcut to get to windows update.
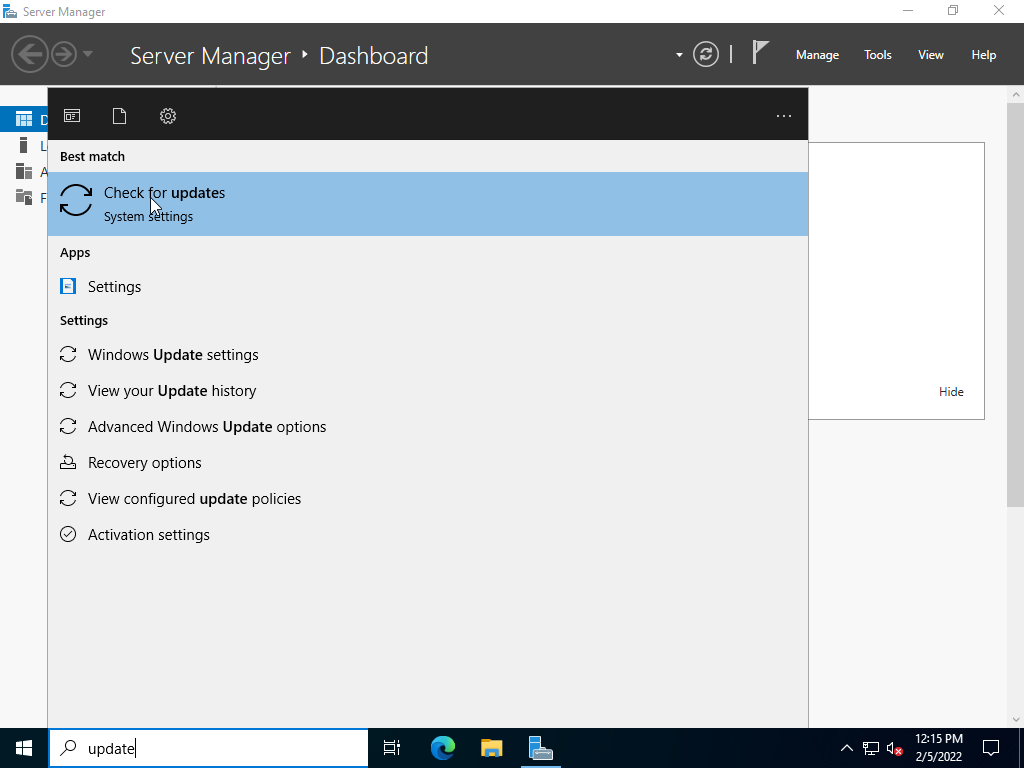
Use the start menu to search for Windows Update
Once Windows update is open, you can click on the "Check for updates" button to update your Windows Server 2022 installation with all the newest patches and upgrades. Depending on how long since the release of your installed version of Windows Server 2022 the update process can take a very short time or a very long time.
Once the installation is completed you will be prompted with the option to restart the system now.
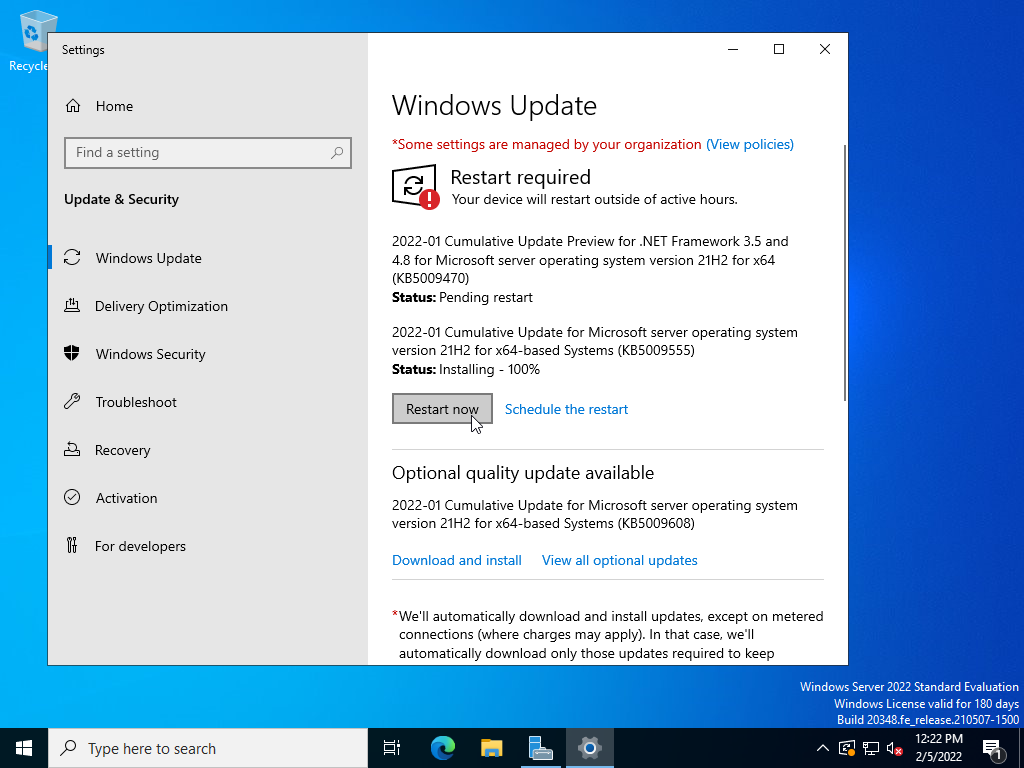
Update completed
Click the "Restart now" button and let the system reboot. This reboot might take a while, so be patient.
VMware tools
Make the VM act like an app on your host
After the OS is fully updated, you can install "VMware tools". These tools make it possible to freely resize the VM windows and have the display make use of the available windows space. You can also have a shared clipboard to make it possible to copy/paste from your host computer into the guest OS, and vice versa.
In VMware Workstation go to the toolbar, click on VM, then select "Install VMware tools" This will insert a virtual disk into your VM's disk drive.
If the "Install VMware tools" button is grayed out you need to remove the floppy drive from the VM. Once that is removed the button will be available.
To remove the floppy drive you must first shut off the VM, then open the settings for the VM, select the floppy drive from the hardware list, and click on the "Remove" button below the list. You can then boot the VM, and have the "Install VMware tools" button available.
Once the VM recognizes that a disk has been inserted you can select to run the installer from the autorun option list that will pop up.
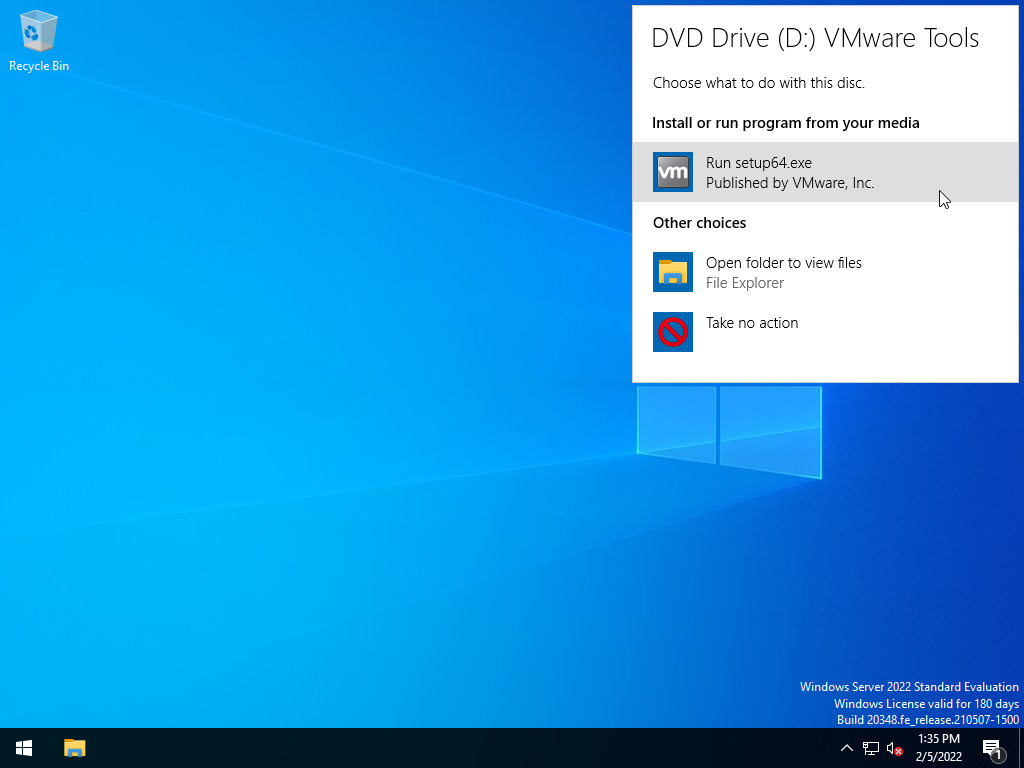
Autorun prompt
Follow the wizard to perform a typical install. Once the installation is completed you need to restart the VM to load the installed drivers.
Clone VM
Praparing for redundant Domain Controllers
For my lab, I wanted to have redundant Domain Controllers to play with. That way I could have lab a network reassembling as possible a real-life Active Directory environment.
Since the installation process for Windows Server 2022 is a bit slow and tedious, it can be a good idea to have a clone of a clean Windows Server 2022 install laying around on your drive in case you want a fresh install ready for some experimentation. I will use the VM I just created for that purpose.
I start off by shutting my Windows Server 2022 VM off.
Then I make a clone of the VM by navigating to "VM" -> "manage" -> "Clone..."
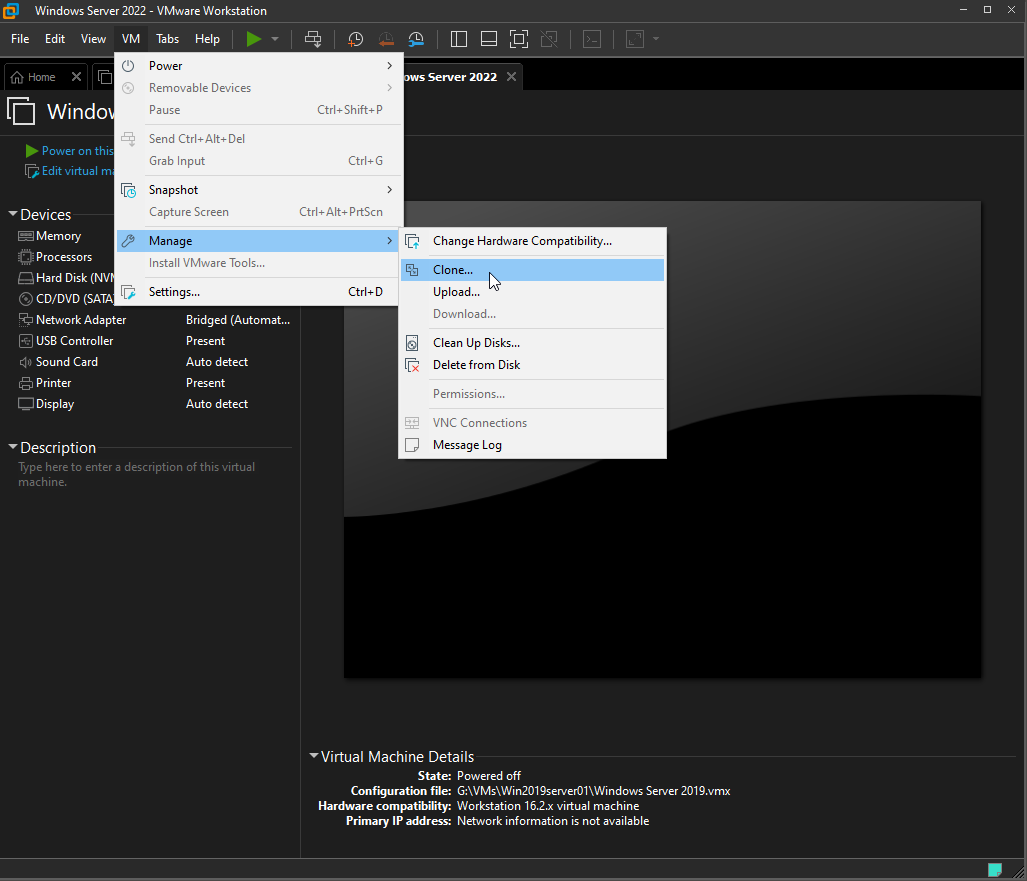
Open the clone wizard
Follow the wizard, and make a clone of the current state of the VM, which is a full clone. Give the clone a name that makes it unique, and let the cloning process finish.
You now have an identical clone of the VM you just set up. This can cause some issues on the Domain we are about to create using Active Directory. Therefore we have to make the VM unique on the network. This can easily be done by running a tool called Sysprep.
To run sysprep you navigate to C:\Windows\System32, and run sysprep.exe

Sysprep tool
Make sure to make the OS "Enter System-Out-of-box Experience" (OOBE), and check the box titled "Generalize". Select "Shutdown" as the shutdown option.
Let the Sysprep tool work its magic, and wait for it to shut down the VM.
Sysprep will remove any unique identifiers on the VM. After the identifiers are removed the VM will shut down. After the shutdown, you can make as many clones as you want of that "clean" VM.
The first time a clean VM boots, it will generate its own unique identifiers to make it function on an Active Directory domain.
After the shutdown you can start the VM, to make it run the initialization sequence and create its own unique identifiers. You will then need to select the language options and add a password for the built-in administrator user account just like you did before the installation of Windows Server 2022 on the first VM.
After that short process, you now have two unique, fully updated, and ready Windows Server 2022 VMs ready to make an Active Directory domain.
Naming the servers
Give the Servers a name that is easy to understand
Every host on the domain should have a unique hostname. This includes the servers we just created. The easiest way to give windows host a name is by opening File explorer", and right-clicking on "This PC" to bring up the contextual menu for it. Then select "Properties" from the list.
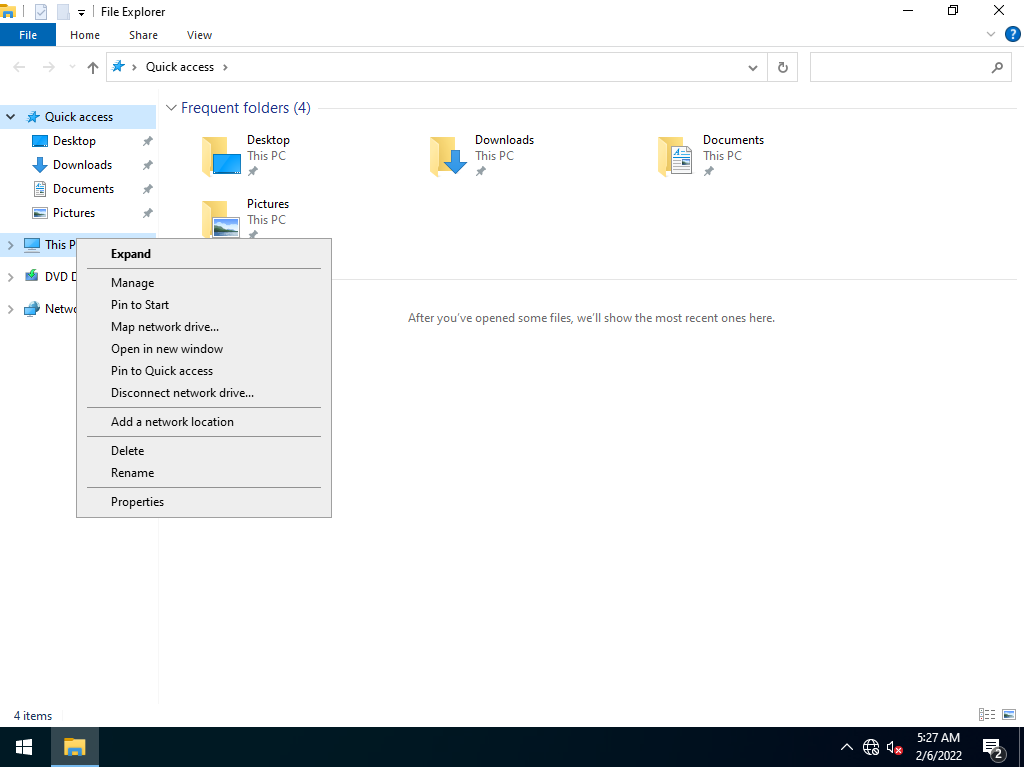
The contextual menu for "This PC"
From this window, you can click the "Rename this PC" button to change the name of the host.
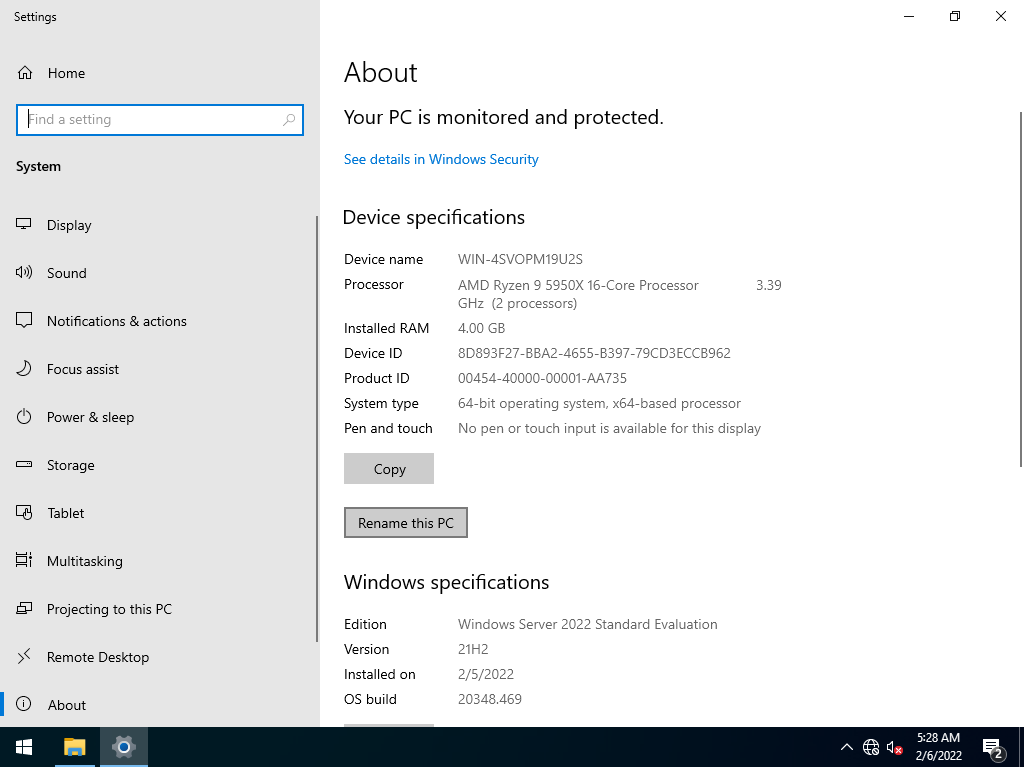
Properties for this PC
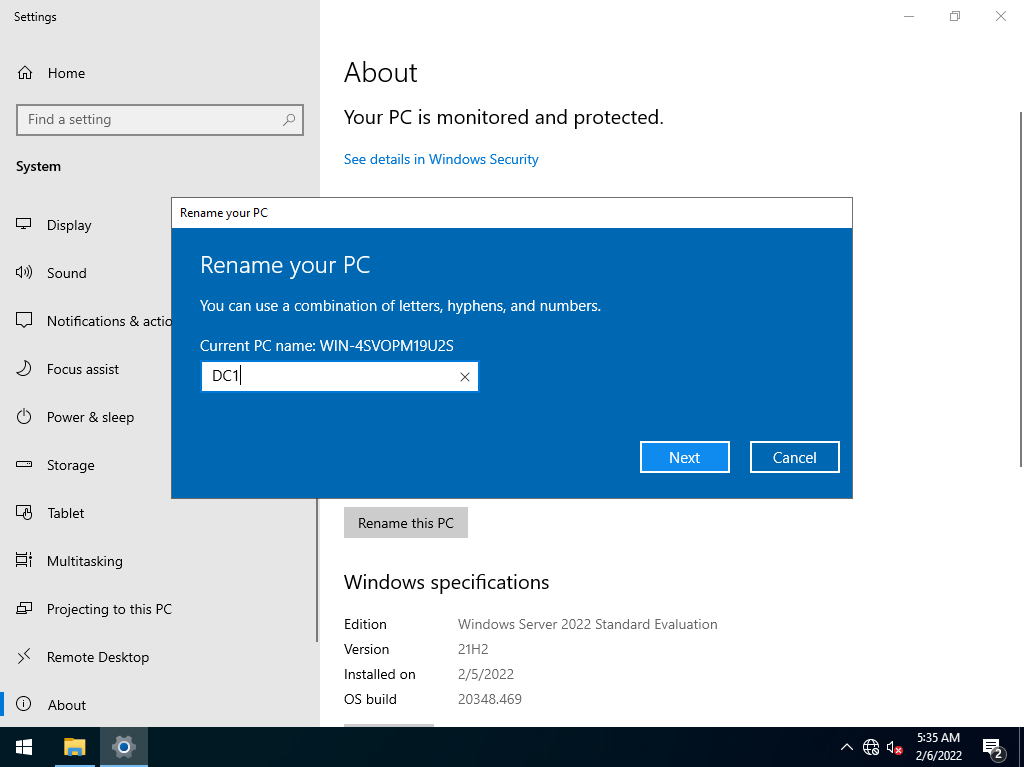
Renaming the server
I gave the first server the name DC1, (Domain Controller 1), and the second server the name DC2. After a short time processing the changes you must restart the servers to apply the changes.
After the reboot, the Servers will have the new hostnames.
Static IP
The domain lived inside the 10.1.1.0/24 subnet on the virtual network connecting the VMs that will make up the domain. This is a virtual network was is NAT'ed to my host computer.
I turned off the built-in DHCP server that VMware provides for this network because I want the Windows servers running the Domain Controllers to act as a DHCP server. By acting as a DHCP server the Domain Controller can easily manage what IP addresses are leased out to the network, and provide the correct DNS server and other critical network information to make the domain function properly.
In this network, the default gateway is 10.1.1.2, and I will give every server a static IP in the range of 10.1.1.10 to 10.1.1.19.
The Domain Controllers had the IP addresses of 10.1.1.10 and 10.1.1.11
I think the quickest way to access the NIC (Network Interface Card) settings in Windows is to right-click on the start menu, to open the contextual menu. From there you can select Network connections.
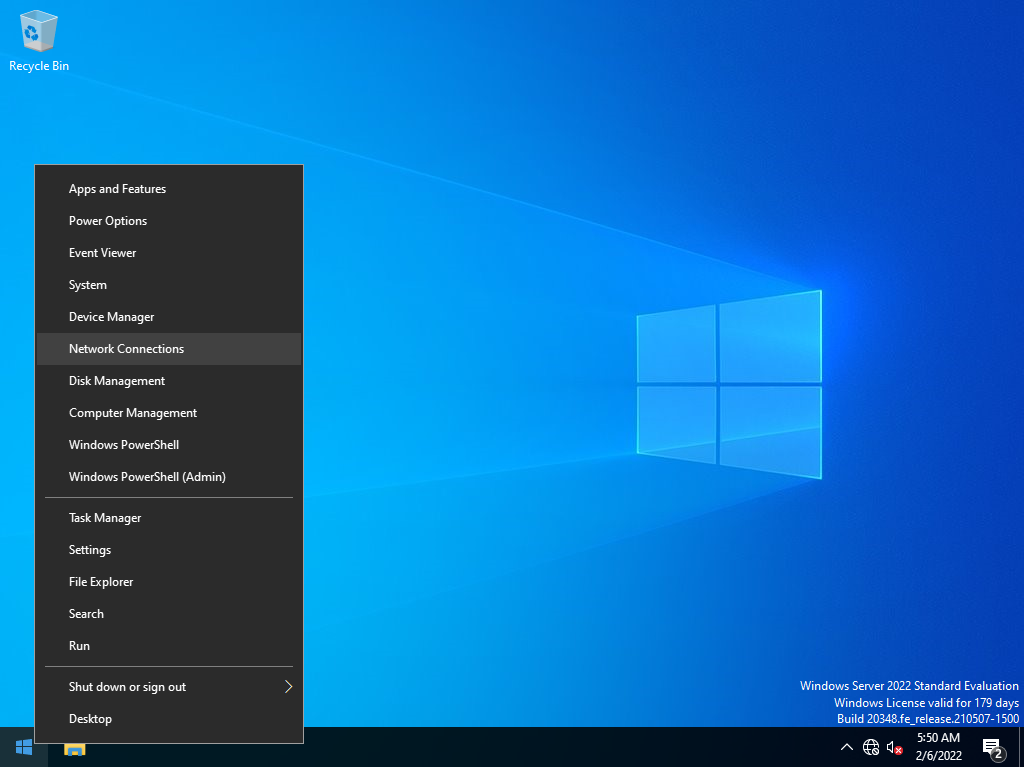
Start menu shortcut to Network Connections
From there you can click on "Change adapter options" to get to a list of the VM's NICs.

Network connections
From the list of NICs, you can right-click on the Ethernet adapter and open the properties for it.
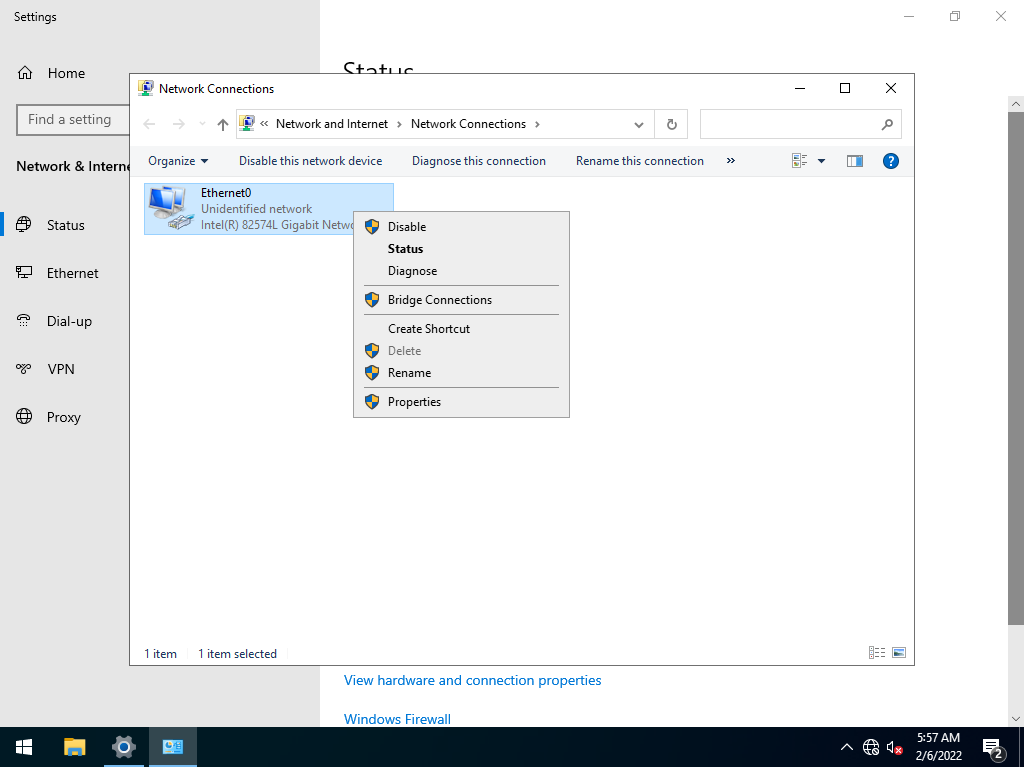
Open the NIC properties
Next, you must highlight "Internet Protocol Version 4 (TCP/IPv4)" and click on properties.
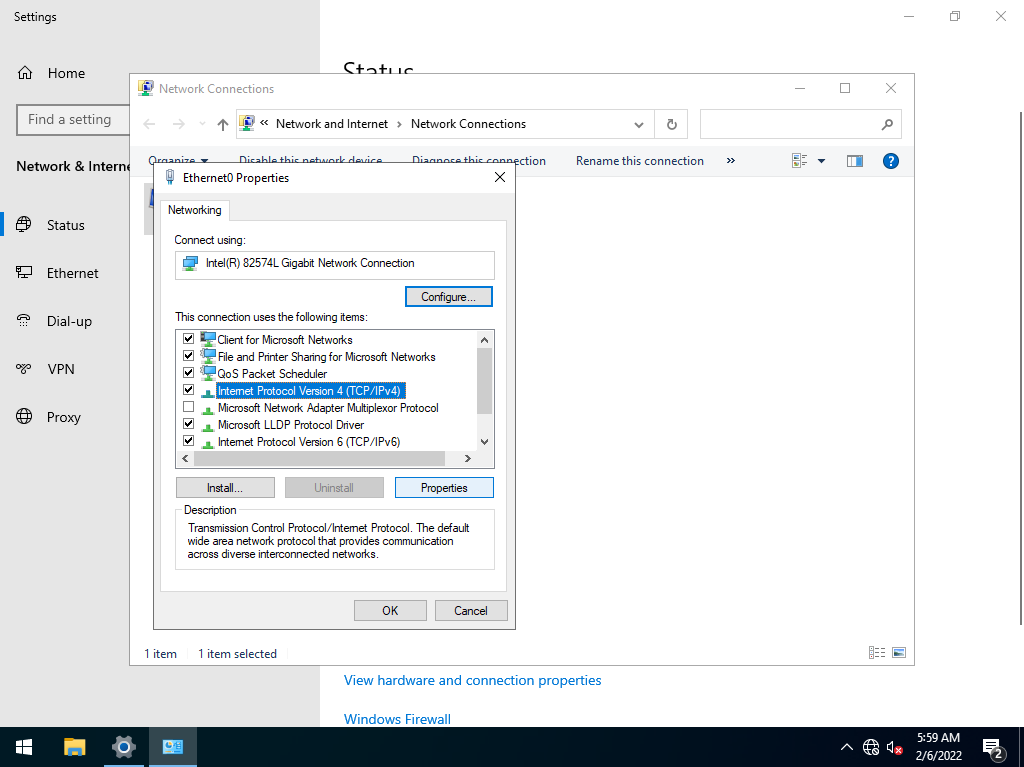
Select the IPv4 settings for the NIC
Now you can finally set static IP settings on the NIC. Since DC1 and DC2 will act as DNS servers you must set the DNS server address to the IP addresses those will use.
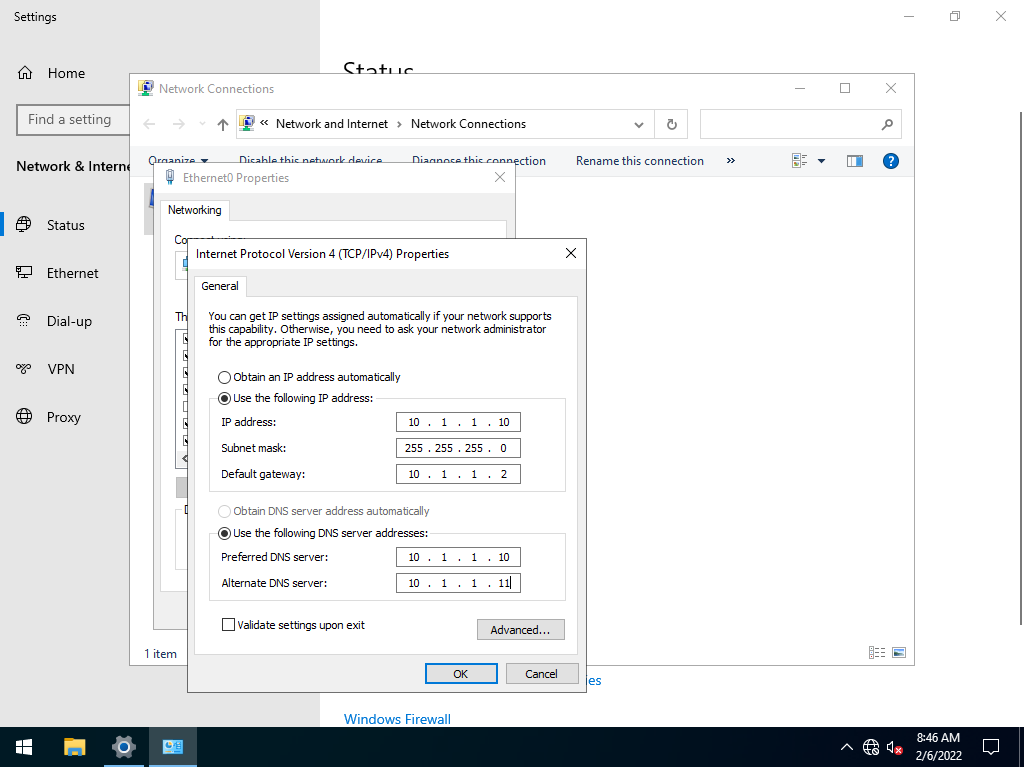
Set static IP on the NIC
Close the properties for the NIC and the settings will be applied.
When both DC1 and DC2 has a static IP you can proceed with the creation of an Active Directory Domain.
New AD Domain
Create a Active Diretory Domain
In our domain we want DC1 to be the main DC (Domain Controller). Now that the hostname and a static IP are set on DC1 we can add the Domain Service to it.
Open Server Manager, and from the top-right menu, open "Manage", and select "Add Roles and Features".
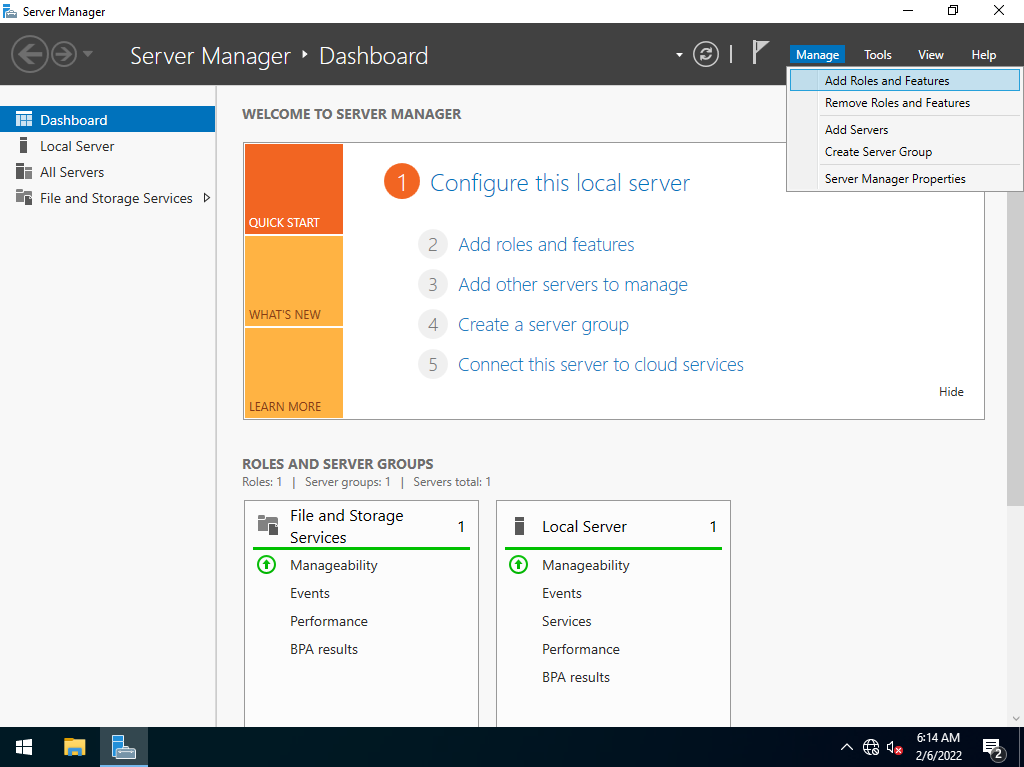
Add roles and features to server
This will open a wizard that will guide you through the process of setting up the new server role. Click next on the first screen, and select "Role-based or feature-based installation" before you continue.
On the next page, you have the option to make the installation on another server, but since you currently have no domain to manage just click next to continue.
From the list of roles to install, select "Active Directory Domain Service".
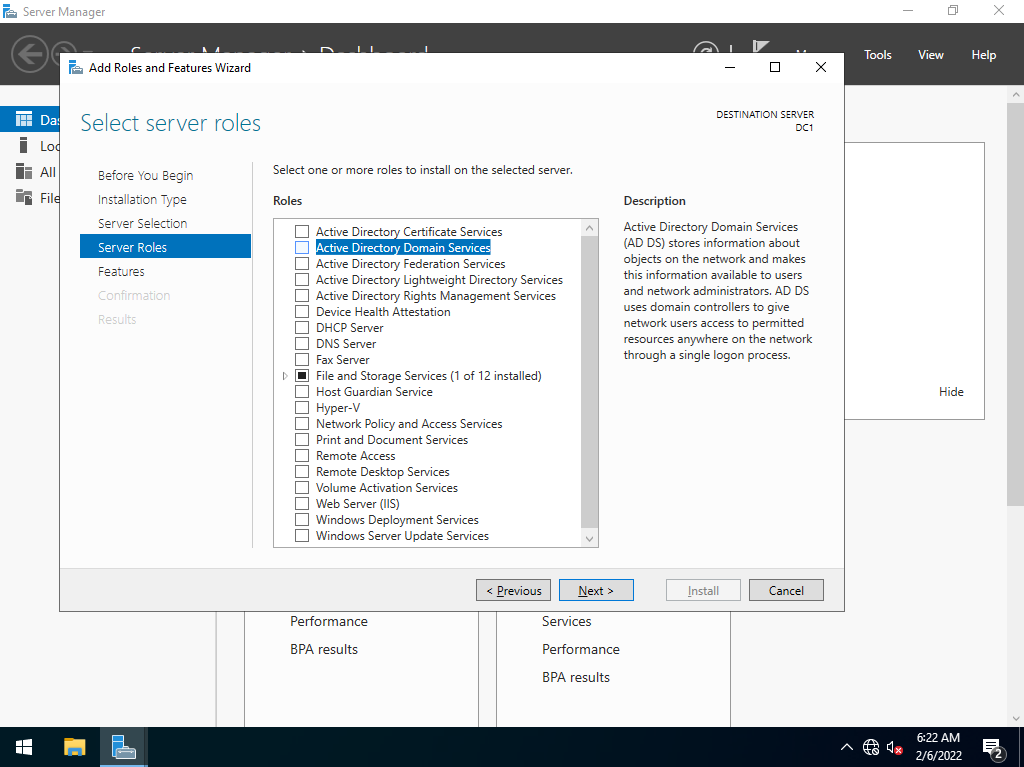
Install the AD Domain Service
Make sure that the box for "Include management tools (if applicable)" is checked, and click on the "Add Feature" button to continue. This will close the window and enable you to continue with the wizard.
On the next page, you will be given the option to install another feature on the server. Skip this by clicking "next".
The next page will give you general information about what Active Directory is, and warn you that you will need to install a DNS server role on this server. Click next to continue.
Finally, you can start the installation of the AD DS role by clicking on the install button.
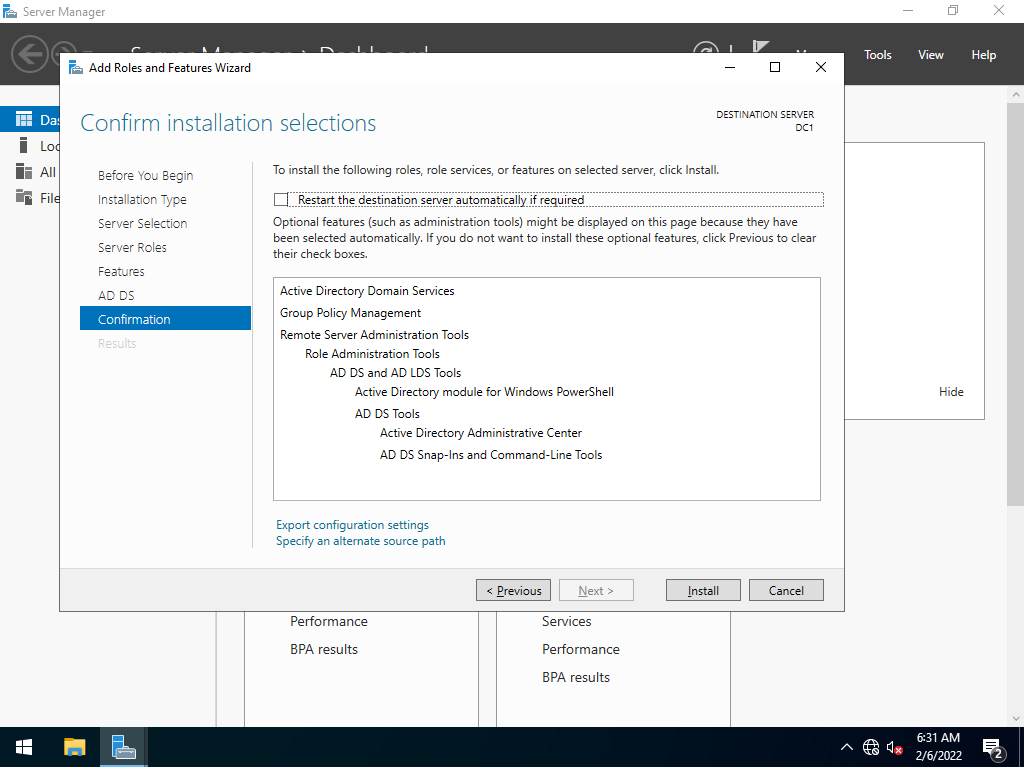
Install server role
After the installation is completed you can close the wizard and restart the server. After the reboot, you can add the Domain Controller role by promoting the server to a DC by clicking on the notification in Server Manager.
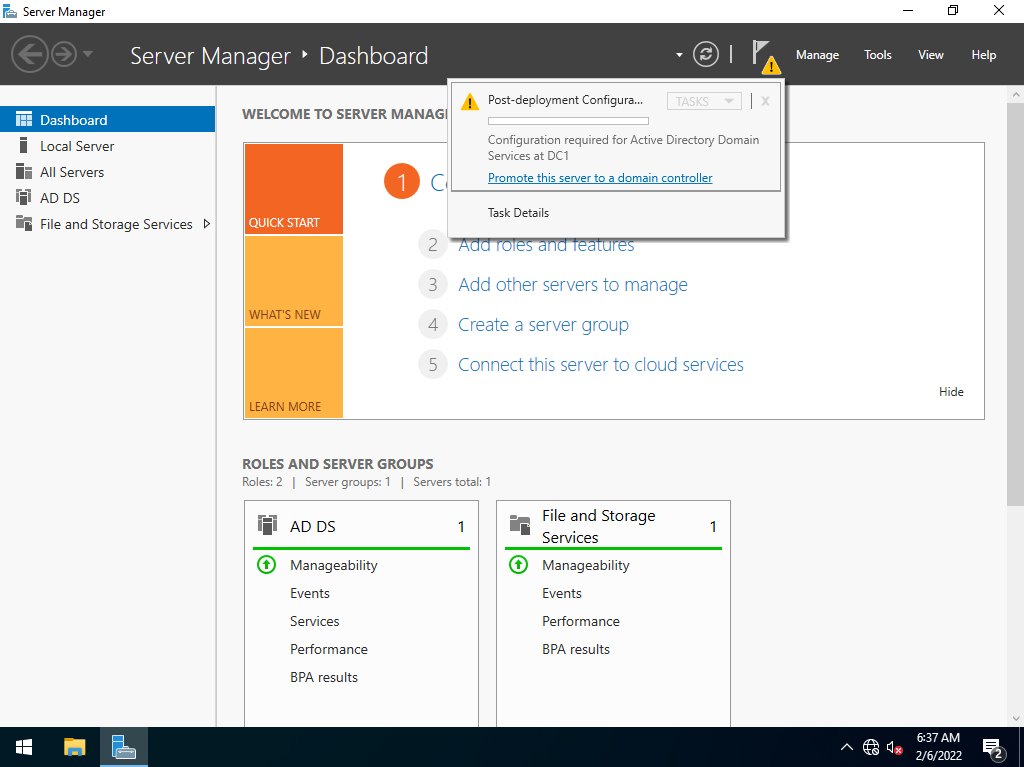
Promote the server to Domain Controller
This will open a new wizard. Because we want to create a brand new forest and a new domain, select the "Add a new Forest" radio button, and enter a creative name for your forest. I called my forest and domain "haxor.local"
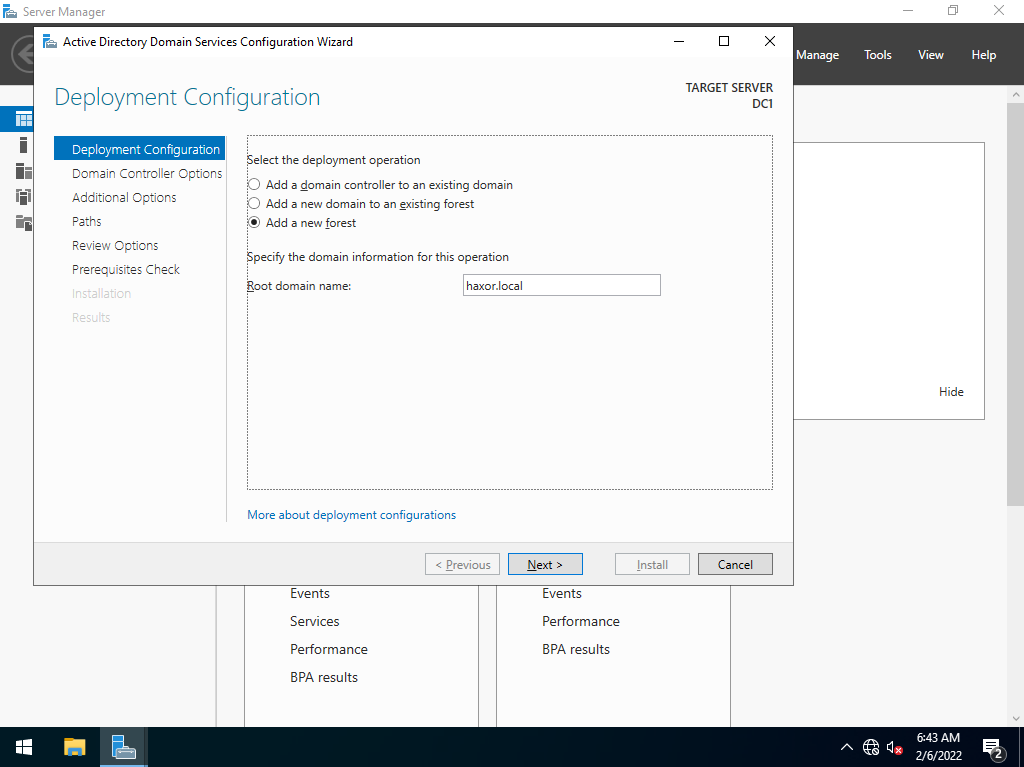
Add your new forest
The ".local" TLD (Top Level Domain) is used for LAN domains that are not meant to be accessed on the internet. By using the ".local" TLD I don't have to worry about the DNS servers in any way will try to resolve the domain to a host on the internet.
On the next page, you must set the forest and domain functional level to ensure backward compatibility. This will simply define the backward compatibility of your Domain Service. In a lab environment and for a brand new production environment I would leave it as default. The main reason to reduce the functional level of the Domain Service is to make it possible for an older version of Windows Server to make use of the Domain Service provided by your Domain Controller.
Make sure that the checkbox for "Domain Name System (DNS) server" capability is checked before you set a secure (long and complex) password for your DSRM password and click "Next" continue.
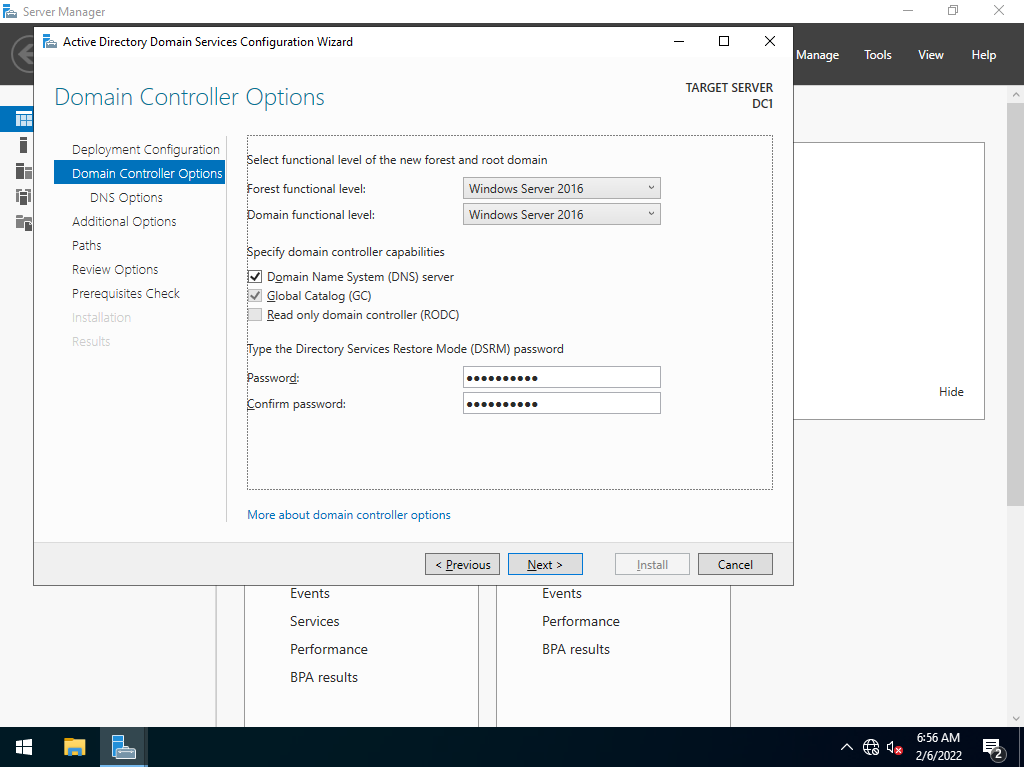
Set system service restore mode password
The next page will take you through the process of setting up a DNS server on DC1. Just click next to accept the default settings on all pages until you get to the final page that prompts you to start the installation.
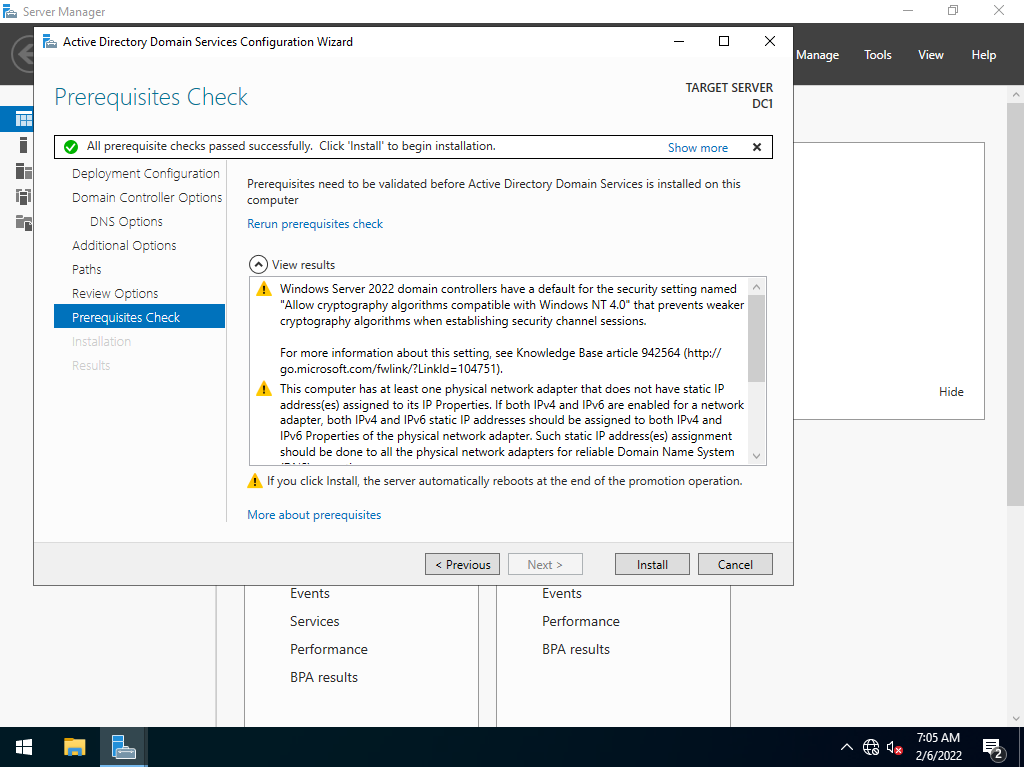
Start installation to complete the DC promotion
Once the installation is completed the server will automatically reboot. After the reboot is completed you have successfully completed the creation of the domain. 🎉
The Administrator user account on DC1 is now the Domain Admin for the newly created domain. From now on that account must be used to manage the entire domain.
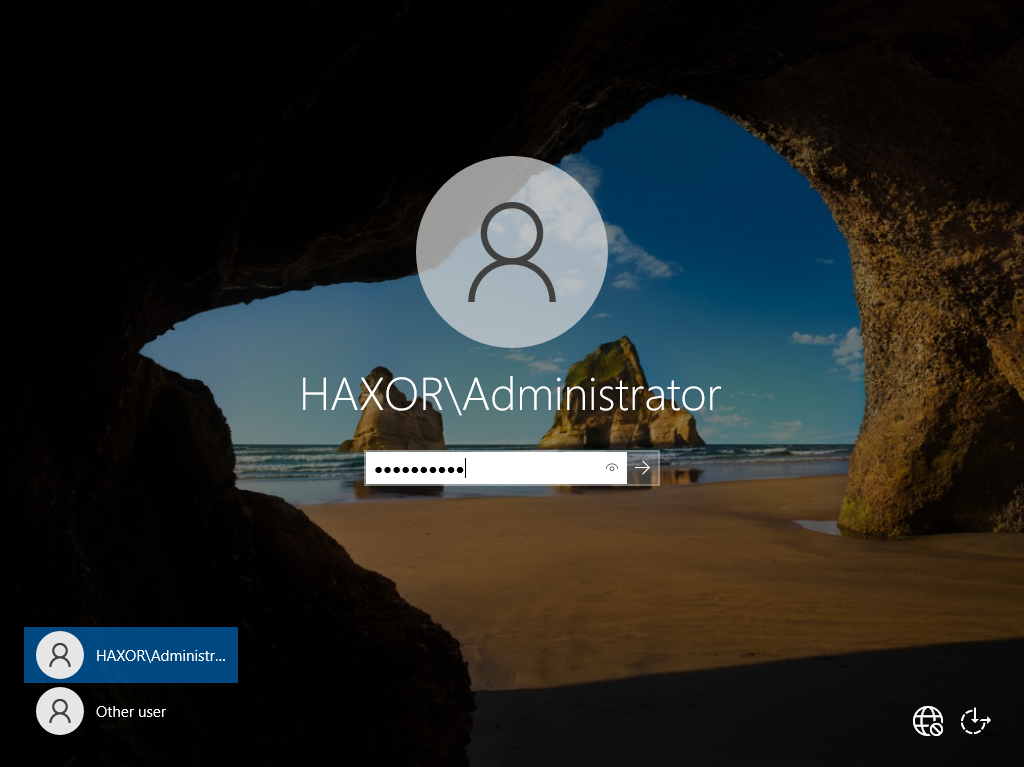
Log in as the domain admin
Redundant DC
Adding a second Domain Controller to domain.
If DC1 shuts down the entire domain stops functioning. Because of this, it's a good idea to add a second DC (Domain Controller) for redundancy. DC2 will be acting as a backup DC in our domain.
Add the server role just like we did on DC1 and restart the server. After the server is up and running again, you can complete the promotion of the server to a DC.
When you have opened the DC Promotion Wizard, you will now make DC2 an additional domain controller to an existing domain.
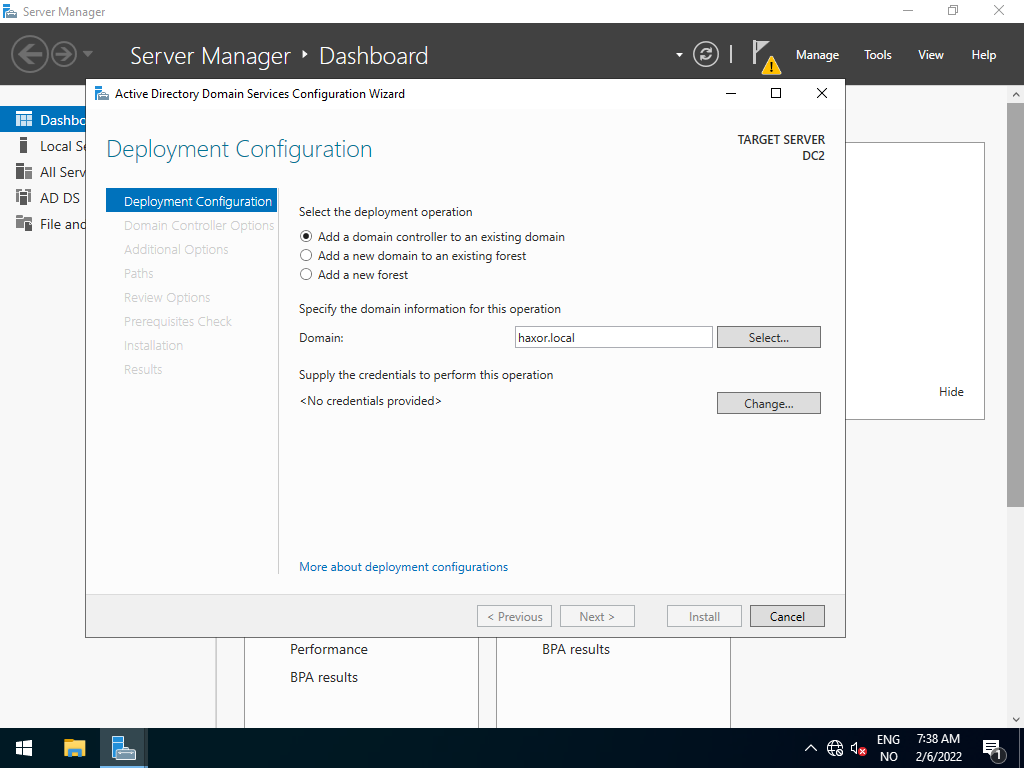
Add a domain controller to an existing domain
To authenticate click on the "Select..." button, and enter the credentials for the domain admin. On this domain, this is HAXOR\Administrator, and the password to that account and continue the wizard.
When you get to the Additional Options, you must select that the redundant DC should replicate from the main DC. In this case that is DC1.haxor.local
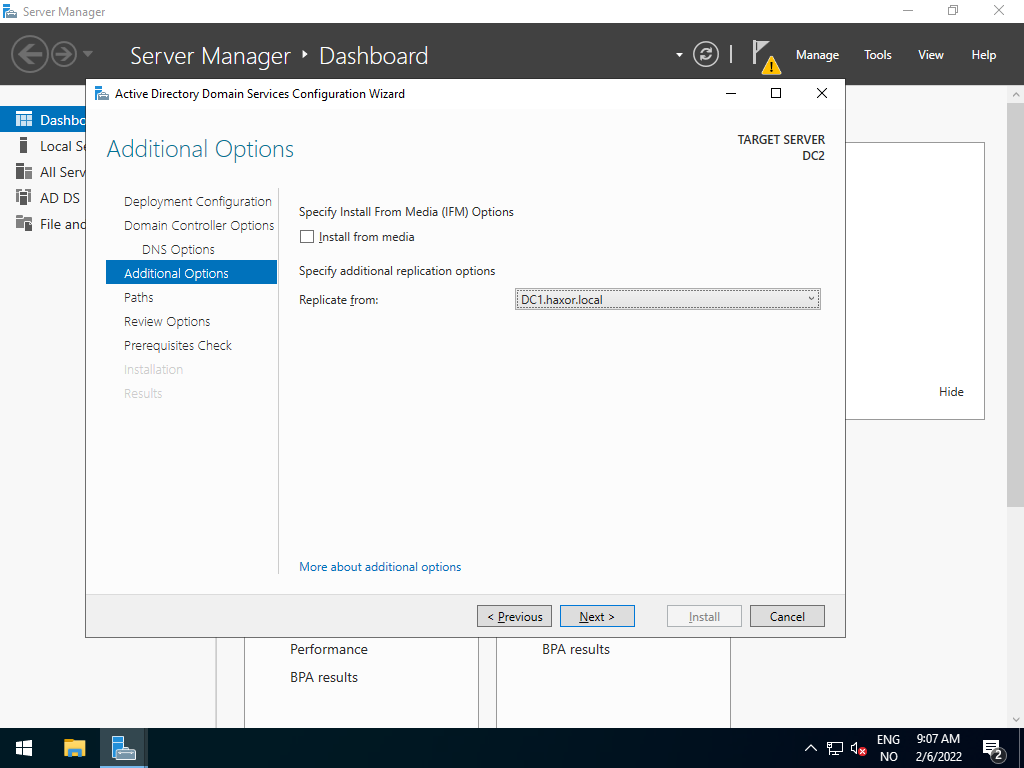
Replicate from dc1.haxor.local
Follow the rest of the wizard using default options, and start the installation. Once the installation is complete the server will reboot to apply the settings.
You now have a redundant Domain Controller for your domain. By adding the Domain Controller role to DC2 you also added a redundant DNS server to the domain.
DHCP
Hand out network information to the domain
To make every host on the network be able to easily connect to the domain controller, and to take control over IP address leases we can configure a DHCP server on the Domain Controllers.
We start the configuration on DC1. This will be the main DHCP server on the network of our Domain. In server manager open "Add roles and Features". Click next all the way until you get to the "Select server roles" page. Add a checkmark to "DHCP server" in the list.
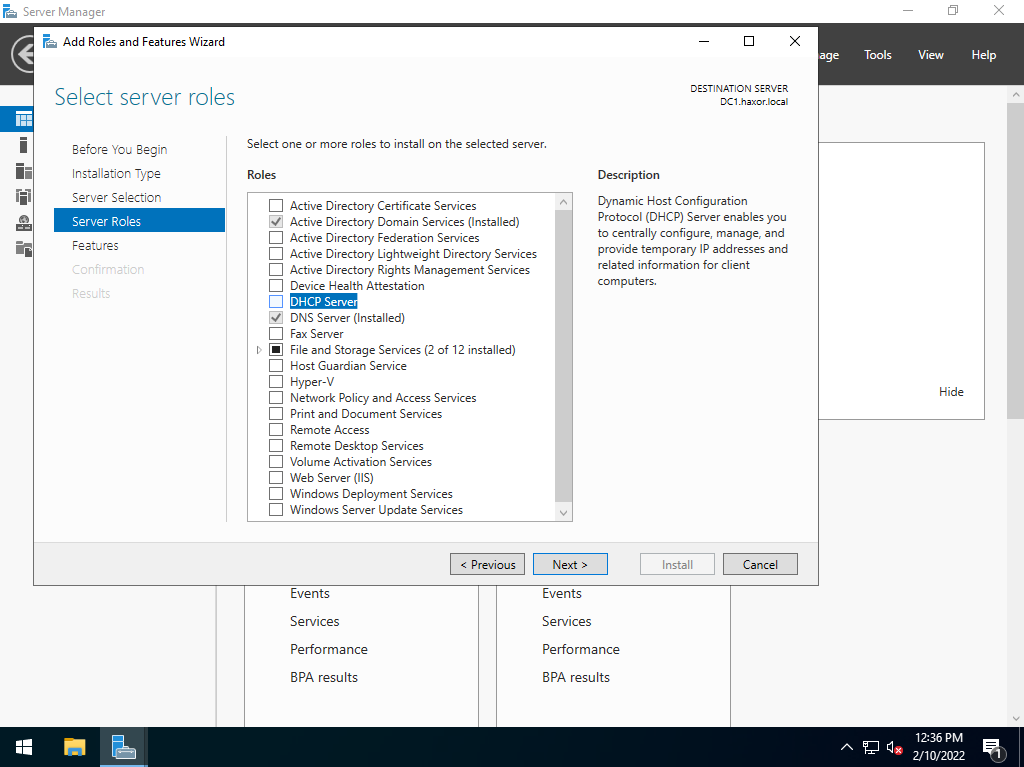
Add the DHCP server role to DC1
Add the feature, including the management tools. Click next until you come to the page where you can click on the install button.
After the installation is completed you can click on the "Complete DHCP configuration" link, to open the configuration wizard.
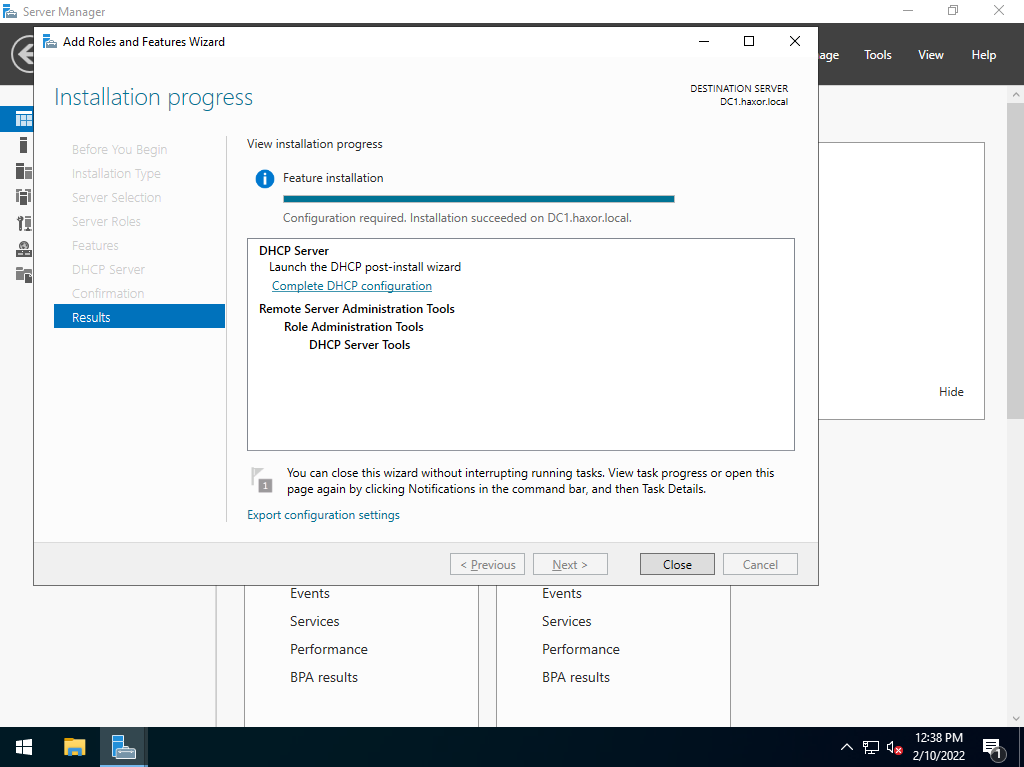
Start the DHCP configuration wizard after the installation
In this wizard, you will be taken through the process of creating a security group and authorizing the DHCP server.
Once this basic configuration is completed you can finally configure the network information to be handed out on the network. In server manager, open "Tools", and select the DHCP option.
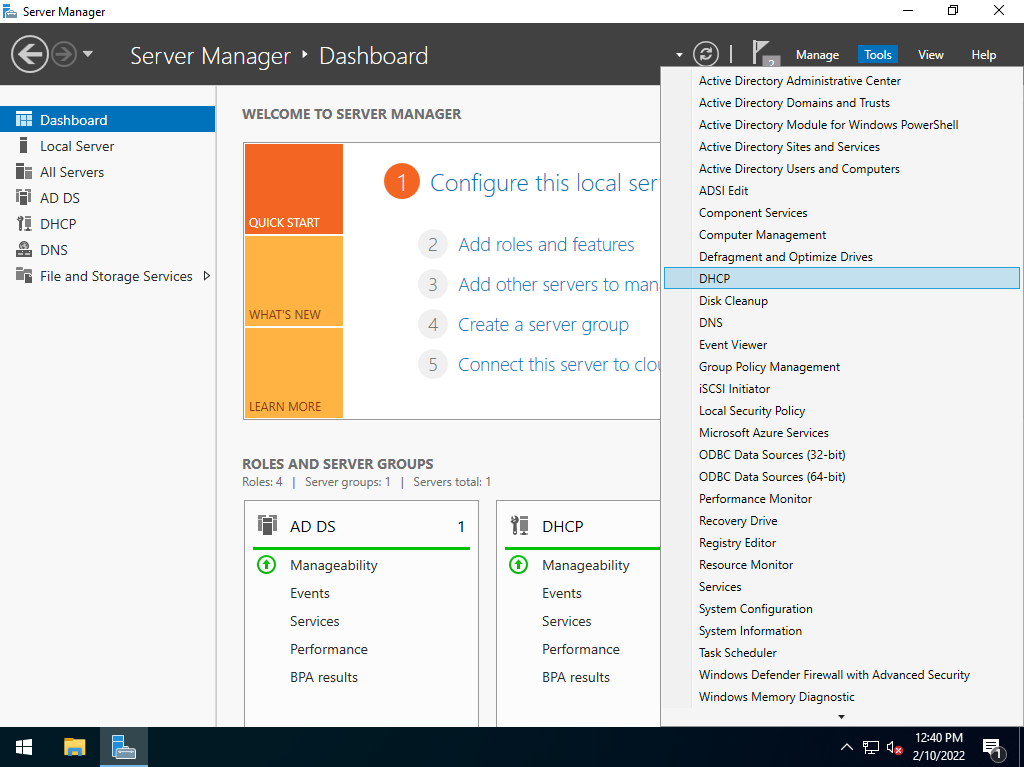
Open DHCP server manager
In the DHCP server manager, you can add a DHCP scope by right-clicking on the IPv4 section, and selecting "New scope..."
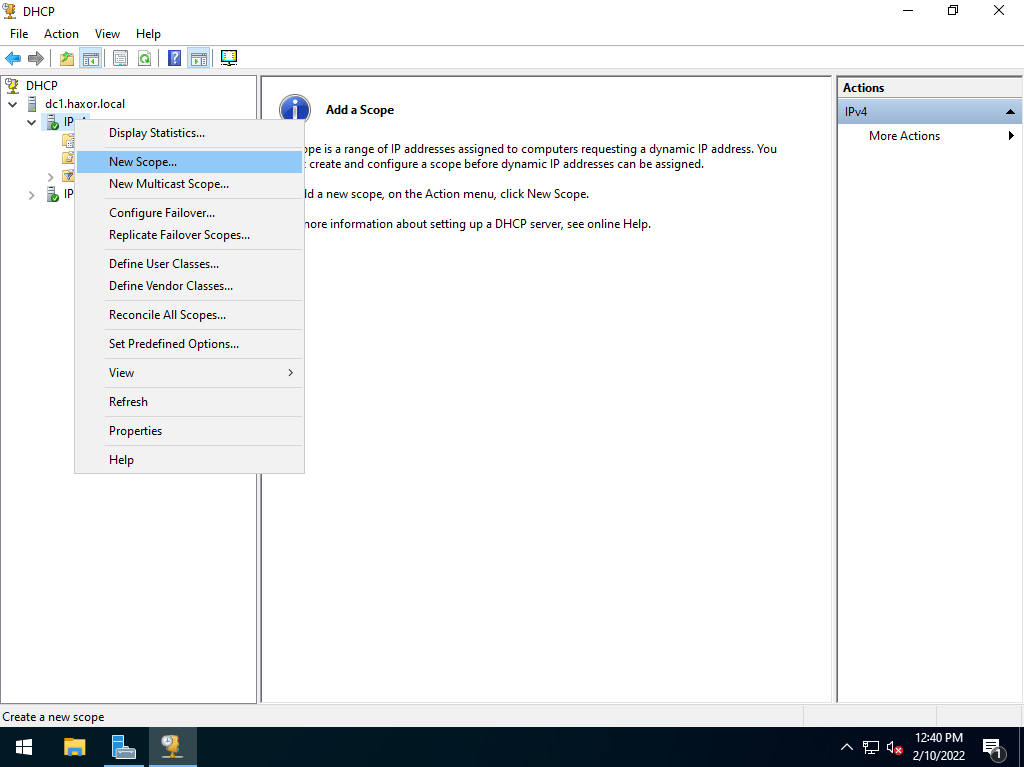
Add a new DHCP scope.
Give the scope a meaningful name, and add a range of IP addresses that the DHCP server will use to hand out IP addresses to clients that connect to it.
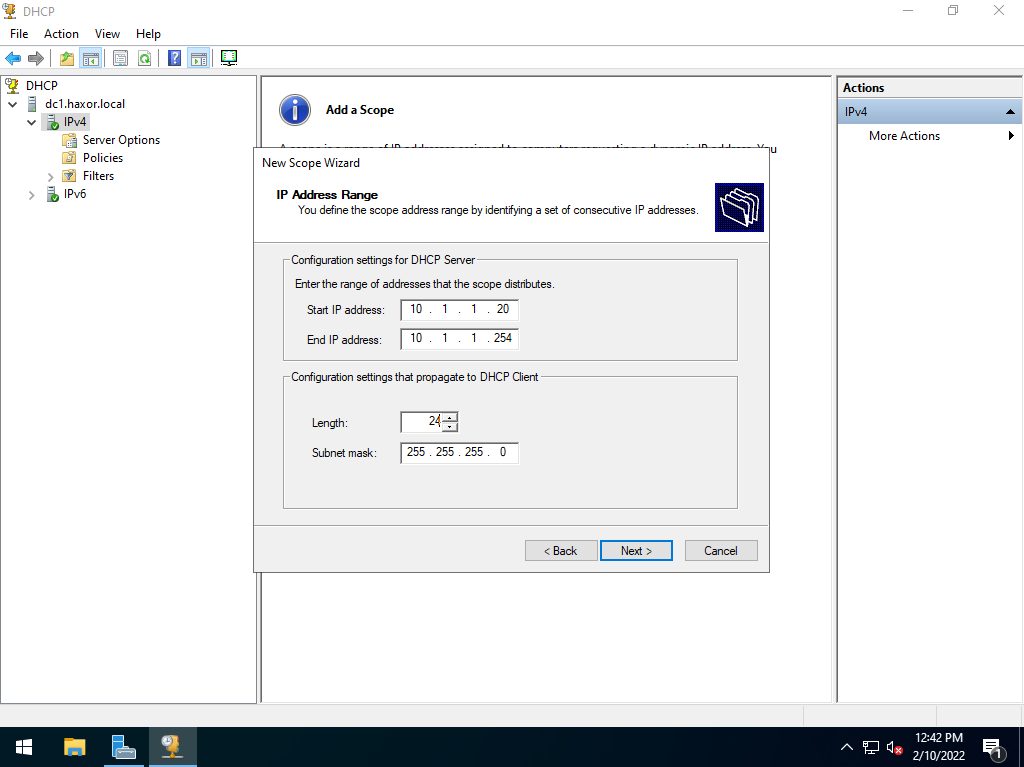
Add the IP address range you want to lease out.
Continue the wizard by adding any excluded addresses you might need. In my example, I skipped the need to exclude addresses by simply having the start IP from 10.1.1.20. By doing this I adhered to the rule I decided on when designing the network addressing structure.
Set the correct default gateway information, add the DNS server information, and finish the wizard by activating the scope.
Congratulations! You now have a working DHCP server on your domain to help autoconfiguration of the connecting host to simply the process of adding them to the Domain. 🎉