Have you ever needed to rewatch what was done by a user during an RDP session captured by Wireshark or tcpdump?
In this article, I will show you how you can rewatch the RDP session using Wireshark and the fantastic PyRDP toolset.
Overview
What you need before starting
The process of viewing a captured RDP session consists of a few steps.
- Capture an RDP session using Wireshark or tcpdump
- Decrupt the TLS traffic containing the RDP session.
- Export the OSI layer 7 data of the capture
- Convert the exported OSI layer 7 data to a PyRDP file
- watch the RDP session
To do this, you will need a few things.
- PyRDP found here
- Wireshark
- A PCAP file where an RDP session is captured
- A PEM file containing the SSL/TLS certificate used for the TLS encryption of the RDP session.
Decrypting TLS
The converter will only work with PCAP just containing data found in the OSI layer 7.
To access the RDP packets, you first need to add the SSL/TLS certificate to Wireshark. This will decrypt the TLS session, revealing the RDP session data.
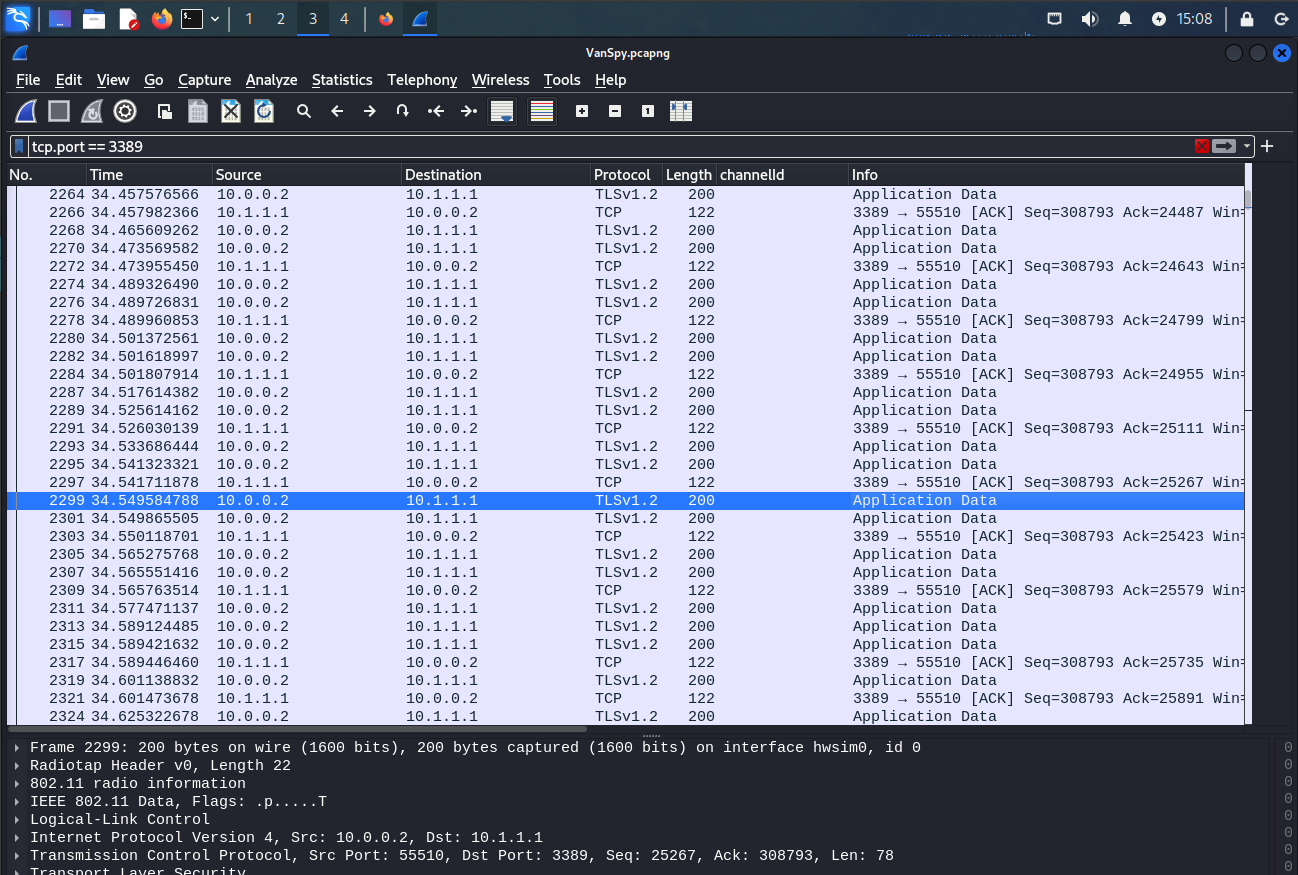
The captured frames in an encrypted state
To import the SSL/TLS Certificate you open Edit -> Preferences -> Protocols -> TLS, and click the "Edit..." button next to the RSA keys list..
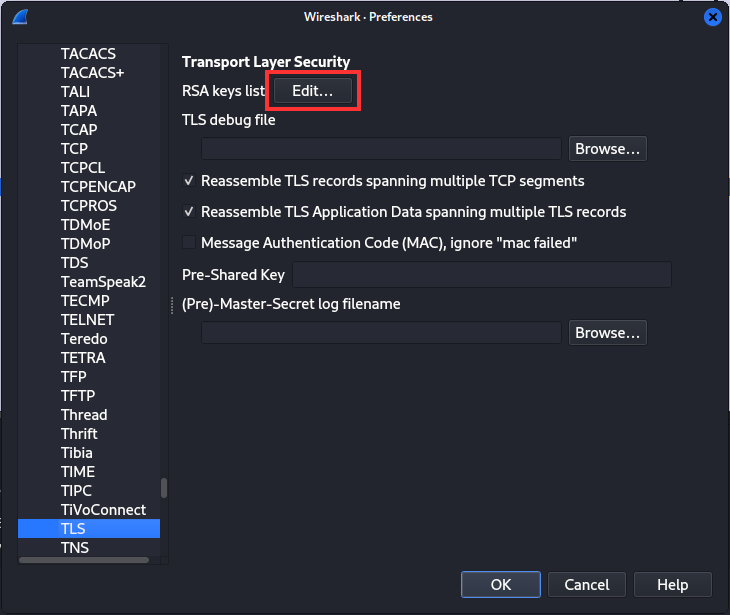
Add the SSL/TLS certificate
Simply add the key file without filling in the rest of the fields, then click ok to close the preferences. This will prompt Wireshark to decrypt the SSL/TLS packets making it possible to access the RDP packets.
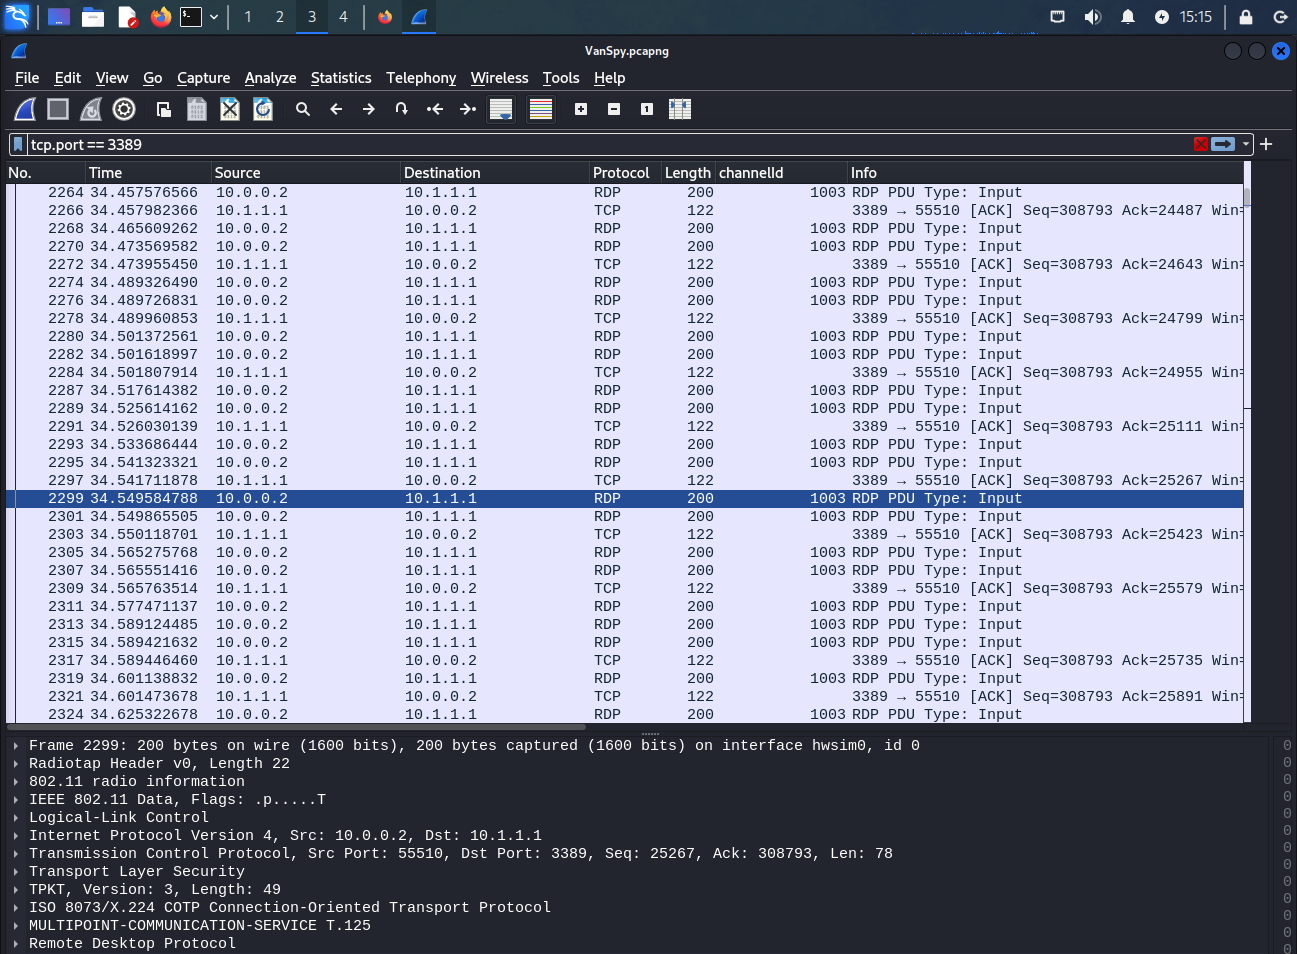
The captured frames in an unencrypted state
Exporting layer 7 data
As previously mentioned, the converter only accepts a PCAP containing OSI layer 7 data. This can be done by first removing all other data from the PCAP, and then saving the result to a new PCAP file.
This is performed by opening File -> Export PDUs to File...
Then select OSI Layer 7 from the dropdown, and without adding any display filters click the OK button.
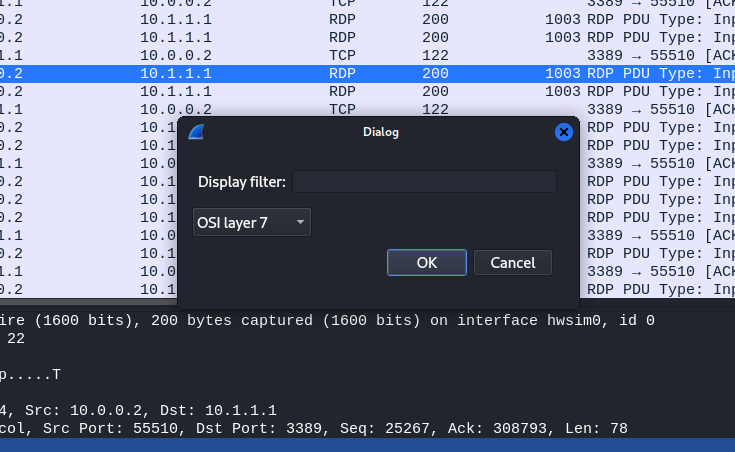
Exporting the OSI Layer 7 data
After Wireshark has completed the removal of data, you can save the capture to a new PCAP file by using File -> Save as...
It's important that you save the OSI layer 7 capture as a PCAP file and not a PCAPNG file. The converter cannot work with PCAPNG files.
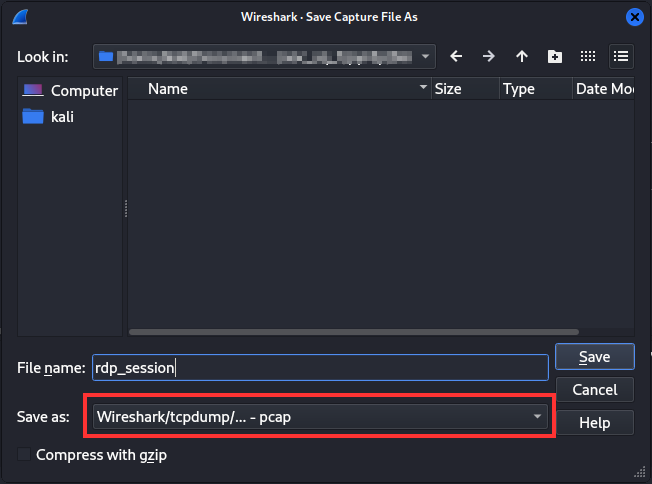
Save the capture as a PCAP.
You now have a PCAP file that can be converted to a PyRDP file for analysis.
Converting to PyRDP
Start off by cloning the PyRDP git repository, establish the venv environment, and navigate into the bin directory of the PyRDP project. To make it simple you can copy your OSI layer 7 PCAP into this directory as well.
To convert the PCAP simply run this command.
pyrdp-convert.py -o output rdp_session.pcap
...
[Output redacted for brevity]
...
[+] Successfully wrote '.../pyrdp/bin/output/20231125145052_10.0.0.2:55510-10.1.1.1:3389.pyrdp'
Watch the RDP session
Finally, you can watch the RDP session using the PyRDP-player.
Open it by running the pyrdp-player.py script.
pyrdp-player.pyThis will open a GUI application used to watch the capture. Open the PyRDP file, by clicking on File -> Open...
Select the file created by the converter, and press the play button in the replays tab. The PyRDP player gives you output similar to the output found in keyloggers. It contains a low-framerate video capture, keys pressed, and what was copied into the clipboard during the RDP session.

PyRDP player in action.
Thats it. PyRDP is a truly wonderful tool that can be used for many purposes including a certain christmas CTF... 😉