Xenia is a great Xbox 360 emulator for PC. I personally use it to play (my legally purchased physical copy of) Ace Combat on my computer with my HOTAS setup.
In this article, I will try to explain how you can use your own HOTAS or game controller when playing games on Xenia.
Joystick Gremlin
Mapping the physical device to a virtual device
Using Joystick Gremlin it's easy to map several devices into a single virtual device. This makes it easy to focus on just one virtual device instead of several physical devices during the next setup phase.
The main reason why I like to use Joystick Gremlin for this is that it's very easy to add response curves to the analog axis. This will make the gaming experience much more enjoyable when mapping a flight stick to an analog stick on a gamepad. The response curves can smooth out dead-zones and make the joystick feel more natural when playing.
A quick guide:
This short guide will give you a quick overview of how to configure and use Joystick Gremlin if you have no experience with it.
When you have a working mapping of the physical devices to a vJoy device you can start the virtualization in Joystick Gremlin and continue this guide.

Make sure the configuration is running
If you just want to use a single joystick device, like a PS4 or Xbox One controller with Xenia (and don't need any response curves) you don't have to use Joystick Gremlin and can skip the steps described in this chapter entirely.
X360CE
Xbox 360 controller emulator
Xenia has a pretty badly documented configuration file. A foolproof method of using virtual devices in the emulator is to use a very good controller emulator called X360CE, short for Xbox 360 Controller Emulator. This tool can be downloaded from the project's official webpage for free.
Once downloaded and installed you must install the Virtual Gamepad Emulation Driver. This is done by clicking on the Issues tab that will be blinking signaling an issue. On this tab, you must click on the "install" button to start the installation. Complete the installation, and restart X360CE.
When X360CE starts a new virtual Xbox 360 controller will "connect" to your computer. The familiar Windows sound will chime, and you can start configuring X360CE to use the vJoy device you configured using Joystick Gremlin.
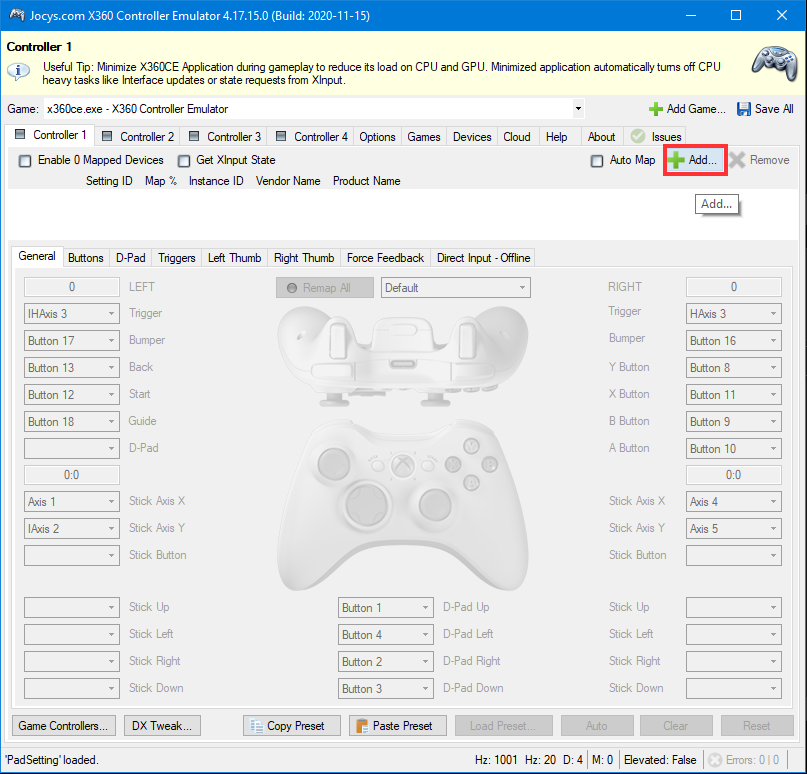
Start by adding the vJoy device as a device that can be mapped to Controller 1 in X360CE. Click on the "Add..." button and add vJoy

Add a new device

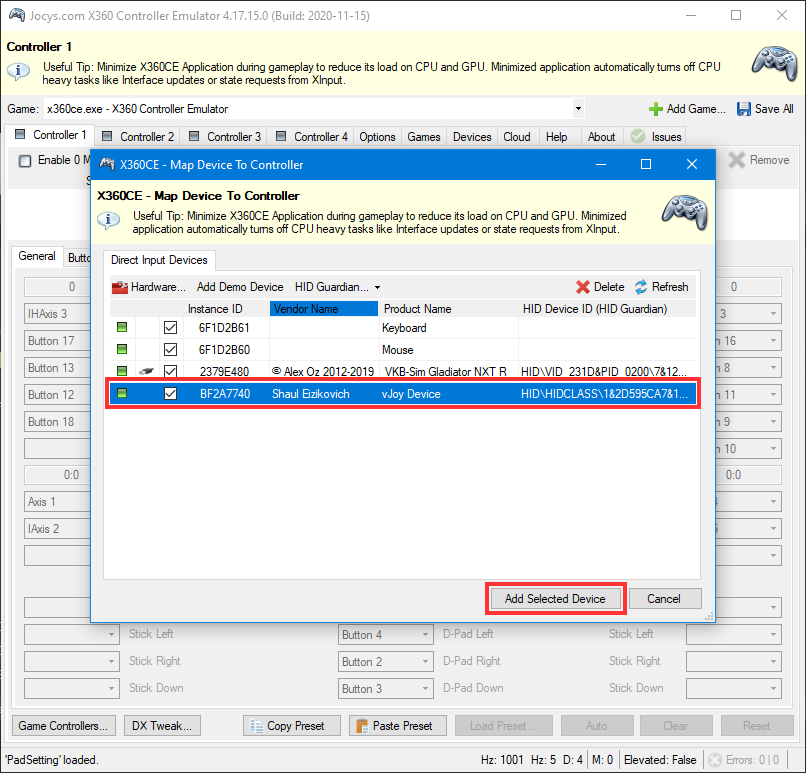
Select the vJoy device from the list, and add it.
If you just want to use a single joystick device like a PS4 or Xbox One controller with Xenia, you select that device in this step.
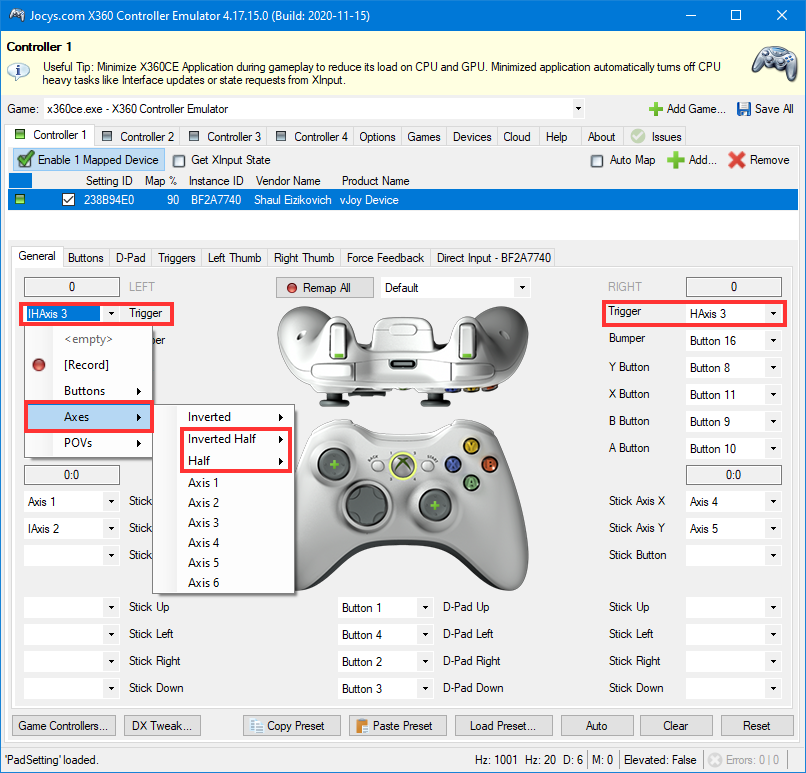
Now you can map the virtual axis and button from the vJoy device to the Xbox 360 controller emulator.
In some games like Ace Combat 6, you must split a virtual throttle axis up in two and put one half on the right trigger, and the other half of the axis on the left trigger. This can easily be done by using the "Half" and "Inverted Half" options when binding the triggers.

Splitting the throttle axis to the controller triggers.
Running Xenia
Now that everything is configured, you can start Xenia and test the configuration in a game. Remember to start the Joystick Gremlin configuration, and have X360CE running in the background. If you close the X360CE window and/or don't have Joystick Gremlin Running, this will not work.
Good luck, and have fun 🎉